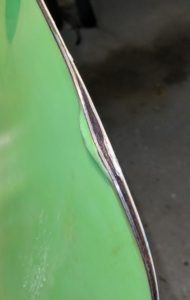
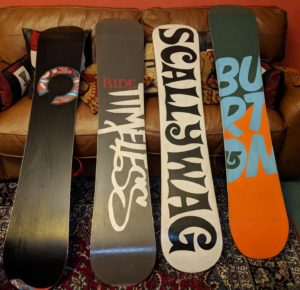
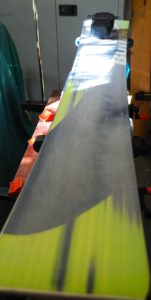
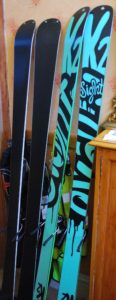
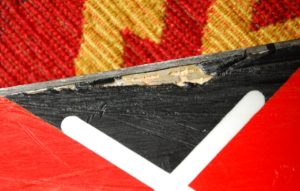
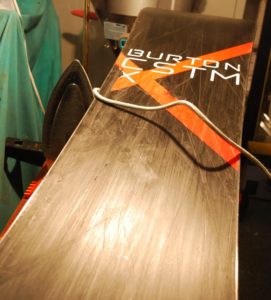
As well as lowering the tone of the Cave with his Scallywag (2nd right here) Eddie handed over a wee challenge in the shape of his Yes Basic.
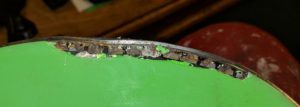
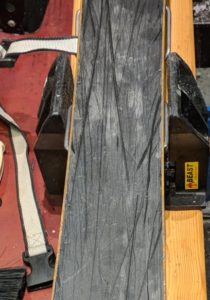
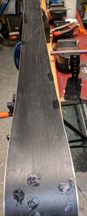
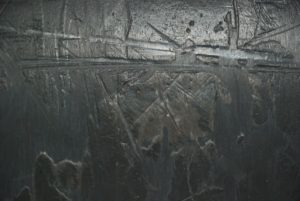
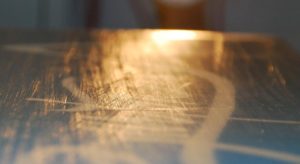
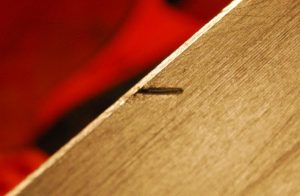
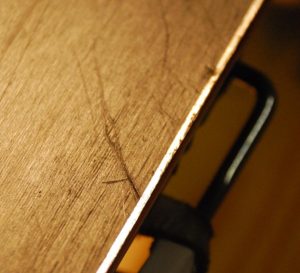
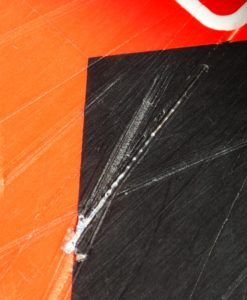
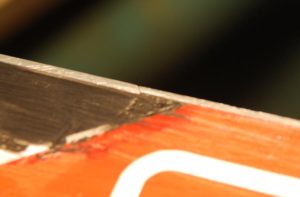
Move along folks, nothing to see here – apart from a serious delamination and an edge bent in two dimensions. Not very pretty inside the gaping hole either – hard to say exactly what’s going on.
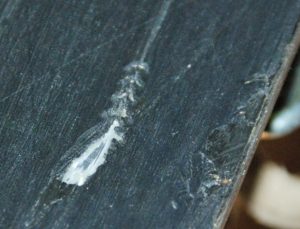
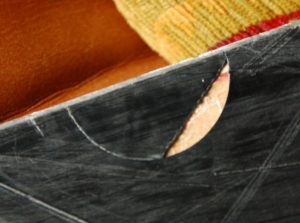
Let’s peel back the P-tex to have a better look:
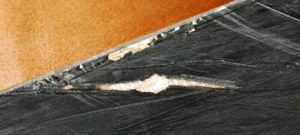
So it’s not pretty but it’s probably saveable with a bit of TLC and the healing powers of Araldite.
First we scrub the wound with a wire brush to clean it up, then careful application of torque through pliers to straighten up the bent edge. Then undercut the edges of the P-tex base so that the patch is held in place.
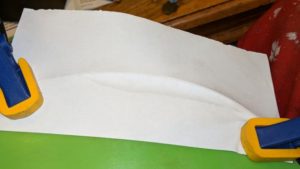
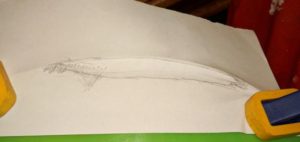
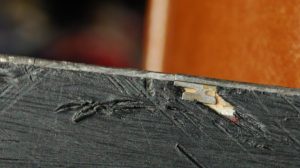
Normally on the flat of the base you use a neat template to cut a perfect semicircle out of the base P-tex then use the same template to cut the new patch. However, life is obviously never as simple as the advert so we need to be a bit more creative here as the damage is on the scoop so it’s in 2 dimensions. So let’s do a bit of brass rubbing:
Once you have the shape on the paper you simply clamp the paper template to the P-tex sheet and use scissors to cut the patch to size. The patch here is held in place by itself, just rather satisfyingly clicked in place:
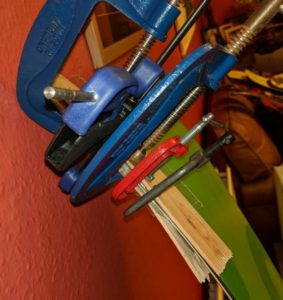
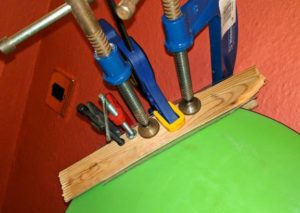
Once the patch is the right size, it’s a simple matter to mix up some Araldite, heat it up with a hairdryer and apply it to the base & patch. I would love to show some pictures of this process but if you’ve ever chased a pint of hyper-fluid glue around your living room, trying to avoid spilling it on the furniture and carpets, you’ll know that taking photos is the last thing on your mind. Here it is with the usual arrangement of plastic sheet to prevent sticking, thin wooden sheets to spread the force and a few clamps done up nice & tight:
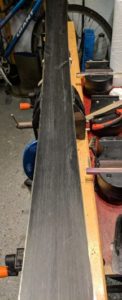
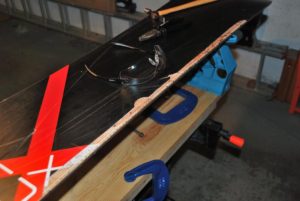
Just leave it like this, perched over your hottest radiator, for 48 hours and hey presto – relaminated. Here it is restructured and with the base renew wax on but not yet scraped –
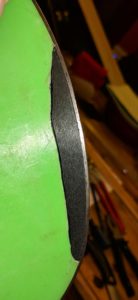
– and here is the board with top wax scraped & brushed, ready to go. All in all a nice wee repair and could only have been improved with some lime-green P-tex instead of boring old black.
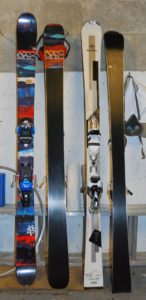
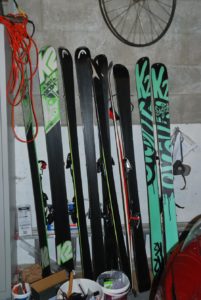
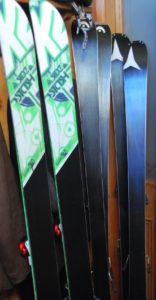
The early season rush included a number of boards, each with their own tale to tell.
Hogging the sofa
The Burton Custom on the left had been tuned by someone in the past who had changed the bevels from the Burton standard 1 degree base/1 edge to 1.5 degrees base & edge. In itself that’s not the end of the world, and indeed Capita and some other boards come from the factory like that, but it’s a drag to try to copy as no-one makes 1 .5 degree file guides for side edges. So now it is 1.5/2 instead. Jonathan had asked for a base grind but we like to preserve client kit if we can so it got substantial P-tex repairs and a restructure instead. By all means get a base grind if your base edges are really knackered, or you want to reset them to some new angle, but remember that P-tex varies from 1.2mm down to 0.6mm thick when new so there just isn’t much to play with. Techs are always happy to grind as it reduces the amount of filling they have to do but remember that you’re shaving life off your pride & joy.
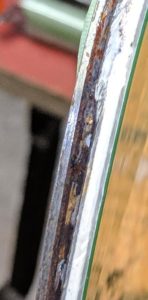
Les’s RIDE looked innocent enough but someone had fitted tungsten carbide edges at some point. Seriously, I need my files to last for more than one board. Once the base edges were in some sort of order the side edges had another joker to play – not only were they brutally hard to file but they were set at zero degrees. That makes the edge profile 91 degrees – I’ve never seen a profile greater than 90 degrees. It’s easy enough to do if the factory simply forgets to bevel the side edges before firing the boards out of the door, but really? Anyway the edges are now set at 1/1 and I have ordered more files from the shop.
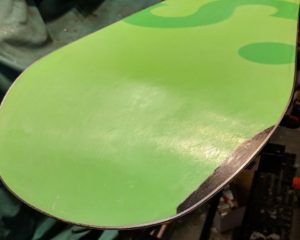
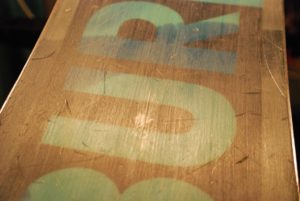
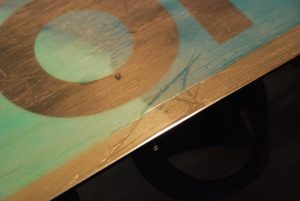
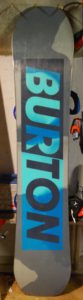
Eddie’s Scallywag exhibits the worst excess of snowboard design – the dreaded white base. It really is the mullet of snowboard bases – never acceptable in any social situation. They get dirty, go orange if your edges rust, never look good when scratches are repaired and you can’t see what you’re doing when you try to wax them. However I soldiered on and got the base into some sort of shape after a base plane, fill, structure, edge & wax.
Finally Ben’s Burton Custom – just a few gouges to fill, 1/1 edges as Burton intended and no machine hardening – a pleasure to work on. Which makes me feel even more guilty for finishing it well after the date I had promised – sorry Ben.
Jon emailed to say his skis just needed “a quick edge & wax”. For a moment I was nearly taken in, but once I got them into the Cave and under some decent light the full horror became apparent. I’ll skip over the concave Salomons & not too bad Völkls and head straight to the Fischer Spyder blades.
Blades used to be very popular in the late 80s & 90s and I have to say that they looked like a lot of fun as people shot past on tiny planks unencumbered by poles. Great for skating if you find yourself in a resort with too much flat between pistes, and you could just about pop them in a rucsac and cycle up to Glenshee as they’re only about 80cm long and nice & light. I suppose the funny bindings and bondage straps maybe put people off. Maybe it’s the folk memory of the days when you weren’t cool if your skis were less than 2 metres 20 long.
Anyway here’s a snap of the “just needing an edge & wax” base:
Let’s just zoom in a little…
Ploughed field & orange edges – nice
If Jon did cycle up to Glenshee it’s starting to look like he towed a mate up behind him on his blades. So it’s time to plane bases, fill any remaining extra deep gouges, reset base edges, sort side bevels, soak in about a gallon of Zoom base renew pink wax then top them off with Zoom universal.
Here they are ready to be shown off in public:
Flat & shiny
*Ski tech in joke – Jon Coster of the Piste Office https://www.thepisteoffice.com/ used to use the name “Spyder Jon” on Snowheads. Sorry. I’ll get my coat…
The early season rush means that I haven’t been taking as many photos as normal, with the backlog of equipment looming over my shoulder every time I enter the Cave. However when Angela dropped off her recently acquired, second hand, ex-hire Salomons they had a few clues about their past that caught my eye.
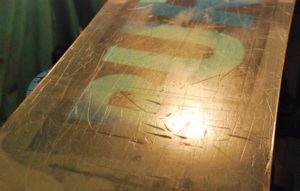
The base photo manages to catch an old, failing scratch repair, transverse ridges (usually caused by dodgy scraping, either p-tex repair or wax) and longitudinal scratches that make it look as though someone has started to flat file the base, then given up.
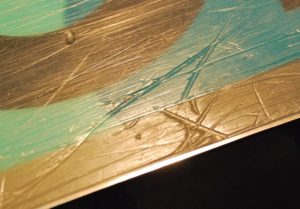
Edges varied in their side bevel and degree of mechanical scarring, as though someone started a hand tune then, well, gave up:
As the bases were still very concave (you can see why someone tried to fix it) they needed to be planed, filled then structured. One of the below photos also helpfully show the SkiVisions base planer and structuring tools:
Base planed, gouges filled
Base structured – note SkiVisions tools
Planing the base means resetting the base bevels from scratch, which was easy enough – the base planer removes any hardening left over from mechanical edging. The side edges were much harder, taking ages to get through the hardened steel. The fact that someone had reset the edges to 1 degree means that quite a lot of extra edge was lost getting them back to the Salomon standard 2 degrees. However eventually the edges were sorted and after some Zoom base renew then Universal top wax they were looking showroom cool again:
The refreshing quantity of pre- and early-season snow has coincided with an uptick in the oil price so there has been a bit of a conflict between the two careers. The severe imbalance between oilfield and ski tech remuneration means that the Cave only really opened to business on Monday 11th Dec then promptly shut again on the 15th so I can hit the Alps. The upside of this is that I took the time to tune my own skis so I get take my own hard work into some actual snow rather than scraping them across the Scottish gravel fields of last season.
Another upside is that there was something of a queue forming when I did return from Australia, and it is quicker on a per-board basis to make a production line. Sadly the CaveCam was still stuck in a suitcase in LHR so there are no photos with this post.
As always there was some new stuff to learn. Bataleon make “3-D bases” which have a bit of a wing thing going on. Someone else had hashed the edges so badly it wasn’t possible to tell what the bevel should be so a few emails to Bataleon HQ in Amsterdam, deep in the Dutch Alps, revealed that they ship with zero base & 1 degree side. This sort of makes sense as the wings on the base keep the edges out of trouble (although you would have a disconcertingly long wait at the start of a turn before any edge actually bit) but from a practical perspective, how do you file a zero bevel? It is flat with the base so if you waft a file up & down with no file guide you are knackering the base. Anyway Bataleon have a relaxed attitude to tuning their boards – have a look at this movie on their website:
No mention of base & edge bevels because – hey! – your tech just bungs the board in a machine and it comes out at whatever settings the last guy left it at. If you look at around 1 minute you can see the sparks flying from the edges as the side edges get nicely case hardened, so that when you learn a bit of board sensitivity and try to tune the board yourself it is a nightmare to try to work through all the hardened patches. And that was certainly the case with Iain’s board, which put up plenty of resistance but which is now in better than new condition.
In contrast, Ross returned his Atomics for another tune & wax and they were done & dusted with no drama, because once your skis have been tuned properly once they are a doddle to tidy up next time.
Moz , Heather, Brett & Scott also put various skis & boards through the mill. Here’s hoping everyone gets some decent riding in over the festive period and I look forward to seeing everyone in the New Year.
Every service starts with a quick eyeball to see what’s what. Scott bought a used board from a mate and it looked OK from a distance:
Nice subtle paint job of the sun going down, top in good condition. However the base was just odd:
It seemed to have about 3mm of something – wallpaper paste? dried up porridge? – on the base. It can’t have been wax as wax comes off when you go down the hill, and the board had clearly been used since the porridge application. Also wax is slippery and this stuff is sticky. You can see how deep it is – the horizontal gouge across the top of this photo disappeared completely once the board was de-porridged.
Anyway whatever it was there was a lot of it. I took the snap below after two minutes of just lightly scraping. Scraping turns the porridge into corn flakes.
Once the base was scraped & cleaned with degreaser it failed the true bar test:
As always the base flatness is not easy to photograph convincingly but there was nearly a 2mm gap in the middle along half the length of the board. Concave bases are grabby bases as you are always riding the edges rather then the base even when you are trying to ride completely flat. However the P-tex is only 2mm thick so you can’t expect to cure this particular case completely. So out with the Base Planer to bring as much off the edges as I could without destroying the base altogether. One good thing about a base grind like this is that lots of superficial scratches just disappear and only the humdingers remain.
Gouges carefully filled with clear & colourless P-tex then scraped flat:
You can still see the shadow of the P-tex after it’s been scraped as the P-tex fills the structure where it has been applied. So we need to structure the base after scraping all the repairs. Here’s the board following structuring:
Base edges need to be reset completely after a base grind so about 10 passes with the file & guide before it’s even worth colouring the edge. Once the edge is inked up it took five more passes to remove the Sharpie ink completely, then smooth the edges up with the diamond files.
Side edges were rusty at first but it didn’t take much to batter them into shape:
One feature of resetting the base edges is a strong tendency to build a burr on the edge. You can feel this easier than see it – nicely sharpened edges feel equally sharp whether you stroke your fingers up or down the edge (looking from above, remember to always check for sharpness of any edge by stroking perpendicular to the length of the edge/blade) but a burr makes the edge feel much sharper in one direction. We use this effect to make our steel scrapers sharper, but on a ski or board we want rid of it and the easiest way to do this is to redo the base edges – just a couple of strokes – then a pass or two on the side edges again and all should be well.
The base lapped up the base renew wax like a man who had arrived at a free bar after two days wandering in the Sahara. Top wax, scrape & polish and the board is looking good, fully cleansed of sticky cereal and ready for action:
A few people have asked for fast turnarounds over the last week or so which precludes proper photo tracking. So if you were hoping to see your planks or board featured and it never made it, I’m sorry. Here are a couple of orphan photos that never quite formed a story by themselves.
Robbie’s furry board:
Hard to see from the picture but if you are worried that your board has a non-flat base either send it to Blues in Edinburgh for a stone grind or give it to me for SkiVisions flattening, but please don’t reach for the wet & dry and give it a seeing to. Sandpaper simply doesn’t cut P-tex but makes it into a big furry ball. Once you’ve made all that fur it’s the devil’s own job to try to get rid of it to actually cut the P-tex & flatten the board. Anyway we persevered and got to a better place, and Robbie did introduce me to the concept of Extreme Carving, which looks quite a lot like having a wee snooze on each turn but in fact must be quite demanding. Robbie’s board was a really good looking Burton “race board” from about 2000, when they were manufacturing in Austria. Nice & slim and purposeful looking.
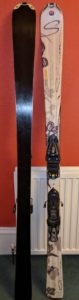
Lara’s skis:
Lara dropped off a couple of sets of skis for wax & edge. As a complete pushover I filled a couple of gouges for free.
Following a bit of a photo drought I finally remembered to snap the finished skis. The Rossis (white tops) are remarkably lightweight and, combined with their sensible black bases, were a pleasure to work on. As a wee bonus Alasdair dropped off his brand new Atomics for a once over when he picked up Lara’s skis.
Other clients though the Cave in the last few days have included Tom’s Blizzards take 2; Darren’s girls’ dry slope boards; Neil’s K2s, Moz’s skis and a couple of others. Most of these were turned round in less than 24 hours or some on a while you wait basis.
Please feel free to add positive comments if you’re happy with the work.
Neil’s clearly been enjoying his backcountry skiing. His K2s were full of gouges but this one caught my eye – through the P-tex, through the fibreglass and down to the metal:
You can also see an existing repair along the edge. Anyway the gouge had to be opened up, metal-grip applied in the bottom of the gouge then topped off with P-tex to get it slick. The bases needed a complete re-structure with the SkiVisions tools to blend all the repairs in and give the wax something to grip on.
Edges are (I suspect) stainless as they were rust-free but battered to hell. They took ages to get sharp again but they finally capitulated.
Here they are awaiting waxing with the rest of that day’s batch:
And there they are awaiting collection once they’re finished. Not many photos this time, too many skis to process.
A doctor friend of mine worked in Papua New Guinea for a couple of years, learning about tropical diseases. He said it was very liberating in that the expectations of the local population were very low. They would take the patient to the tribal witch doctor, and if that didn’t work they would let Andy try his white man’s magic. If he cured the patient that was great; if not then that was only to be expected and no-one complained – a shrug of the shoulders and off they went.
Marc had a similar fatalistic view when he dropped off his venerable Burton Custom for a review. The board was really only fit for the mortuary slab but he figured that letting me try the ManCave magic wouldn’t hurt. He might get a “Scottish Board” out of it and if not then it would make a nice garden bench.
If you are of a sensitive disposition you might want to look away now.
You’ll see some of the gouges have exposed the tabs on the edges. If you look closely you’ll see that there are a number of cracks in the edges:
This one has been repaired:
You can see the principle for replacing short lengths of edge – clamp a template to the board, cut out a regular shape of P-tex, pull out the knackered edge, glue new edge in, then use the same template to cut out a P-tex cover for the hole. This repair folded over soon after it was done (it was an overnight in-resort repair so maybe failure was to be expected) so Marc just cut the fold off. Unfortunately for us, the damaged part of the edge was around 80cm long so no templates that size exist, leaving us to cut the P-tex freehand then chisel it out. Like I said, look away now if you are easily shocked:
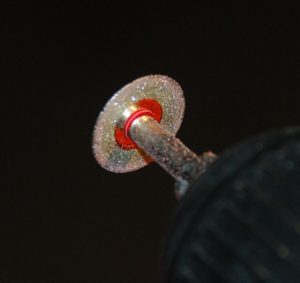
Once the edge is fully exposed it needs to be cut at 45 degrees so the repair won’t be plucked out by stones. Time for the baby diamond disc:
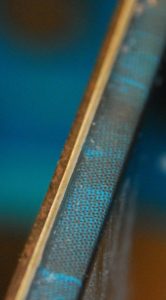
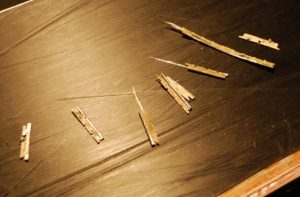
Once the edge has been cut it is simply a case of pulling it off the board. That really exposes the number of breaks in the edge and raises an interesting point. Burton have used narrow edges made of stainless steel for the board. Narrow to save weight presumably, although narrow profile edges are sometimes sold as “racing profile” as the edges drag more than the bases so you might want to reduce the area on the snow. They have also used thin grade P-tex so I think weight loss was the objective. You might think stainless edges are a good idea, especially if you store your gear in a wet roof box between seasons. However they have never really caught on, and a bit of web searching reveals that they are a bit more expensive than carbon steel, slightly harder to form when you’re making your skis/board, definitely harder to sharpen/file/tune and finally somewhat prone to cracking. Well I can verify that last bit – the first photo is the edge pulling away then the photo below is just some of the pieces the edge came away in:
Needless to say stainless edges have receded in popularity in the last decade or so. So it’s boring old carbon steel that’s going in as a replacement.
Here is the new edge with a couple of baby screws already in. The screws are there to resist anything that tries to pull the edge out and are really an admission that we can’t form & glue the repair as well as we can a brand new board. For this repair I added a screw every three or four tabs. At 6mm long they are a barrel of laughs as you drop two screws on the floor for each one that actually goes in the hole.
Once the holes are all made it’s time to apply araldite, fit all the screws and clamp the edge up good & tight. The board gets to sleep next to a radiator for a night to help the glue to set:
Once the epoxy is set it’s time to cut the new P-tex to size. Start with a rectangle of P-tex, clamp it to the board above the repair area, very carefully mark the shape using your daughter’s compasses, swear a bit, cut out the new shape, swear a bit more, trim to size, pop it in the hole. At this point I realised that my repair sheet (of fancy-dancy A4000 P-tex) was a good bit thicker than the slimline soft stuff that Burton had chosen. And a good bit harder too.
Next job has to be the most satisfying – time to chop the heads of the screws. Remember the baby diamond disc? It fairly whistles through the baby screws and leaves the shaft in the board, anchoring the edge but with no protruding head to get in the way:
Then it is a simple matter of fitting the P-tex patch, gluing, clamping, leaving overnight:
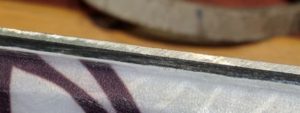
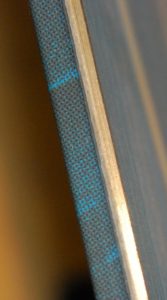
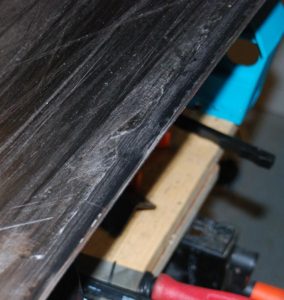
The join between the new edge (left) and old edge. Note the new edge is wider and the 45 degree join to prevent the join catching.
OK it doesn’t look pretty so we fill the tiny gaps around the edges and would normally just scrape to get everything even. However my thick P-tex is standing well proud of the rest of the base so it needs a good seeing to with the SkiVisions cutter to get anywhere near level. Once it is good and the rest of the gouges are filled, scraped and the base is structured it’s time to blend in the repaired edge which was very easy as the existing stainless edge is harder than the replacement edge. Then base & side edges are applied as per the recommendation printed on the board – base 1 degree side 1 degree. The hardest part was definitely trying to get a meaningful edge on the side that wasn’t repaired – it took 5 or 6 times longer to get the stainless to take an edge than the brand new carbon steel.
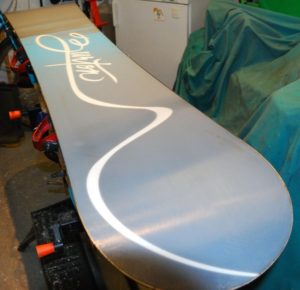
Here’s the board ready for waxing:
The board won’t be mistaken for new but Marc is hoping to get it up a hill asap to see how it performs. If it’s worth keeping we’ll tidy up some of the cosmetics and double check the blending of the new P-tex to make sure it doesn’t go the way of the previous repair.
And if it doesn’t perform on the hill it will still make a great bench for telling tall tales over a beer in the garden.
As promised Angus tore himself away from the snow at Glenshee to drop off his dry slope bashing board for a bit of base restoration. I’ve never actually had a session at Garthdee but it seems to involve a lot of attacking each others’ boards with hand held grinders:
The board was also fairly concave so it took a fair base of base planing to get it flat. This takes off some of the more superficial gouges…
…but still leaves the big ones to deal with. Experience has shown that it takes two or even three passes of P-texing & scraping to get a really mashed base clean and there really isn’t any way to short cut the fill & scrape process.
Here is the board smothered in clear & colourless P-tex the first time:
And the second pass, which included all the metal-grip down along the rather gappy edges:
However eventually it is ready for structuring with the trusty SkiVisions tools, tidying up the edges (which is easy as they were last done a few weeks ago by Angus himself) then some Zoom Universal wax to keep it looking nice and shiny until the next robot wars session at the dry slope.
This website uses cookies to improve your experience. We'll assume you're ok with this, but you can opt-out if you wish. Cookie settingsACCEPT
Privacy & Cookies Policy
Privacy Overview
This website uses cookies to improve your experience while you navigate through the website. Out of these cookies, the cookies that are categorized as necessary are stored on your browser as they are essential for the working of basic functionalities of the website. We also use third-party cookies that help us analyze and understand how you use this website. These cookies will be stored in your browser only with your consent. You also have the option to opt-out of these cookies. But opting out of some of these cookies may have an effect on your browsing experience.
Necessary cookies are absolutely essential for the website to function properly. This category only includes cookies that ensures basic functionalities and security features of the website. These cookies do not store any personal information.
Any cookies that may not be particularly necessary for the website to function and is used specifically to collect user personal data via analytics, ads, other embedded contents are termed as non-necessary cookies. It is mandatory to procure user consent prior to running these cookies on your website.


 It seemed to have about 3mm of something – wallpaper paste? dried up porridge? – on the base. It can’t have been wax as wax comes off when you go down the hill, and the board had clearly been used since the porridge application. Also wax is slippery and this stuff is sticky. You can see how deep it is – the horizontal gouge across the top of this photo disappeared completely once the board was de-porridged.
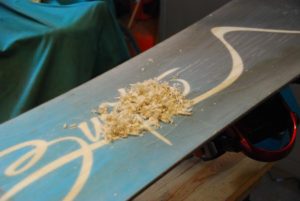
 As always the base flatness is not easy to photograph convincingly but there was nearly a 2mm gap in the middle along half the length of the board. Concave bases are grabby bases as you are always riding the edges rather then the base even when you are trying to ride completely flat. However the P-tex is only 2mm thick so you can’t expect to cure this particular case completely. So out with the Base Planer to bring as much off the edges as I could without destroying the base altogether. One good thing about a base grind like this is that lots of superficial scratches just disappear and only the humdingers remain.
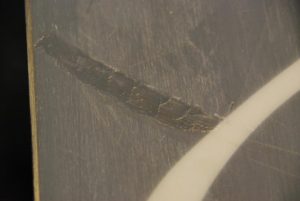
 Following a bit of a photo drought I finally remembered to snap the finished skis. The Rossis (white tops) are remarkably lightweight and, combined with their sensible black bases, were a pleasure to work on. As a wee bonus Alasdair dropped off his brand new Atomics for a once over when he picked up Lara’s skis.
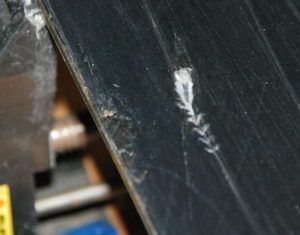

 You can see the principle for replacing short lengths of edge – clamp a template to the board, cut out a regular shape of P-tex, pull out the knackered edge, glue new edge in, then use the same template to cut out a P-tex cover for the hole. This repair folded over soon after it was done (it was an overnight in-resort repair so maybe failure was to be expected) so Marc just cut the fold off. Unfortunately for us, the damaged part of the edge was around 80cm long so no templates that size exist, leaving us to cut the P-tex freehand then chisel it out. Like I said, look away now if you are easily shocked:
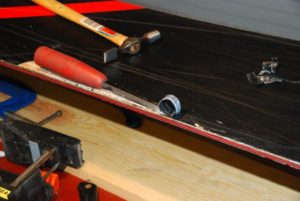
 Once the edge has been cut it is simply a case of pulling it off the board. That really exposes the number of breaks in the edge and raises an interesting point. Burton have used narrow edges made of stainless steel for the board. Narrow to save weight presumably, although narrow profile edges are sometimes sold as “racing profile” as the edges drag more than the bases so you might want to reduce the area on the snow. They have also used thin grade P-tex so I think weight loss was the objective. You might think stainless edges are a good idea, especially if you store your gear in a wet roof box between seasons. However they have never really caught on, and a bit of web searching reveals that they are a bit more expensive than carbon steel, slightly harder to form when you’re making your skis/board, definitely harder to sharpen/file/tune and finally somewhat prone to cracking. Well I can verify that last bit – the first photo is the edge pulling away then the photo below is just some of the pieces the edge came away in:
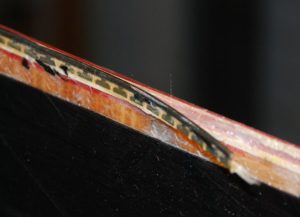
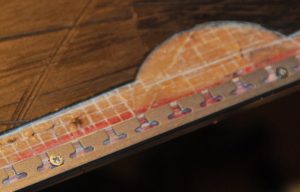 Here is the new edge with a couple of baby screws already in. The screws are there to resist anything that tries to pull the edge out and are really an admission that we can’t form & glue the repair as well as we can a brand new board. For this repair I added a screw every three or four tabs. At 6mm long they are a barrel of laughs as you drop two screws on the floor for each one that actually goes in the hole.
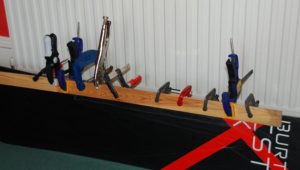
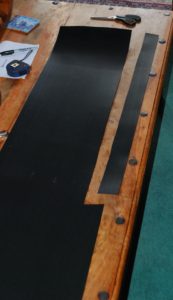 Once the epoxy is set it’s time to cut the new P-tex to size. Start with a rectangle of P-tex, clamp it to the board above the repair area, very carefully mark the shape using your daughter’s compasses, swear a bit, cut out the new shape, swear a bit more, trim to size, pop it in the hole. At this point I realised that my repair sheet (of fancy-dancy A4000 P-tex) was a good bit thicker than the slimline soft stuff that Burton had chosen. And a good bit harder too.
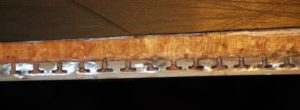
 takes two or even three passes of P-texing & scraping to get a really mashed base clean and there really isn’t any way to short cut the fill & scrape process.
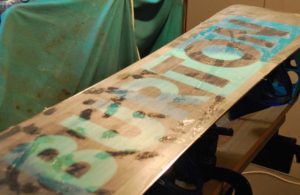

 However eventually it is ready for structuring with the trusty SkiVisions tools, tidying up the edges (which is easy as they were last done a