A doctor friend of mine worked in Papua New Guinea for a couple of years, learning about tropical diseases. He said it was very liberating in that the expectations of the local population were very low. They would take the patient to the tribal witch doctor, and if that didn’t work they would let Andy try his white man’s magic. If he cured the patient that was great; if not then that was only to be expected and no-one complained – a shrug of the shoulders and off they went.
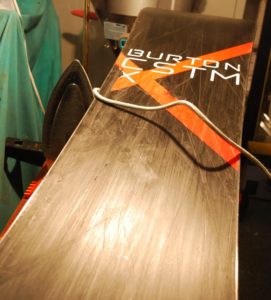
Marc had a similar fatalistic view when he dropped off his venerable Burton Custom for a review. The board was really only fit for the mortuary slab but he figured that letting me try the ManCave magic wouldn’t hurt. He might get a “Scottish Board” out of it and if not then it would make a nice garden bench.
If you are of a sensitive disposition you might want to look away now.
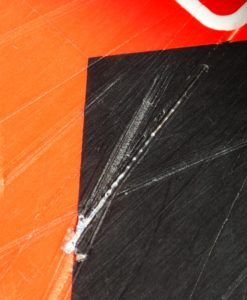
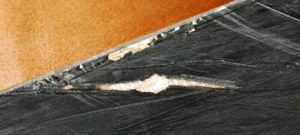
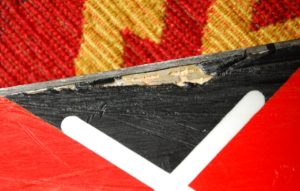
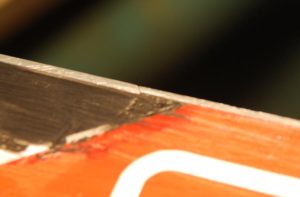
You’ll see some of the gouges have exposed the tabs on the edges. If you look closely you’ll see that there are a number of cracks in the edges:

This one has been repaired:
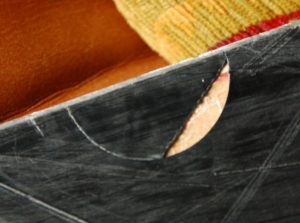 You can see the principle for replacing short lengths of edge – clamp a template to the board, cut out a regular shape of P-tex, pull out the knackered edge, glue new edge in, then use the same template to cut out a P-tex cover for the hole. This repair folded over soon after it was done (it was an overnight in-resort repair so maybe failure was to be expected) so Marc just cut the fold off. Unfortunately for us, the damaged part of the edge was around 80cm long so no templates that size exist, leaving us to cut the P-tex freehand then chisel it out. Like I said, look away now if you are easily shocked:
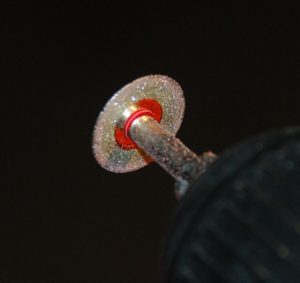
Once the edge is fully exposed it needs to be cut at 45 degrees so the repair won’t be plucked out by stones. Time for the baby diamond disc:
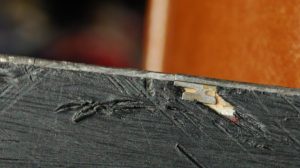
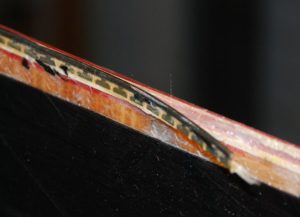
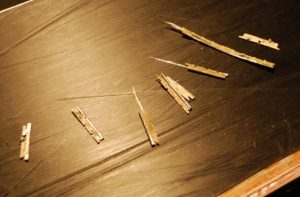
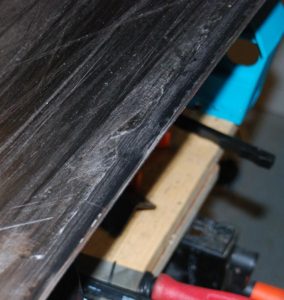
 Once the edge has been cut it is simply a case of pulling it off the board. That really exposes the number of breaks in the edge and raises an interesting point. Burton have used narrow edges made of stainless steel for the board. Narrow to save weight presumably, although narrow profile edges are sometimes sold as “racing profile” as the edges drag more than the bases so you might want to reduce the area on the snow. They have also used thin grade P-tex so I think weight loss was the objective. You might think stainless edges are a good idea, especially if you store your gear in a wet roof box between seasons. However they have never really caught on, and a bit of web searching reveals that they are a bit more expensive than carbon steel, slightly harder to form when you’re making your skis/board, definitely harder to sharpen/file/tune and finally somewhat prone to cracking. Well I can verify that last bit – the first photo is the edge pulling away then the photo below is just some of the pieces the edge came away in:
Needless to say stainless edges have receded in popularity in the last decade or so. So it’s boring old carbon steel that’s going in as a replacement.
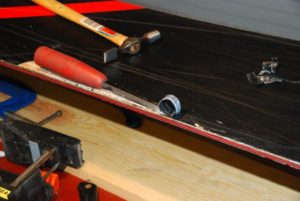
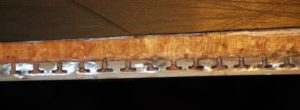
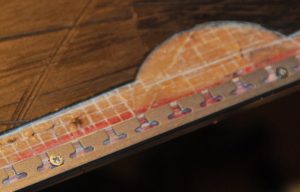 Here is the new edge with a couple of baby screws already in. The screws are there to resist anything that tries to pull the edge out and are really an admission that we can’t form & glue the repair as well as we can a brand new board. For this repair I added a screw every three or four tabs. At 6mm long they are a barrel of laughs as you drop two screws on the floor for each one that actually goes in the hole.
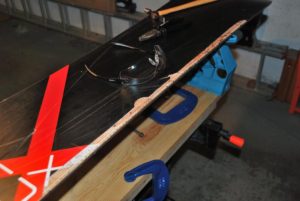
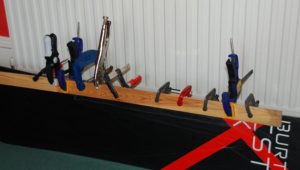
Once the holes are all made it’s time to apply araldite, fit all the screws and clamp the edge up good & tight. The board gets to sleep next to a radiator for a night to help the glue to set:
 Once the epoxy is set it’s time to cut the new P-tex to size. Start with a rectangle of P-tex, clamp it to the board above the repair area, very carefully mark the shape using your daughter’s compasses, swear a bit, cut out the new shape, swear a bit more, trim to size, pop it in the hole. At this point I realised that my repair sheet (of fancy-dancy A4000 P-tex) was a good bit thicker than the slimline soft stuff that Burton had chosen. And a good bit harder too.
Next job has to be the most satisfying – time to chop the heads of the screws. Remember the baby diamond disc? It fairly whistles through the baby screws and leaves the shaft in the board, anchoring the edge but with no protruding head to get in the way:
Then it is a simple matter of fitting the P-tex patch, gluing, clamping, leaving overnight:
OK it doesn’t look pretty so we fill the tiny gaps around the edges and would normally just scrape to get everything even. However my thick P-tex is standing well proud of the rest of the base so it needs a good seeing to with the SkiVisions cutter to get anywhere near level. Once it is good and the rest of the gouges are filled, scraped and the base is structured it’s time to blend in the repaired edge which was very easy as the existing stainless edge is harder than the replacement edge. Then base & side edges are applied as per the recommendation printed on the board – base 1 degree side 1 degree. The hardest part was definitely trying to get a meaningful edge on the side that wasn’t repaired – it took 5 or 6 times longer to get the stainless to take an edge than the brand new carbon steel.
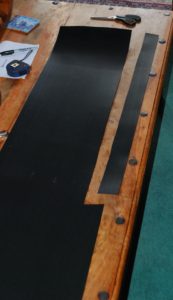
Here’s the board ready for waxing:
The board won’t be mistaken for new but Marc is hoping to get it up a hill asap to see how it performs. If it’s worth keeping we’ll tidy up some of the cosmetics and double check the blending of the new P-tex to make sure it doesn’t go the way of the previous repair.
And if it doesn’t perform on the hill it will still make a great bench for telling tall tales over a beer in the garden.