John brought round a pair of Factions because he knows how infuriating it is to work on white bases 🙂
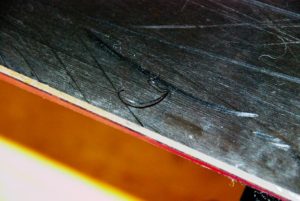
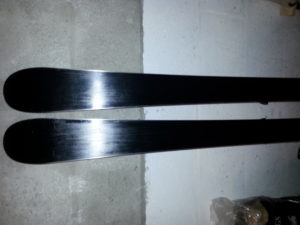
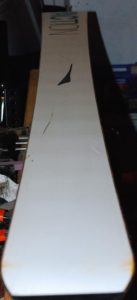
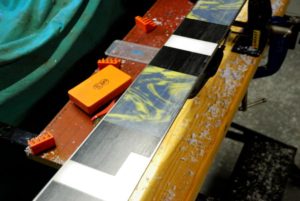
All seemed well until we got busy with the true bar. Take a look at these bases:

I have never seen such wavy bases before. They are like a ploughed field. So what looked like a simple edge & wax turned into a massive battle with the base planer to try to at least reduce the waves to a state where they can be waxed easily.
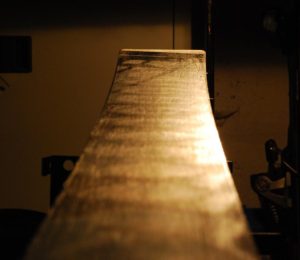
The received wisdom on base waves is to attack them at 45 degrees so you don’t just follow them up & down. The base planer holds the file at 45 degrees for just this reason:
So after many, many passes with the file I was hoping for perfectly flat – what I got was instead was flatter:
The peaks have been smeared out into ovals rather than lines so better but still not perfect. However John had never complained about the waves before so let’s not kill ourselves 3 days before Xmas.
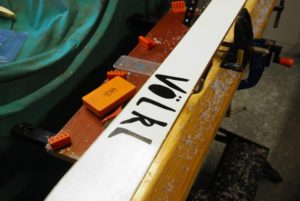
 Another concern was the huge hole shot that had been repaired some time ago with a big swoosh of black P-tex. Although it has held on for quite some time it is about half a millimetre shy of the base so it will act as a little anchor. After much furious base planing it was still keeping its head down so I roughened up the surface with a stiff brush and added more black P-tex to bring it up flush with the base. Once that was done and the other gouges repaired with clear & colourless P-tex (rather disconcertingly you can still see the original gouge even after a perfect repair) it was time to edge the skis. Faction ask for 1 degree base and 1.5 degree side, just to be awkward, but someone else had tuned the sides to 1 degree so I followed their lead. The edges came up very nicely which was a pleasant change from the Bacons.
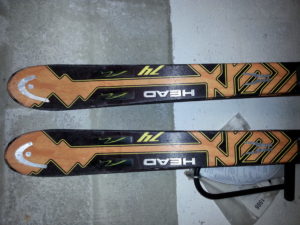
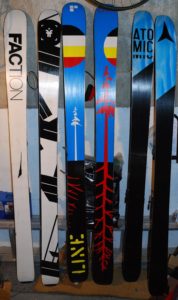
Once waxed they looked OK and here they are with the infamous Bacons and Ross’s Atomics, awaiting collection from the Cave:
 John brought round a range of skis. As well as the
 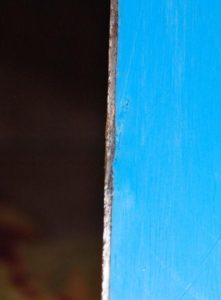 During the routine check a small bulge on the base turned out to be a bit
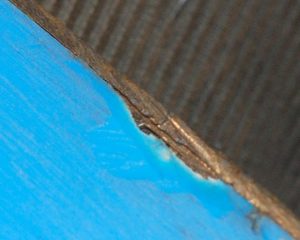 It’s hard to see on this photo but the P-tex is very slightly coming away from the edge for an inch in each direction and a thin strip of rust is peeping out.
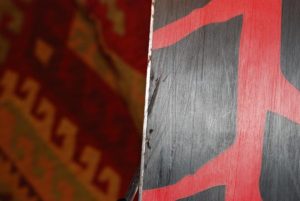 The edges are horrible but John has been careful to keep a left & right ski so the less-used edges can be saved, to an extent anyway. Obviously there are other gouges, one of which seems to have a bit of quartz wedged in it – a wee memento from a past trip.
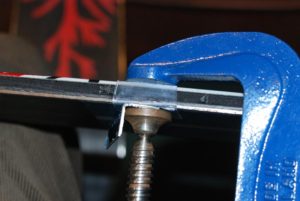
 The hole I made around the break has a fair bit of Araldite lining it but there is plenty of steel exposed so out with the metal-grip and the gas-fired base mender soldering iron. Metal-grip is basically P-tex with added kryptonite so it sticks properly to steel. Once the Metal-grip is smoothed and the other remaining gouges are filled & scraped it is time to veeeeery carefully file down the highs around the repair.
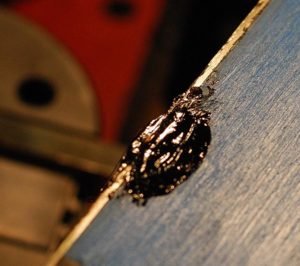
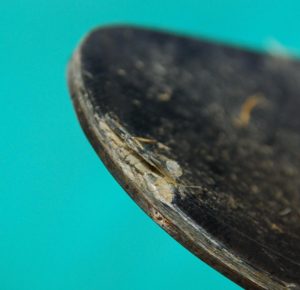
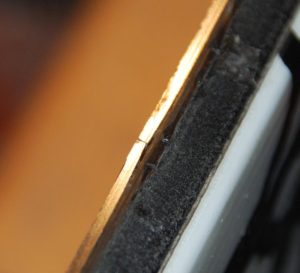 This photo makes the edge look proud of the base but in fact it isn’t – the edge sinks away slightly so I took a further photo to try to show the repair in a better light.
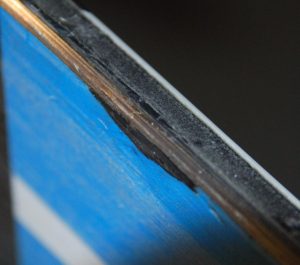
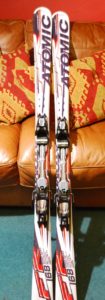 I’ll admit that I like Atomic skis a lot. They are one of the few ski manufacturers that unashamedly ship skis with 1 degree base & 3 degree side bevels – the golden ratio according to many of the
 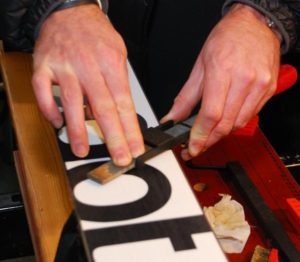 Next step as always is to double check the base bevels with a sharpie and file in the appropriate base file guide. They were already at 1 degree as per manufacturer’s guidance so they were just given a few swipes to clear rust and a couple of minor scratches.
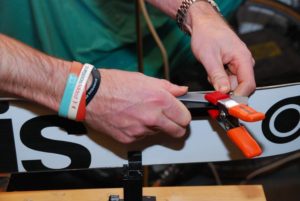
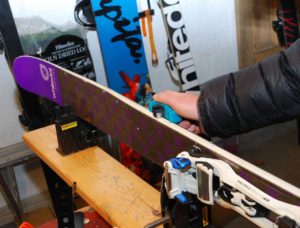 Before we could do any edging the sidewalls needed planing. Although the skis had been tuned once before there was a good bit of plastic in the way of the edging tools. As always getting the right combination of weight & speed to plane the sidewall perfectly smooth takes plenty of time & patience, especially as these walls had been left pretty lumpy by the last guy. If in doubt many fast & light strokes always beat one huge heroic effort. And finally, don’t be frightened to use a knife to remove big lumps if the alternative is shattering your planer blade.
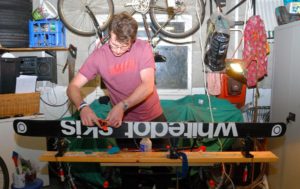
 John tried out a few angles with the wax scraper, including this one pictured left. As always touring skis are a drag to scrape just because they are so big.
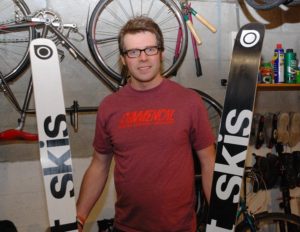 The scraping showed up the weird M-shaped bases again but some furious brushing left them in tip top condition. Here’s John showing off his planks and just ready to head back home and dig out a few more sets of skis for the treatment.
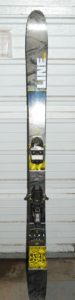 Her LINE skis are needed for a trip to the Alps on Friday so she brought them round for some pre-trip TLC. They are a good looking ski, quite wide under the binding but not ironing-board wide like true powder skis. Pretty light too.
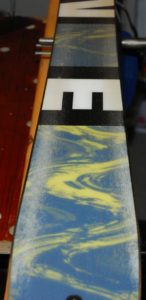 Serious white lines on the bases indicating not just “not much” wax left but frankly indicating “less than zero wax left”. To get this effect requires years of studious neglect. It’s not 100% percent certain that simply waxing them will bring them back to life once they have reached this state. When ski forum experts talk about “oxidized” bases this is what they mean. Any organic chemists out there care to comment on whether or not high molecular weight polyethylene gets “oxidized” rather than “scratched”?
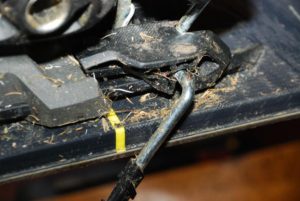 Another giveaway that the skis are more used to pastoral use is the amount of grass & soil in the bindings.
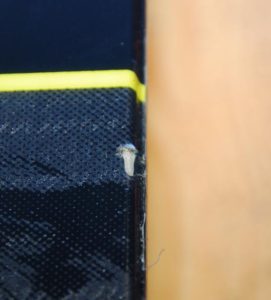

 Nothing like as bad as they were, and I would hope that the two coats will keep Hazel gliding for a whole week in the Alps, but not quite perfect. Nothing for it but another visit to the ManCave after the Alps to freshen up the structure, check out the various nicks and wax them back up again. Of course the huge discount means the more work she gets done the more savings she’ll have for Jägerbombs or whatever young people drink on ski trips these days. Bon voyage!