Neighbour Martyn made the arduous 20 metre trek from his garage to mine to get two sets of his skis sorted and his wife’s K2 board as well.
He dropped of a pair of Atomics which gave no issues beyond the very rusty state of the side edges, which took a lot of filing to get clean, plus a wacky pair of Fischer skis that have a weird fishtail and a bizarre bulge at the tips which I think he called a snow keel or similar.
Once the bases were tidied up on both skis, they rather unusually both needed 3 degree side edges to get to spec which was easy enough. But the waxing – help ma boab. I’d already done the Fischers once before but the bizarre bulges seemed to be even more infuriating to wax than I remembered.
Anyway they finally succumbed and were ready for the mandatory radiator picture:
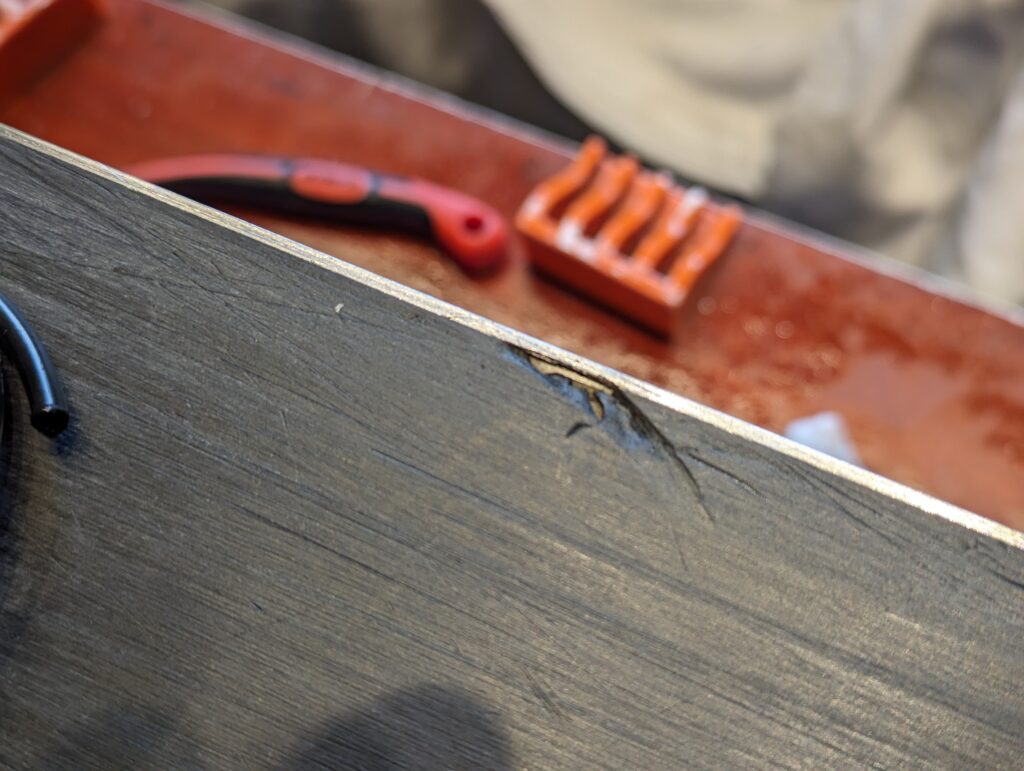
Julian was an early client of the Cave and dropped off his Völkls for an edge & wax. There was nothing unusual to report other than a wee ding next to the edge which needed some metal grip to fill:
Once that was sorted there were a couple of trivial gouges to fill and plane, base/side angles 1/2 degrees, coat of base renew wax and a coat of Holmenkohl Alpha warm weather wax and Bob’s your uncle.
Once they were waxed I couldn’t find the repair so the only after photo is below:
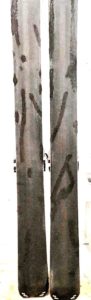
Elliot dropped off a set of Salomon Supercross and Scott Aztecs for a service to celebrate the 4 days of snow we had in Scotland in January.
Both skis are a little older, enjoying their golden years as it were, but that really appeals to me. Skiing is a pretty environmentally unfriendly activity at the best of times, and me refusing to use forever chemicals like hydrophobic wax finishers doesn’t really make much difference, but Elliot keeping skis going for ten or fifteen years is admirable. Especially with those lovely, easy to work on all-black bases and edges that are broadly where they were on leaving the factory.
In fact both sets of skis also had pretty much flat bases, not always a given these days, so they only needed minor filling to some base dings, edging to original specs and they were ready to go:
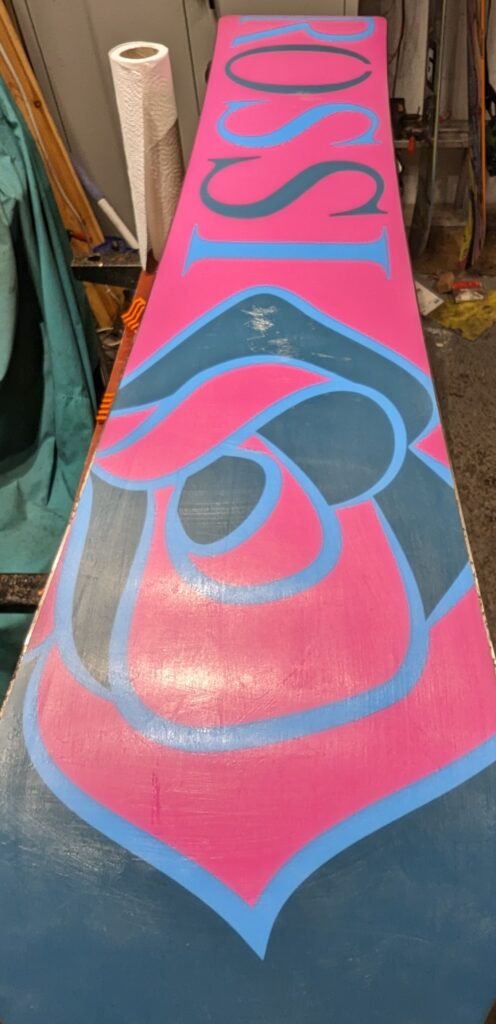
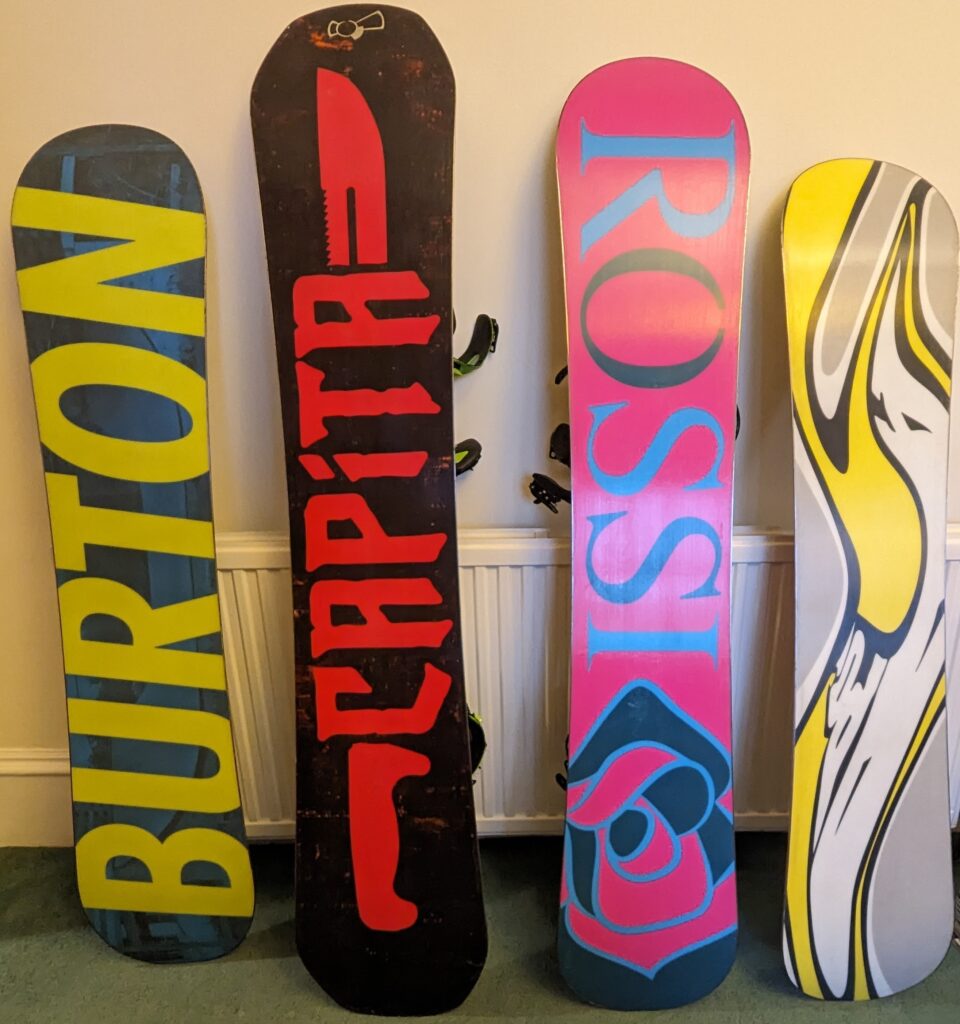
Martin has been a stalwart for the last few years, bringing in more boards every year. This year he delivered four boards with the help of a Martinette. There were a couple of minor dings to be sorted on top of the usual edge & wax – the Burton had a wee lift on its top sheet and the Rossi looked like someone had accidentally left a testy piranha fish in the bag:
The bases all needed a little bit of tweaking to get out the worst of the gouges and bite marks but nothing too onerous.
Edges were in good shape – 3 of the boards had been sorted by me in the past (see the Capita/Apos post here: https://mancaveservices.co.uk/2022/10/one-and-a-half-boards/ to read the story of the weird edge angles) so they were a breeze. Fortunately the Rossi still retained its original base 1/side 1 angles so a bit of sidewall planing and rust removal got everything back in shape.
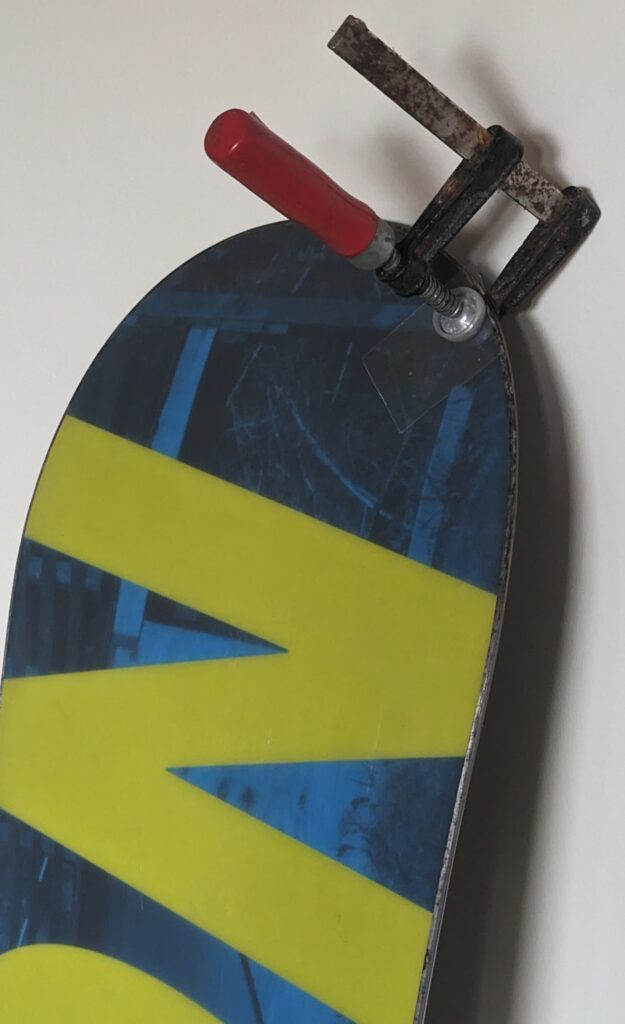
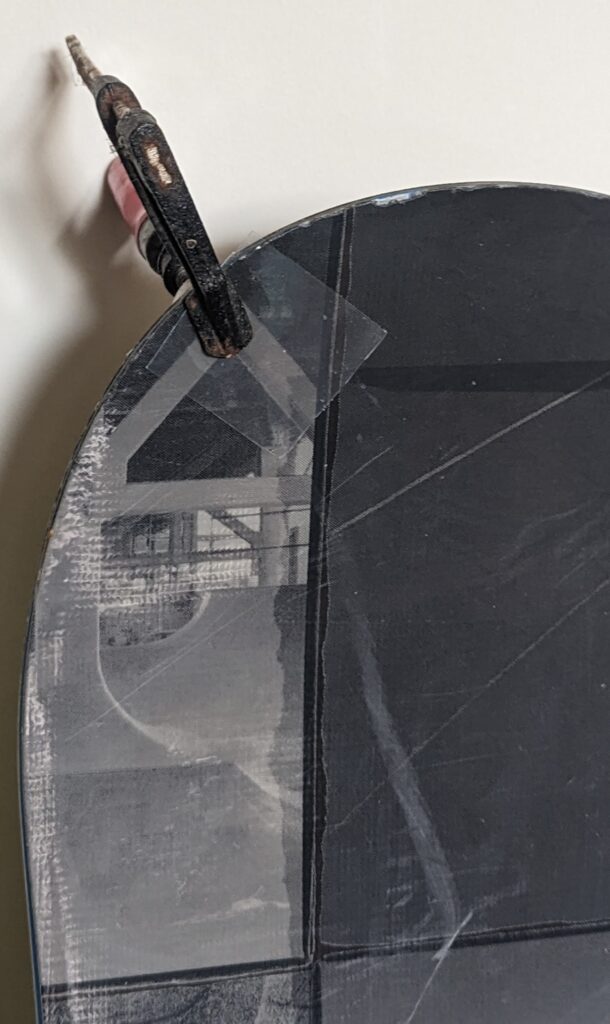
Once everyone was prettied up I remembered that the Burton needed some epoxy to stick its top sheet down again so it spent a couple of evenings warming up above the front room radiator:
Always remember to use a bit of plastic tray between the C clamp and the board – epoxy doesn’t stick to it and you can see what the glue is getting up to through the clear plastic.
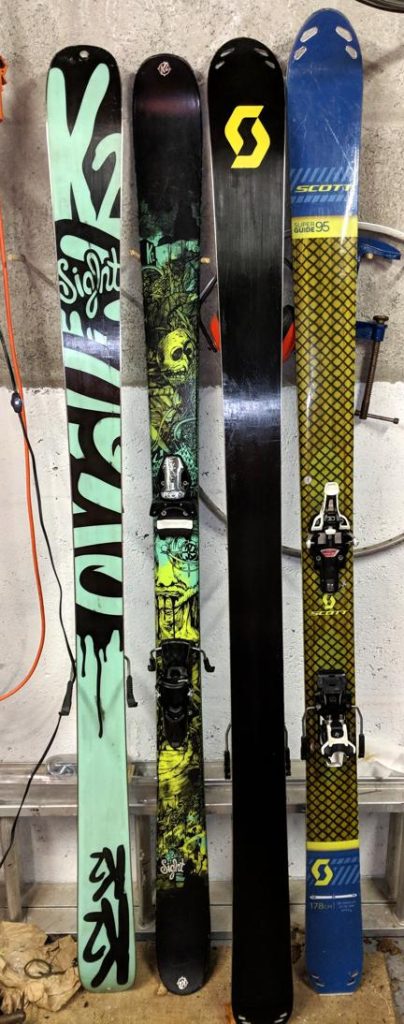
Here they are in the inevitable line up:
Repair is in the top left of the board, roughly where the rafters are. Someone has conscientiously cut down another couple of dings right on the tip of the board to stop them from catching in future. It’s worth carrying a sharp knife up the hill along with your 200 grit diamond file to keep on top of ad-hoc board surgery.
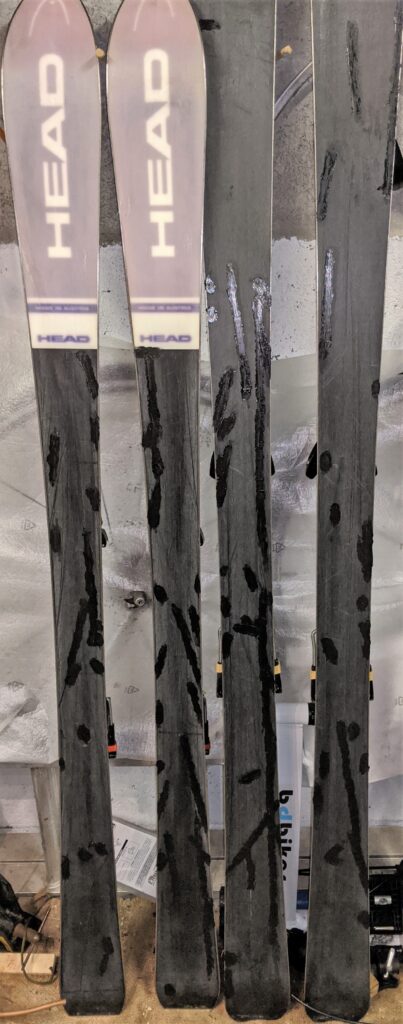
Sean dropped off his & hers skis for fettling with a view to heading off to Austria later in the week. His skis are big Atomics, just looking for big piles of soft snow to whizz across, while hers were ZAGs, a brand I have to say had previously passed me by. In the hunt for guidance on how they are set up in the factory (the edges had been assaulted previously by one of those hand-held grinder dudes) I discovered that ZAG are based in Chamonix and source 95% of their materials in the EU – edges from Germany, wood for cores from Poland etc. All very laudable but the retail prices on their website are a reminder of why everyone else gets their gear made in China or Vietnam.
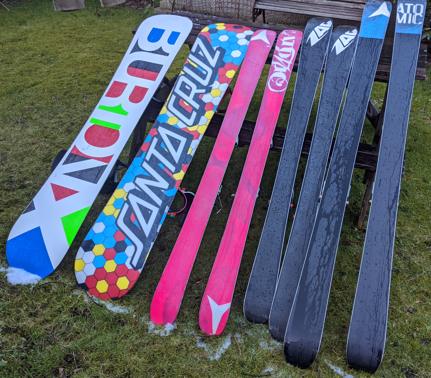
Lovely day so cleaned the bases in the garden. ZAGs are second right.
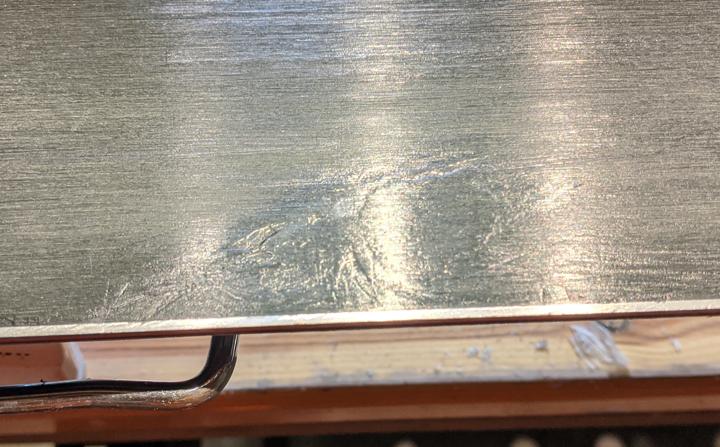
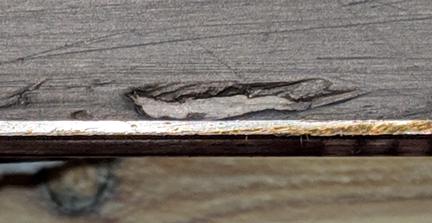
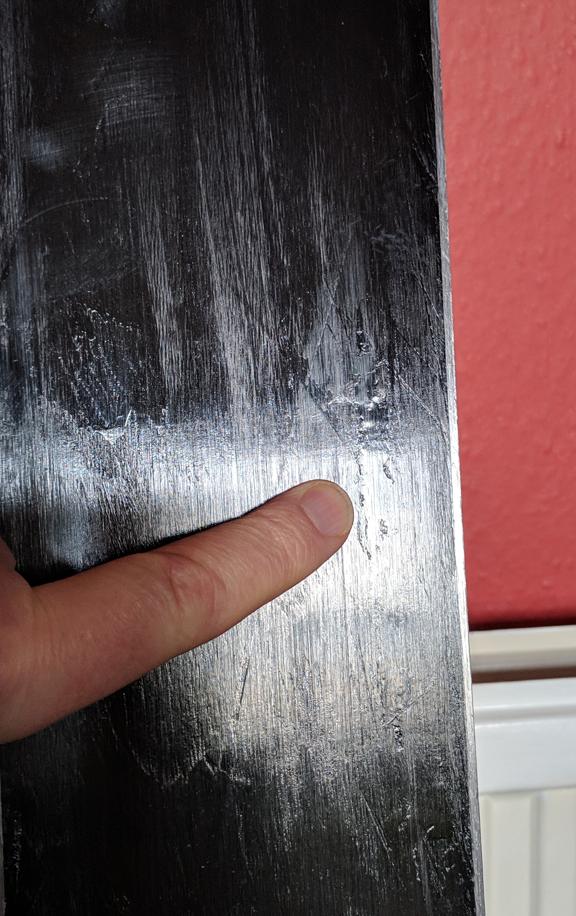
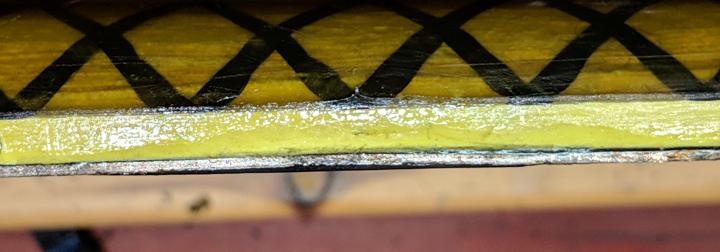
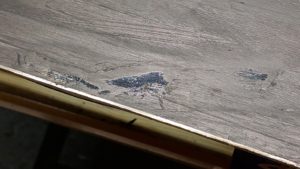
Anyway Sean’s skis didn’t look too bad until I ran a finger over this weird-looking light spot and it turned out to be a big depression:
Hard to see what happened to leave this behind
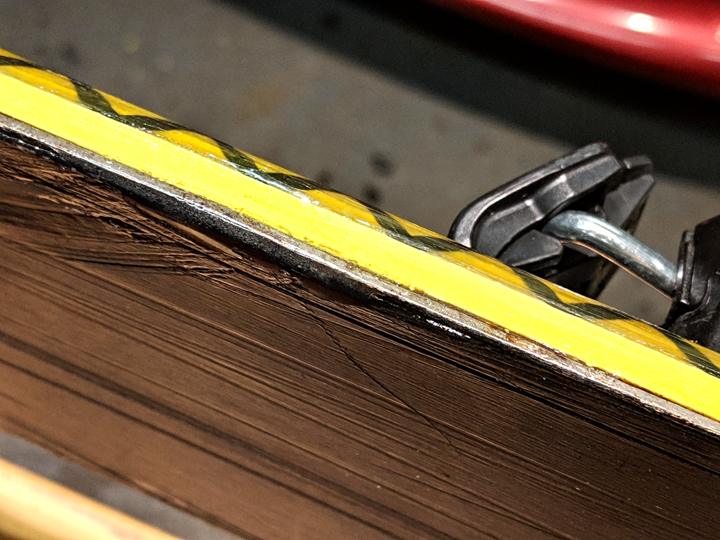
Unfortunately someone had already tried to fill the hole with repair P-tex which hadn’t quite cut the mustard but it makes future work that bit harder. Anyway, Sean was on a deadline and I hadn’t quoted for a serious repair involving cutting out the old P-tex and replacing it with new. So, time to hit & hope. Simply heating up the area to soften it up for additional P-tex is enough to melt the previous repair so you end up looking like you’re stirring a pot of soup as you try to make the new P-tex hot without melting the old.
Eventually with this sort of caper you give up because it becomes obvious that no-one could do a perfect job. This is as good as I could get it – better than before but not gorgeous:
Both sets of skis came up quite nicely in the end and here’s hoping there’s lots of lovely snow in Austria.
Dave has gratifyingly taken my advice and snapped up a pair of ex-rental skis for a song. They’re not pretty but he understands that there’s a gorgeous base hiding under all those scars and rust:
This is why you should repair gouged bases not just wax them and hope for the best – it takes ages to dig the wax out when you do actually want to repair them…
The skis were Head & Salomon, both of which had almost completely black bases (another Brownie point for Dave) so they were easy enough to plaster with new P-tex:
Patched up and awaiting scraping
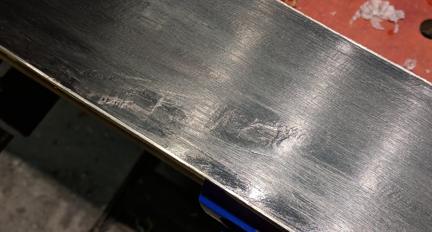
Once the excess P-tex is scraped off the bases were structured using the SkiVisions ruby stone then finished off with the base plane.
Pancake flat but not very shiny yet
The Heads leave the factory with base 1 degree edge 1 degree and as that is the most common “do ’em all the same” setting for rental planks they were fairly easy to tidy up. The Salmons on the other hand should be 1,2 so the frankly revolting edges had to be beaten back to specs.
Nasty in & out edge plus extra hard to shave placcy top sheet. Soon be sorted with hardly any swear words.
Having stopped advertising the Cave due to other commitments, I’ve had lots of returning kit which means the edges are a breeze – done right once then just maintain them. So it’s a while since I’ve had to wrestle a pair of skis into submission, and you forget just how physical it is. If you ever need to do it yourself, the sequence is 1) shave sidewall 2) run your coarsest diamond file up and down the edge to try to get rid of any case-hardened burr 3) work the edge back to 2 degrees with the file guide & your coarse steel bastard file 4) stop to wipe the sweat from your brow and curse whichever dumpling buggered them up in the first place 5) get the edge to a decent state with the steel file, checking for burrs as resetting an edge will always give a mean burr 6) remove burr with coarse diamond file 7) use your diamond files & guide on the edge, fining up from 100 to 1600 grit (or whatever you’ve got) 8) check for burrs again 9) if OK polish side & base edges with gummi stone. Congrats – you’ve done one edge, only three more to go.
Next up is of course soak in a gallon of pink base renew wax, scrape & brass brush, then top off with green universal wax, scrape, brass brush then polish to a high shine with nylon/horsehair soft brush. Remember to remove the brake retainers…
Like new and a lot cheaper than buying new
Dave took advantage of the at-cost velcro separators that I got from the Piste Office last season and keep forgetting to mention to people (only three Scottish pounds per pair to you effendi), and he asked for some maintenance tips which I think I’ll make into a new blog post.
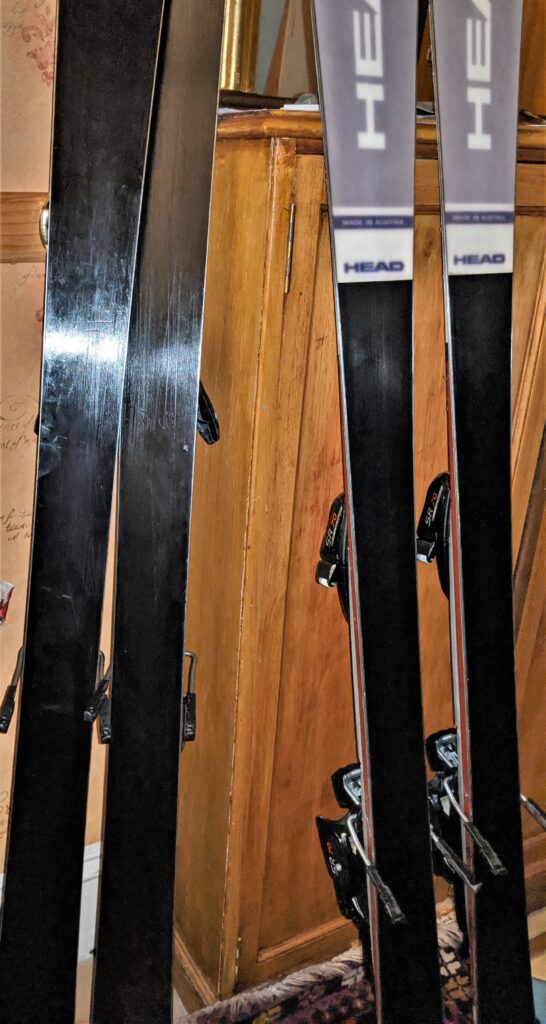
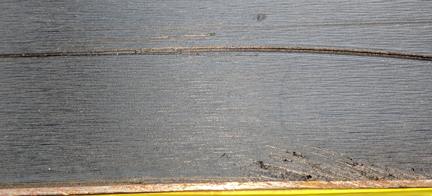
Michael won the race to be the first Eastern European client at the Cave. Sadly he didn’t hand over a set of Soviet-era sturdy planks for attention, but instead some decadent western Salomon X-frees. These date from around 2001 and the Salomon sales blurb from that time calls them “shaped” (they are about 3 mm narrower at the waist than the tips) and “all mountain”. Now I know people used to ride powder in the black & white days on toothpick-wide skis because I’ve seen some grainy super-8 footage, but still, with just 62 mm under your foot it doesn’t feel like you’ll be floating across the soft stuff. Just a year later Salomon were offering the CrossMax Carve which had a properly shaped body but frankly old duffers, myself included, just weren’t ready for skis that turned all by themselves. And after years of lusting after 220 cm arrows who could seriously be seen on fat 160’s?
Enough nostalgia, what sort of shape were the X-frees in? Well, there was plenty of filling to be done and the edges seemed to have escaped any attention at all over the years. But that’s no bad thing – better than having endured endless base grinds & wobbly handheld grinder edging efforts.
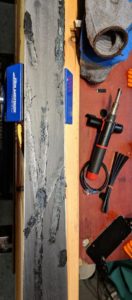
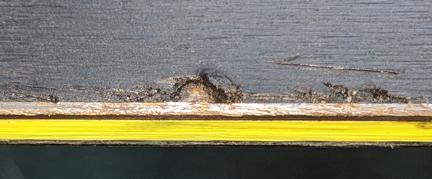
This was the worst gouge – easy enough to deal withPlenty of filling required. The MetalGrip is the black circle of wire under the base doc and the P-tex is the strips to the right
Once the bases were filled, scraped & restructured the edges were easy enough to sort out. The base edges were really scored but that’s to be expected if they had a hard life in a rental shop. The side edges were in reasonable shape and they came up nicely. The top sheet of the skis is made from some wacky metallic wrap that comes off like swarf when you plane the sidewalls but I guess it’s tough as the tops look like new.
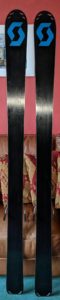
Finally here’s a picture of them in their full 185 cm glory. Further proof that you can bag a bargain by buying used and refurbishing back to good condition.
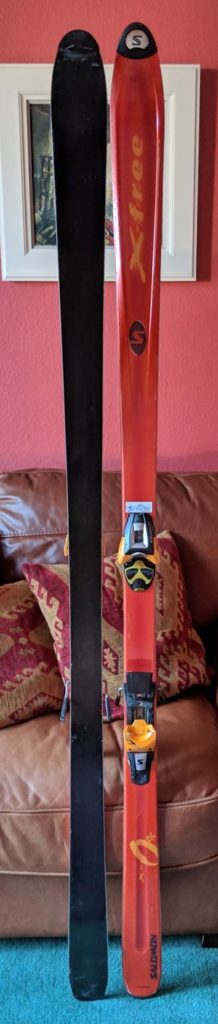
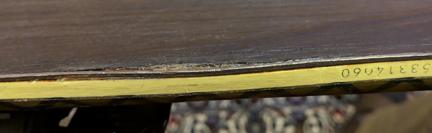
Regular readers of the blog, if such a class of person exists, will have seen these Wailers before. Colin likes an adventurous ski trip, which seems to involve putting some serious town miles on his planks. He’s also not frightened to pay a little extra for hand made carbon-rich skis.
So what does he get for his cash? Well, no fancy graphics – pale blue on top & proper all black on the base. The base is made of particularly tough P-tex which resists gouging (and resists repair, as we’ll see). The bases are perfectly flat, which is a challenge on such wide skis. The edges are narrow and tough but don’t seem to be prone to cracking like the stainless edges that were trendy for a few years – they also take a better edge than stainless. Edges are hand-sharpened at the factory (in the US as opposed to the People’s Republic) and very easy to tune again as the angles are true right from day 1. Finally the base doesn’t flex under the pull of the binding bolts – you see this very often on snowboards, hardly ever on thick & tough piste skis but quite often on touring skis due to the low height of the ski.
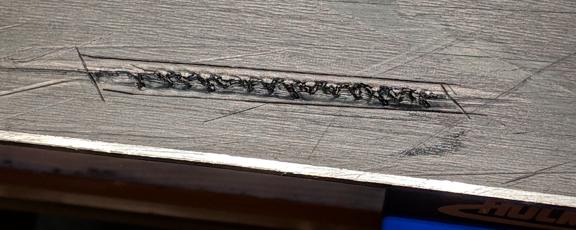
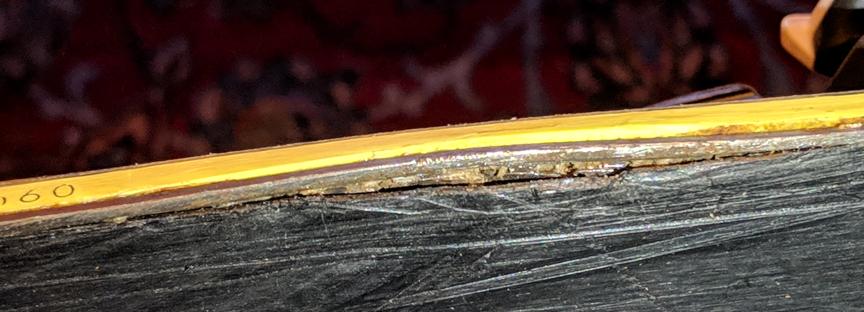
I’m always pleased to see gear back in the Cave for another service, as I can see how well the repairs have stood up and the edges are nice & easy to follow. All the existing repairs were in good shape but Colin had a wee present for me:
The corrugations are courtesy of a stone, the knife marks are mine
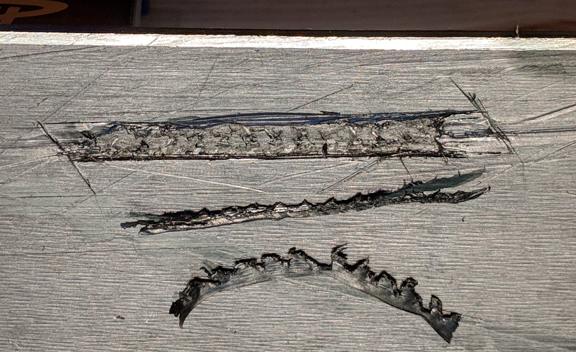
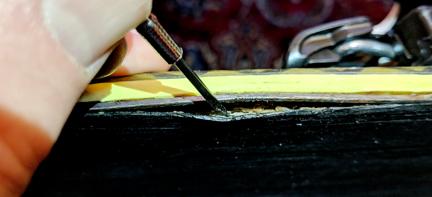
Normally a gouge this size needs to be cleaned out and new P-tex should be cut to shape and glued in. However, Colin was on a deadline, I don’t have any skinny P-tex on hand and anyway, once the corrugated bits were cut out the remaining wound had a very uneven base.
Who knows what DPS glue their bases with but my goodness it’s tough
At this point I should really have Dremelled the wound flat, Araldited in some P-tex and left it for 48 hours to cure. However the timetable didn’t really cater for waiting for the 0.8 mm P-tex sheet to arrive from the Junk Supply guys in Malmo (check them out, probably better not to do it from a work computer…).
So, the repair was completed with a base coat of Metal Grip, topped off with P-tex repair strips and although it’s not the ideal repair it will see out the next week jumping out of choppers in La Grave. Here is the repair once the skis are sorted & waxed:
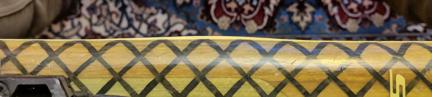
It is there, on the right hand side of the right hand ski
I couldn’t see it either so after some hunting and reference to the earlier photos here it is:
No sooner had I dropped off the newly repaired Scotts with Doug than I was picking up another set from his mate Dave. Dave’s skis are a year older and, remarkably, had sustained even more damage than Doug’s. It’s not often you see a bulge like this:
The destruction continues on the underside:
The edge started to come away after a bump and Doug decided he had nothing to lose by sticking some unnamed adhesive in there before heading off for another week’s skiing. It all seemed to hold together but it means an extra step for me as I have to pick all the gunk out of the wound.
Regular readers will know that there is only one path from here – clean out the gunk, straighten the edge as far as is possible, sloop some hot Araldite in and clamp that puppy good & tight for a couple of days.
Once the wraps were off it didn’t look too bad if I say so myself.
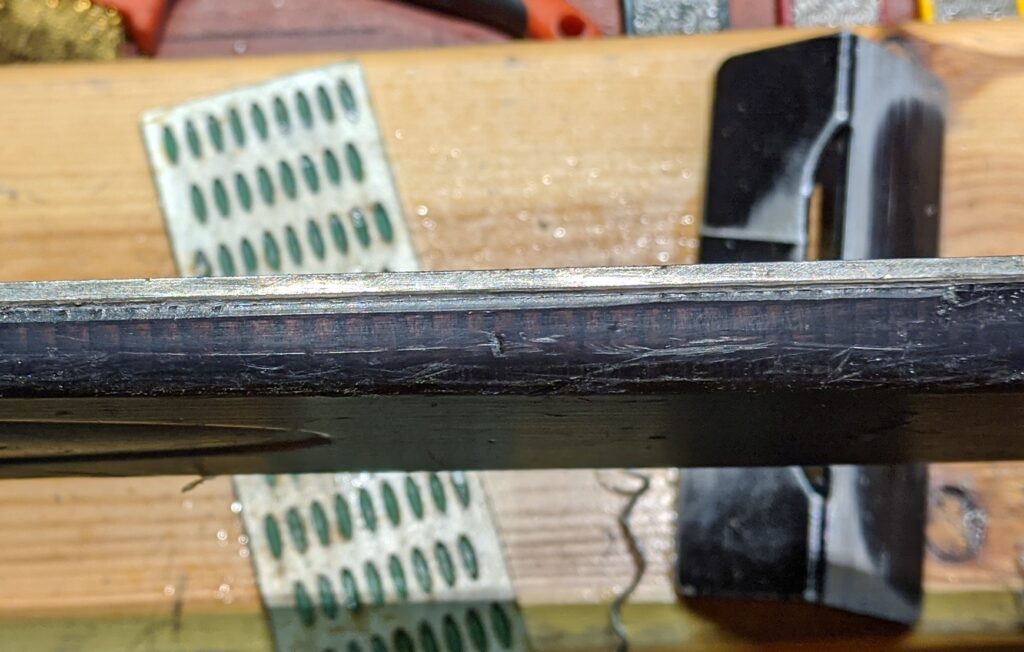
The edge is shiny with Araldite which will need to be cut off, but not bad – only a slight upward curve . The base was even better with a nice straight line and the topside bulge completely absent:
You can see from that snap that the base was pretty badly scraped up. Here’s another picture of the damage, before the edge was glued:
As I’ve pointed out before there’s next to no P-tex on these touring ski bases, so we need to weld in new material and scrape it down to size.
Just in case that doesn’t look like enough new P-tex here’s another one:
The photo above highlights a couple of things – mainly the shocking state of dave’s bases, but also my mantra about long linear scratches not really being a problem – they just become part of the structure. I’ll only fill them if they’re just a bit too deep to ignore. However the diagonal scrapes, and any hollows, will need to be filled as best we can.
So, after scraping off the excess P-tex, structuring the base, sorting the edges and waxing the skis here’s the original knackered edge:
You can still make out the scrape that led to the edge battering but it’s all pretty much where it needs to be and ready to go off and find some early season snow. Here’s another shot, this time with Fraser’s much less problematical K2s:
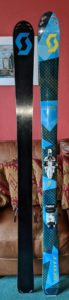
I don’t get many Scott skis through the Cave and the ones that have been in have tended to be stiff & weighty piste skis. So it was interesting to see Doug’s Superguide tourers:
The skis are very lightweight and boast wood, carbon fibre & aramid (presumably kevlar) in their construction. Like a lot of touring skis they have skinny P-tex on the base – somewhere between 0.8 & 1.0 mm, instead of the 1.2 or even 1.8 mm on sturdier equipment. They also have thin edges, which might be stainless – the Scott website has dumbed everything down so no help there. Stainless edges are the very devil to sharpen, they are much more prone to breaking than normal carbon steel and they can get quite discoloured even if they don’t actually rust. I’m not a fan.
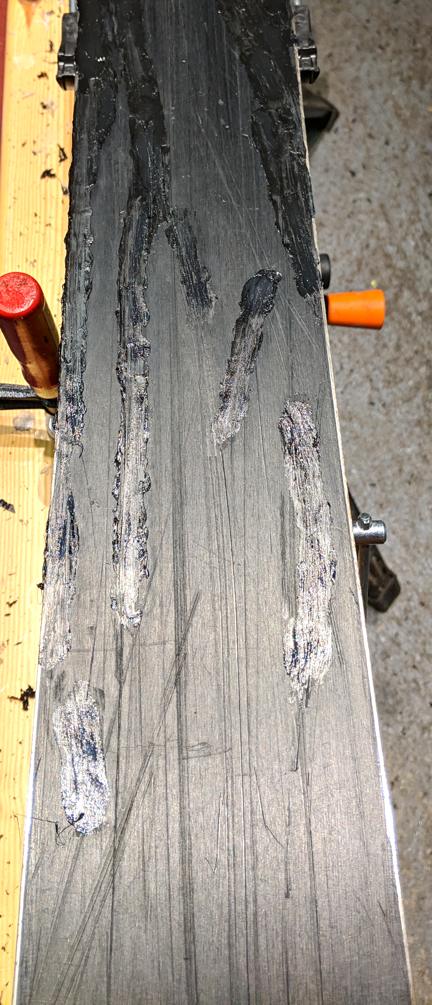
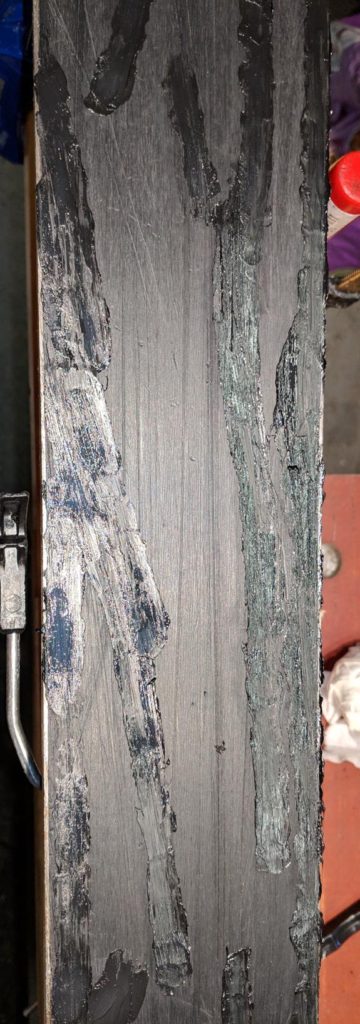
Anyway the skis had a few little issues with rather a lot of stone damage.
There was a baby core shot:
An edge break:
A fracture in the lacquer on the topside:
And finally a bent upwards edge. The base was also a bit warped from all the rockhopping. This is one of the weak points of these very light skis.
So the starting point here was to sort the edges first. The bent edge pictured above was bent back straight as far as possible with a hammer & chisel without delaminating the entire ski. This is not work for the faint-hearted. You get to the point where it’s definitely better but you don’t want to push your luck by trying for completely straight. The broken edge was relatively simple but there was no real gap between either the two broken pieces or between the edge and the rest of the base/sidewall. That’s a problem as the glue needs somewhere to go if it is to bond the various bits together. So out with a mounted needle to dig out some space around the break, heat up the Araldite and apply to both damaged areas (different sides of the same ski). 48 hours later it’s time to repair the gouges and see if we can do something about the ripple that the big impact has left behind:
I’ve forced the exposure to highlight the black P-tex against the black base. The gouges ranged from narrow & deep, easy to fill & scrape, through broad & shallow, hard to sort, to a long slow wave which proved very hard to do anything constructive with. If these were piste skis we could possibly have flattened the entire ski to take out the wave but there’s so little base and edge anyway that we don’t have anything to play with. Here’s the base with the wave half-filled after the first phase of filling:
The broken edge seemed to have taken pretty well to the glue and it filed down to a nice smooth line:
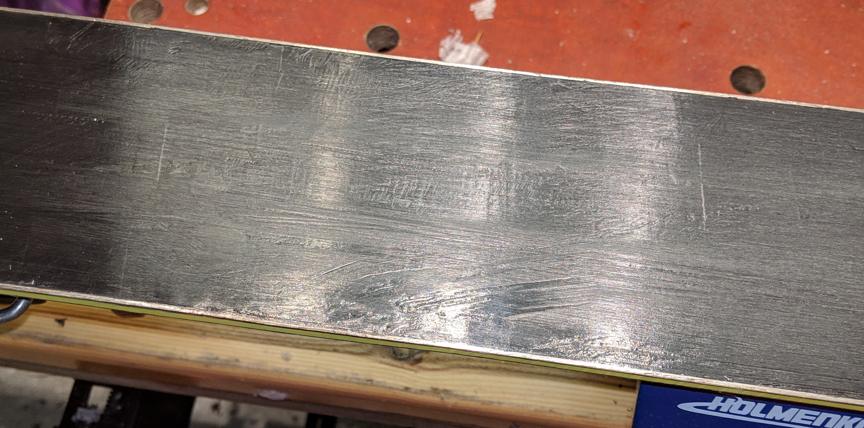
Once the bases were scraped and structured and edges were sorted – and we’re not talking a five minute job with stainless edges as they seem to delight in developing nasty burrs which are extremely hard to file out – it was time to sploosh on the pink Zoom base renew wax, scrape and then get the green universal wax on top. The bent edge and associated wave were never going to be perfect but I’m not unhappy with the result. Good enough to ski on and cheaper than a new set of Superguides.
This website uses cookies to improve your experience. We'll assume you're ok with this, but you can opt-out if you wish. Cookie settingsACCEPT
Privacy & Cookies Policy
Privacy Overview
This website uses cookies to improve your experience while you navigate through the website. Out of these cookies, the cookies that are categorized as necessary are stored on your browser as they are essential for the working of basic functionalities of the website. We also use third-party cookies that help us analyze and understand how you use this website. These cookies will be stored in your browser only with your consent. You also have the option to opt-out of these cookies. But opting out of some of these cookies may have an effect on your browsing experience.
Necessary cookies are absolutely essential for the website to function properly. This category only includes cookies that ensures basic functionalities and security features of the website. These cookies do not store any personal information.
Any cookies that may not be particularly necessary for the website to function and is used specifically to collect user personal data via analytics, ads, other embedded contents are termed as non-necessary cookies. It is mandatory to procure user consent prior to running these cookies on your website.