Colin again

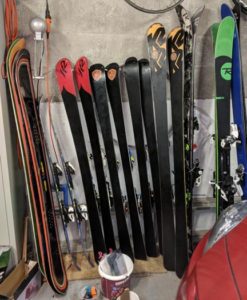
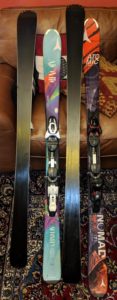
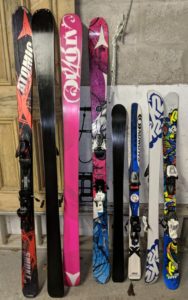
Colin was my first customer and has probably been the most loyal with various sets of skis coming through the shop and plenty of recommendations to his mates.

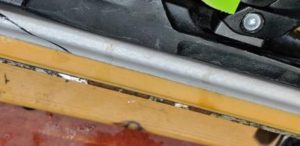
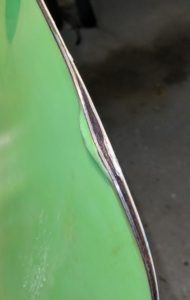
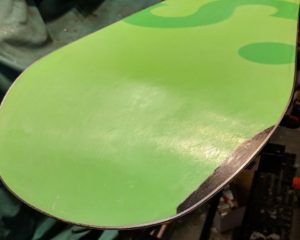
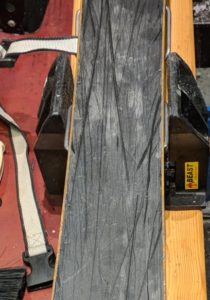
One thing I really like about Colin is that fact that, despite spending the sort of money on skis and bindings that could buy you a flat in Torry, he’s not frightened to ski the nuts off his kit. Naturally that leads to a few minor dings:

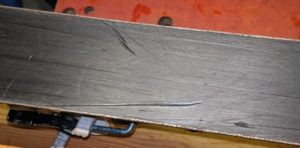
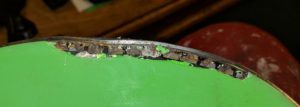
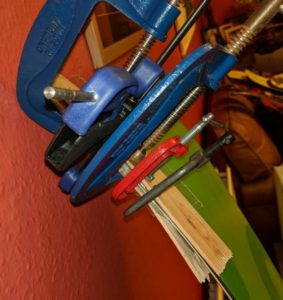
But fear not, DPS know a thing or two about skis and use rufty-tutfy P-tex, probably 7200 or higher, if it exists. So while that means the repair P-tex takes a while to weld in, it also means it’s staying there for good. You just need to remember that there isn’t really anywhere for excess heat to go on these super lightweight carbon fibre skis so be vigilant.

Heavy P-tex repairs 

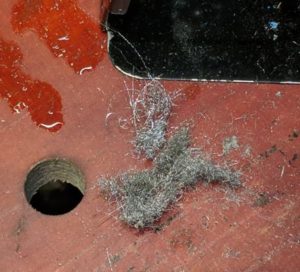
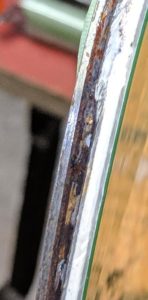
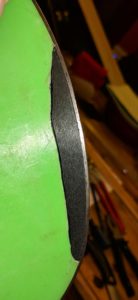
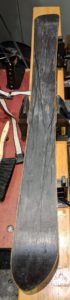
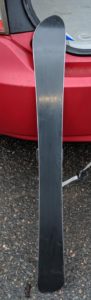
DPS are the only people I know who hand-tune skis at the factory, which makes tuning them an absolute breeze. Like most manufacturers they’ve parted company with stainless edges, so even if the edges are worse for wear you can get them back in shape fairly easily without wearing out all your files. They even cut back the sidewall polythene above the steel edges so that your overworked local tech doesn’t need to do it himself.

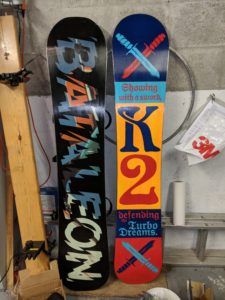
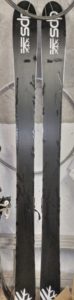
It goes without saying that the bases are perfectly flat and, despite the very thin skis there’s no “pull through” of binding  screws. Unlike half the snowboards I see that have “wax wells” under the bindings…

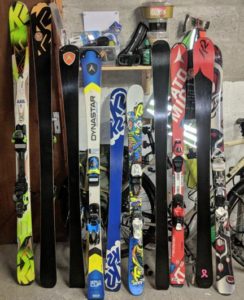
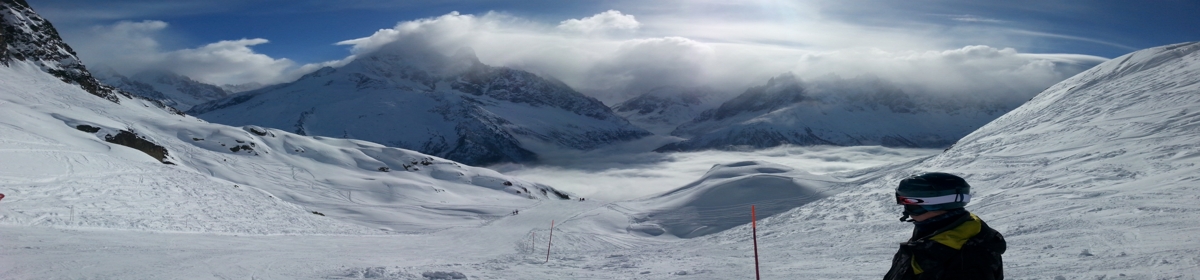
So it’s the same old story – you can have as much fun on your Decathlon skis as Colin has on his DPSs – they’re only a bit heavier, and a bit softer, and a bit more flexi – but you won’t have the feeling of innate superiority as you pile out of the chopper into the unknown…

Neil’s stable of skis

Spurred on by Ally’s recent shop full of skis, Neil thought he’d go one better and bring in five pairs for attention. And attention is what they sorely needed – have a look at this typical gouge:


Or this rusty edge (blending into the wooden plank for the vice so it looks a bit odd):


At the risk of sounding like I’m giving a lecture, please try to dry off your gear after a day out. You can see in the snap above the water staining from the binding sneaking down to the edge – this is where the water was hiding when Neil left the skis to stew in his roofbox. Even without getting the entire edge back to bright metal, see how much steel had to come off a single edge:

You’ve paid for all that metal and it won’t last forever, so please try to get busy with the tissues once you leave the slopes. I know all your mates with their rental gear just dump it and head to the bar but sometimes you have to suffer a little for the gear you love – just ask anyone who’s had a classic car.


One wee point to make if you find yourself surrounded by budding skiers and are tempted to buy everyone their own planks – you might want to consider getting skis with the same base & edge bevels. Neil’s planning to return for a lesson and he’ll be finding out then that the Dynastars are 1,1 the K2s 1,2 and the Atomics 1,3 so he’ll be buying three edge guides to keep on top of everything. Don’t bother buying a variable edging tool – they fill up with swarf from the bastard file and water from the diamond files and you can probably guess what happens after that. Get the edge guides the pros use – simple aluminium ones.

Here is the line up after the base wax has been scraped, patiently waiting with the rest of the backlog for their top coat then the finished article ready for collection:

Martin’s Scottish Board and porridge for breakfast

Martin picked up his heavily scored K2 after it had received the fill, scrape, structure, edge & wax treatment – after on the left, before on the right…


Then when he picked up his “Scottish Board” he dropped off a rather nice Never Summer board for some TLC. More on that in another blog post sometime.
The other board in the after picture was caked in ?wax? when it was dropped off. Jon was so embarrassed by the white base and mysterious chemical coating that he told me he was dropping it off “for a friend”. Aye, right…

Anyway, once the base goo was scraped off it turned out that the edges had been tuned by hand at some point which made redoing the edges a pleasure rather than a trial, which goes to show you shouldn’t judge a board by its base.

Neil’s Atomics

Neil presented a couple of pairs of Atomics for a pre-holiday short back & sides. In sharp contrast to Ally’s  shop-serviced Atomics in an earlier post, Neil’s almost identical skis had never seen the belt of death and two pairs of skis were cleaned, edged & waxed in the blink of an eye, ready to be picked up 24 hours after being dropped off.

Ally’s full house

Alasdair has done the sums and realised that paying someone to service a house full of skis only makes sense if you’re a Russian oligarch. So he called up looking for a lesson.

Full house, of skis, dewaxing

Sadly he came up against the new ManCave hard line on lessons – you have to have the skis tuned by me first before turning up for a lesson. There’s a good reason for this – if you’ve had skis machine serviced and the edges are all over the place & case hardened too then chances are the lesson involves watching me wrestling and swearing for thirty minutes before you get to do anything.

So in some ways it was a relief to find that Ally’s Atomics complied pretty well with the usual horror story. Regular readers will know that all Atomics leave the factory with 1 degree base bevels & 3 degree side bevels, sharp to the tips. Readers may also have spotted that production line servicing outlets tend not to change their angles between skis, so there’s a tendency for all the skis to come out the same. Ally reckoned that he’s had the skis seen to twice, in different resorts. One edge had a nice break of slope, indicating that the first “service” had taken the side edge down from 3 degrees to 2 degrees. At least that guy had finished the job – the following effort had tried to give the edge a one degree bevel, but gave up before the whole edge was finished. It was obvious before even starting as the rust looked different on the two faces and there was a clear line between the two.

So, that took a bit of sorting out. The other edge on the same ski had something very odd – the edge was more than 3 degrees. That means that the first pass with the file in a 3 degree guide only took metal off the part of the edge nearest the base. It’s so unusual that I spent 5 minutes checking that the file guide wasn’t bent or the file somehow sitting wrong. Definitely the edge and not me, so more wrestling and swearing to bring it back to three degrees. The other ski was similarly out of spec and the edges well hardened. I didn’t mention earlier that the skis also had the common Atomic issue of concave bases, so I spent some time flattening , filling & structuring the bases before getting onto the edges. So the single pair of skis consumed a lot of time before they were even ready to be waxed.

The rest of the family planks were less abused and didn’t take too long to get back to manufacturer’s specs, then two coats of wax for everyone and polish to a high shine. Here they are waiting to be picked up:

So the point I started to make at the top of the blog is that it’s better to learn ski servicing on sorted skis than it is to watch me beat them into submission for an hour. Ally just needs to ski the wax off these for a week or two then he can come back and be inducted into the dark arts of the ski tech in a sensible amount of time, then he can start saving a (small) fortune on tuning costs, with the added satisfaction of knowing he’ll have the same bevels on both edges of his skis…

Jack’s tourers

Jack dropped off two pairs of skis for a quick once over. If only all my clients had his taste in equipment – the beautiful Rossi Soul7’s and a pair of K2s too. I can forgive him the white bases as the skis are both light, flat, not wavey, with unhardened edges that are a doddle to sharpen.

I’m not entirely sure how a student can afford this lovely kit but he was able to take advantage of the 20% student discount to keep some beer money for his trip to Andorra.

Eddie’s wee bump

As well as lowering the tone of the Cave with his Scallywag (2nd right here) Eddie handed over a wee challenge in the shape of his Yes Basic.


Move along folks, nothing to see here – apart from a serious delamination and an edge bent in two dimensions. Not very pretty inside the gaping hole either – hard to say exactly what’s going on.

Let’s peel back the P-tex to have a better look:

So it’s not pretty but it’s probably saveable with a bit of TLC and the healing powers of Araldite.

First we scrub the wound with a wire brush to clean it up, then careful application of torque through pliers to straighten up the bent edge. Then undercut the edges of the P-tex base so that the patch is held in place.

Normally on the flat of the base you use a neat template to cut a perfect semicircle out of the base P-tex then use the same template to cut the new patch. However, life is obviously never as simple as the advert so we need to be a bit more creative here as the damage is on the scoop so it’s in 2 dimensions. So let’s do a bit of brass rubbing:

Once you have the shape on the paper you simply clamp the paper template to the P-tex sheet and use scissors to cut the patch to size. The patch here is held in place by itself, just rather satisfyingly clicked in place:

Once the patch is the right size, it’s a simple matter to mix up some Araldite, heat it up with a hairdryer and apply it to the base & patch. I would love to show some pictures of this process but if you’ve ever chased a pint of hyper-fluid glue around your living room, trying to avoid spilling it on the furniture and carpets, you’ll know that taking photos is the last thing on your mind. Here it is with the usual arrangement of plastic sheet to prevent sticking, thin wooden sheets to spread the force and a few clamps done up nice & tight:


Just leave it like this, perched over your hottest radiator, for 48 hours and hey presto – relaminated. Here it is restructured and with the base renew wax on but not yet scraped –


– and here is the board with top wax scraped & brushed, ready to go. All in all a nice wee repair and could only have been improved with some lime-green P-tex instead of boring old black.

Four boards

The early season rush included a number of boards, each with their own tale to tell.

Hogging the sofa

The Burton Custom on the left had been tuned by someone in the past who had changed the bevels from the Burton standard 1 degree base/1 edge to 1.5 degrees base & edge. In itself that’s not the end of the world, and indeed Capita and some other boards come from the factory like that, but it’s a drag to try to copy as no-one makes 1 .5 degree file guides for side edges. So now it is 1.5/2 instead. Jonathan had asked for a base grind but we like to preserve client kit if we can so it got substantial P-tex repairs and a restructure instead. By all means get a base grind if your base edges are really knackered, or you want to reset them to some new angle, but remember that P-tex varies from 1.2mm down to 0.6mm thick when new so there just isn’t much to play with. Techs are always happy to grind as it reduces the amount of filling they have to do but remember that you’re shaving life off your pride & joy.

Les’s RIDE looked innocent enough but someone had fitted tungsten carbide edges at some point. Seriously, I need my files to last for more than one board. Once the base edges were in some sort of order the side edges had another joker to play – not only were they brutally hard to file but they were set at zero degrees. That makes the edge profile 91 degrees – I’ve never seen a profile greater than 90 degrees. It’s easy enough to do if the factory simply forgets to bevel the side edges before firing the boards out of the door, but really? Anyway the edges are now set at 1/1 and I have ordered more files from the shop.

Eddie’s Scallywag exhibits the worst excess of snowboard design – the dreaded white base. It really is the mullet of snowboard bases – never acceptable in any social situation. They get dirty, go orange if your edges rust, never look good when scratches are repaired and you can’t see what you’re doing when you try to wax them. However I soldiered on and got the base into some sort of shape after a base plane, fill, structure, edge & wax.

Finally Ben’s Burton Custom – just a few gouges to fill, 1/1 edges as Burton intended and no machine hardening – a pleasure to work on. Which makes me feel even more guilty for finishing it well after the date I had promised – sorry Ben.

Spyder Jon*

Jon emailed to say his skis just needed “a quick edge & wax”. For a moment I was nearly taken in, but once I got them into the Cave and under some decent light the full horror became apparent. I’ll skip over the concave Salomons & not too bad Völkls and head straight to the Fischer Spyder blades.

Blades used to be very popular in the late 80s & 90s and I have to say that they looked like a lot of fun as people shot past on tiny planks unencumbered by poles. Great for skating if you find yourself in a resort with too much flat between pistes, and you could just about pop them in a rucsac and cycle up to Glenshee as they’re only about 80cm long and nice & light. I suppose the funny bindings and bondage straps maybe put people off. Maybe it’s the folk memory of the days when you weren’t cool if your skis were less than 2 metres 20 long.

Anyway here’s a snap of the “just needing an edge & wax” base:


Let’s just zoom in a little…

Ploughed field & orange edges – nice


If Jon did cycle up to Glenshee it’s starting to look like he towed a mate up behind him on his blades. So it’s time to plane bases, fill any remaining extra deep gouges, reset base edges, sort side bevels, soak in about a gallon of Zoom base renew pink wax then top them off with Zoom universal.

Here they are ready to be shown off in public:

Flat & shiny


*Ski tech in joke – Jon Coster of the Piste Office https://www.thepisteoffice.com/ used to use the name “Spyder Jon” on Snowheads. Sorry. I’ll get my coat…


Struan’s kit

Struan stretched the pick up radius slightly as he resides in sunny Inverurie but it was a pleasure to give his equipment the seeing to it deserved. Not many pictures taken due to the backlog but here are the Bataleon and K2 ready to be delivered back into darkest Aberdeenshire: