Michael’s vintage Salomons

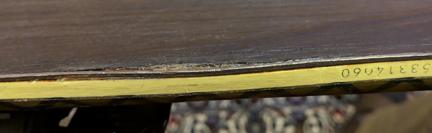
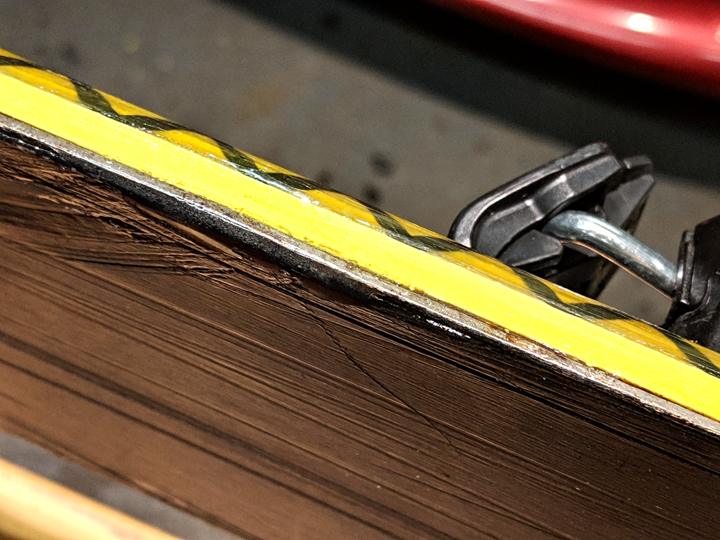
Michael won the race to be the first Eastern European client at the Cave. Sadly he didn’t hand over a set of Soviet-era sturdy planks for attention, but instead some decadent western Salomon X-frees. These date from around 2001 and the Salomon sales blurb from that time calls them “shaped” (they are about 3 mm narrower at the waist than the tips) and “all mountain”. Now I know people used to ride powder in the black & white days on toothpick-wide skis because I’ve seen some grainy super-8 footage, but still, with just 62 mm under your foot it doesn’t feel like you’ll be floating across the soft stuff. Just a year later Salomon were offering the CrossMax Carve which had a properly shaped body but frankly old duffers, myself included, just weren’t ready for skis that turned all by themselves. And after years of lusting after 220 cm arrows who could seriously be seen on fat 160’s?

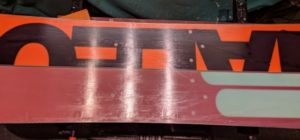
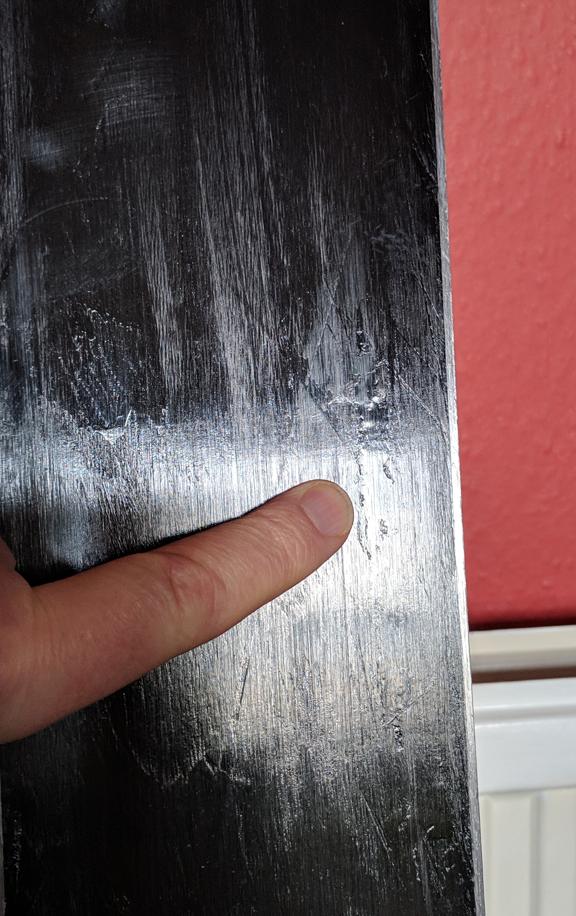
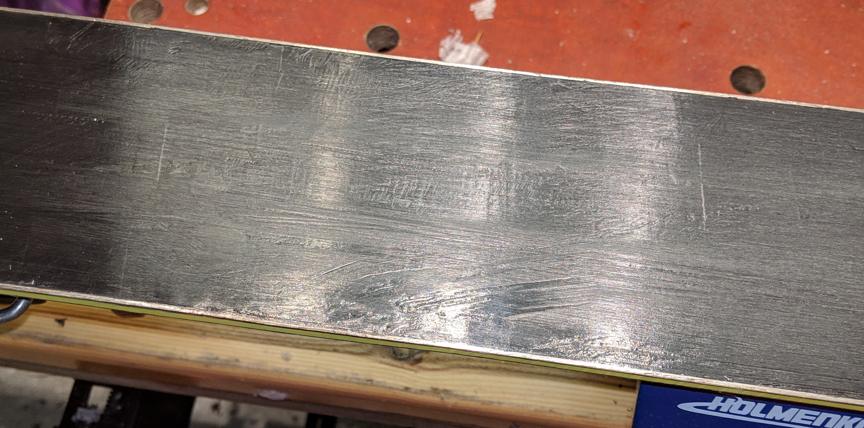
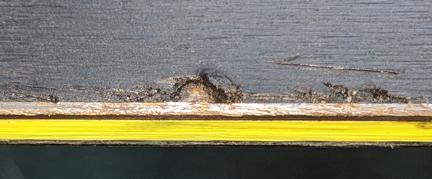
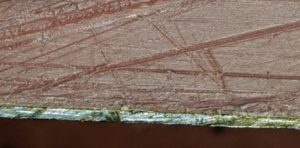
Enough nostalgia, what sort of shape were the X-frees in? Well, there was plenty of filling to be done and the edges seemed to have escaped any attention at all over the years. But that’s no bad thing – better than having endured endless base grinds & wobbly handheld grinder edging efforts.

This was the worst gouge – easy enough to deal with
Plenty of filling required. The MetalGrip is the black circle of wire under the base doc and the P-tex is the strips to the right

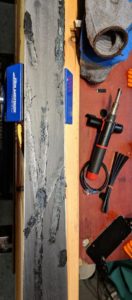
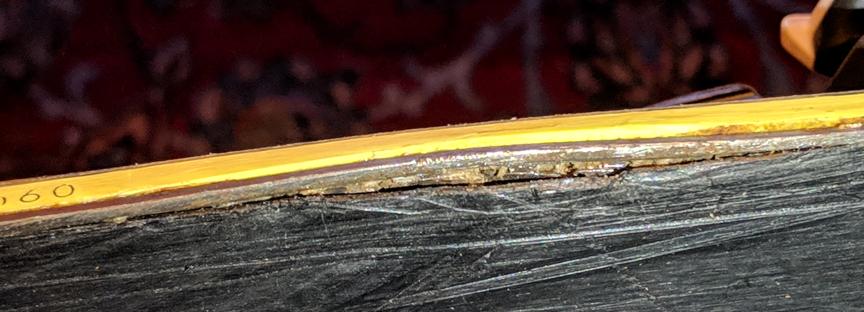
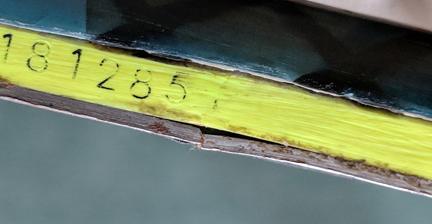
Once the bases were filled, scraped & restructured the edges were easy enough to sort out. The base edges were really scored but that’s to be expected if they had a hard life in a rental shop. The side edges were in reasonable shape and they came up nicely. The top sheet of the skis is made from some wacky metallic wrap that comes off like swarf when you plane the sidewalls but I guess it’s tough as the tops look like new.

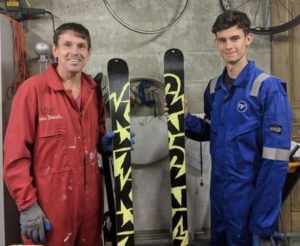
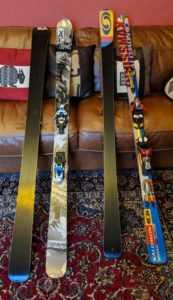
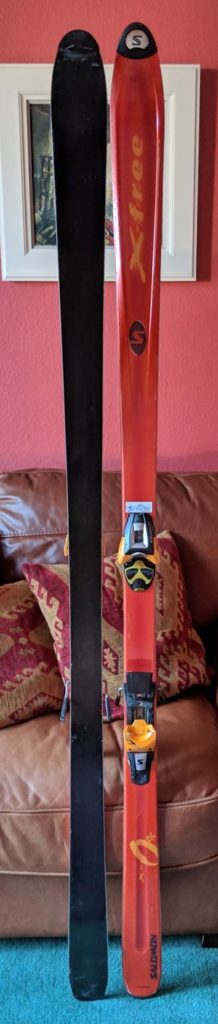
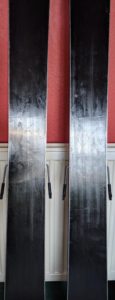
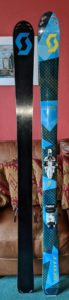
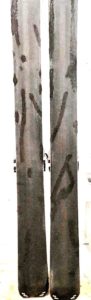
Finally here’s a picture of them in their full 185 cm glory. Further proof that you can bag a bargain by buying used and refurbishing back to good condition.

Colin’s DPS ding

Regular readers of the blog, if such a class of person exists, will have seen these Wailers before. Colin likes an adventurous ski trip, which seems to involve putting some serious town miles on his planks. He’s also not frightened to pay a little extra for hand made carbon-rich skis.

So what does he get for his cash? Well, no fancy graphics – pale blue on top & proper all black on the base. The base is made of particularly tough P-tex which resists gouging (and resists repair, as we’ll see). The bases are perfectly flat, which is a challenge on such wide skis. The edges are narrow and tough but don’t seem to be prone to cracking like the stainless edges that were trendy for a few years – they also take a better edge than stainless. Edges are hand-sharpened at the factory (in the US as opposed to the People’s Republic) and very easy to tune again as the angles are true right from day 1. Finally the base doesn’t flex under the pull of the binding bolts – you see this very often on snowboards, hardly ever on thick & tough piste skis but quite often on touring skis due to the low height of the ski.

I’m always pleased to see gear back in the Cave for another service, as I can see how well the repairs have stood up and the edges are nice & easy to follow. All the existing repairs were in good shape but Colin had a wee present for me:

The corrugations are courtesy of a stone, the knife marks are mine

Normally a gouge this size needs to be cleaned out and new P-tex should be cut to shape and glued in. However, Colin was on a deadline, I don’t have any skinny P-tex on hand and anyway, once the corrugated bits were cut out the remaining wound had a very uneven base.

Who knows what DPS glue their bases with but my goodness it’s tough

At this point I should really have Dremelled the wound flat, Araldited in some P-tex and left it for 48 hours to cure. However the timetable didn’t really cater for waiting for the 0.8 mm P-tex sheet to arrive from the Junk Supply guys in Malmo (check them out, probably better not to do it from a work computer…).

So, the repair was completed with a base coat of Metal Grip, topped off with P-tex repair strips and although it’s not the ideal repair it will see out the next week jumping out of choppers in La Grave. Here is the repair once the skis are sorted & waxed:

It is there, on the right hand side of the right hand ski

I couldn’t see it either so after some hunting and reference to the earlier photos here it is:

Thar she blows

Dave’s Superguides

No sooner had I dropped off the newly repaired Scotts with Doug than I was picking up another set from his mate Dave. Dave’s skis are a year older and, remarkably, had sustained even more damage than Doug’s. It’s not often you see a bulge like this:

The destruction continues on the underside:

The edge started to come away after a bump and Doug decided he had nothing to lose by sticking some unnamed adhesive in there before heading off for another week’s skiing. It all seemed to hold together but it means an extra step for me as I have to pick all the gunk out of the wound.

Regular readers will know that there is only one path from here – clean out the gunk, straighten the edge as far as is possible, sloop some hot Araldite in and clamp that puppy good & tight for a couple of days.

Once the wraps were off it didn’t look too bad if I say so myself.

The edge is shiny with Araldite which will need to be cut off, but not bad – only a slight upward curve . The base was even better with a nice straight line and the topside bulge completely absent:

You can see from that snap that the base was pretty badly scraped up. Here’s another picture of the damage, before the edge was glued:

As I’ve pointed out before there’s next to no P-tex on these touring ski bases, so we need to weld in new material and scrape it down to size.

Just in case that doesn’t look like enough new P-tex here’s another one:

The photo above highlights a couple of things – mainly the shocking state of dave’s bases, but also my mantra about long linear scratches not really being a problem – they just become part of the structure. I’ll only fill them if they’re just a bit too deep to ignore. However the diagonal scrapes, and any hollows, will need to be filled as best we can.

So, after scraping off the excess P-tex, structuring the base, sorting the edges and waxing the skis here’s the original knackered edge:

You can still make out the scrape that led to the edge battering but it’s all pretty much where it needs to be and ready to go off and find some early season snow. Here’s another shot, this time with Fraser’s much less problematical K2s:

Doug’s Superguides

I don’t get many Scott skis through the Cave and the ones that have been in have tended to be stiff & weighty piste skis. So it was interesting to see Doug’s Superguide tourers:

The skis are very lightweight and boast wood, carbon fibre & aramid (presumably kevlar) in their construction. Like a lot of touring skis they have skinny P-tex on the base – somewhere between 0.8 & 1.0 mm, instead of the 1.2 or even 1.8 mm on sturdier equipment. They also have thin edges, which might be stainless – the Scott website has dumbed everything down so no help there. Stainless edges are the very devil to sharpen, they are much more prone to breaking than normal carbon steel and they can get quite discoloured even if they don’t actually rust. I’m not a fan.

Anyway the skis had a few little issues with rather a lot of stone damage.

There was a baby core shot:

An edge break:

A fracture in the lacquer on the topside:

And finally a bent upwards edge. The base was also a bit warped from all the rockhopping. This is one of the weak points of these very light skis.

So the starting point here was to sort the edges first. The bent edge pictured above was bent back straight as far as possible with a hammer & chisel without delaminating the entire ski. This is not work for the faint-hearted. You get to the point where it’s definitely better but you don’t want to push your luck by trying for completely straight. The broken edge was relatively simple but there was no real gap between either the two broken pieces or between the edge and the rest of the base/sidewall. That’s a problem as the glue needs somewhere to go if it is to bond the various bits together. So out with a mounted needle to dig out some space around the break, heat up the Araldite and apply to both damaged areas (different sides of the same ski). 48 hours later it’s time to repair the gouges and see if we can do something about the ripple that the big impact has left behind:

I’ve forced the exposure to highlight the black P-tex against the black base.  The gouges ranged from narrow & deep, easy to fill & scrape, through broad & shallow, hard to sort, to a long slow wave which proved very hard to do anything constructive with. If these were piste skis we could possibly have flattened the entire ski to take out the wave but there’s so little base and edge anyway that we don’t have anything to play with. Here’s the base with the wave half-filled after the first phase of filling:

The broken edge seemed to have taken pretty well to the glue and it filed down to a nice smooth line:

Once the bases were scraped and structured and edges were sorted – and we’re not talking a five minute job with stainless edges as they seem to delight in developing nasty burrs which are extremely hard to file out – it was time to sploosh on the pink Zoom base renew wax, scrape and then get the green universal wax on top. The bent edge and associated wave were never going to be perfect but I’m not unhappy with the result. Good enough to ski on and cheaper than a new set of Superguides.

We three boards

It’s getting close to Xmas so a cheery festive heading. Martin dropped off a brand new Rossi and a used baby Burton while Stuart dropped off his big Burton for a quick edge & wax. Here they are before – note the brown rusty edges on the baby Burton:

And here they are after a good deal of rust removal. The Rossi had OK edges for a brand new board, pretty flat & even rather than the lumpy grinder marks some new kit has. Stuart’s board was in for the second time and was dealt with very quickly.

As the tops are quite attractive here they are too:

A Tale of Two Atomics

Having threatened to drop skis off for at least the last two seasons Roger finally walked the 20 metres from his house to the Cave to drop off his sons’ Atomics. His cunning plan is to use them himself so he brought a boot for setting up the bindings too.

As is so often the case they looked OK on a quick once over in the living room but the bright lights of the Cave often highlight defects that have been missed.

First the good news: even though they’re Atomics (a pair of newish Redsters and a pair of slightly more mature D2s) the bases were reasonably flat, so no need to plane them down as is so often the case with the Austrian planks.

However the D2s had a little secret: at some point one of the edges had split. 
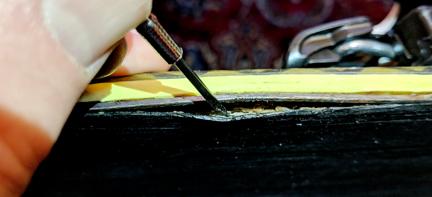
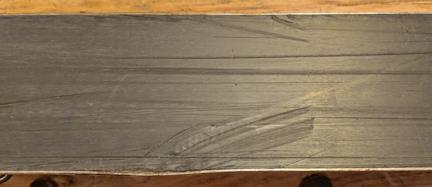
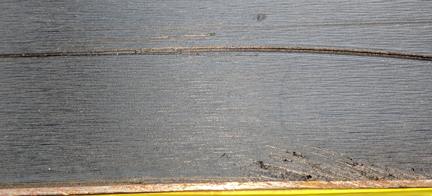
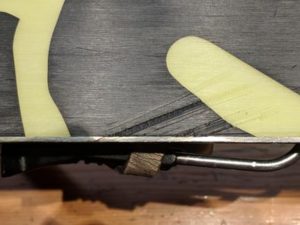
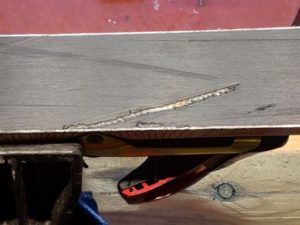
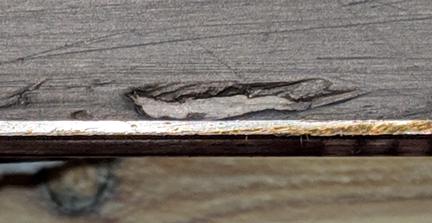
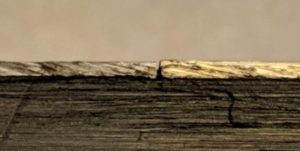
Hard to see any peripheral damage to explain what insult actually caused the split; usually there is a gouge or bulge from the rock but I can’t really see any smoking gun here. What you can see, for technical interest, is a little burr at the bottom of the side edge to the left of the crack. These are the very devil to photograph and it’s good to see I snapped this one by accident.

Anyway, regular readers will know the pragmatic response to this type of damage comes in three steps:

  1. Pour some warm Araldite into the crack and leave for 48 hours
  2. File to approved angles
  3. Mark the ski, in this case left, to make sure the crack will always be on an outside edge in future.

Here’s the repaired crack, all sorted and shiny:

So once the D2s were organised the Redsters had a wee tale of their own to tell. Not quite so impressive but they had endured a little bump at some point, and this time the stone had left a bit of base damage too. See the way the light only reflects off half of this little section of edge:

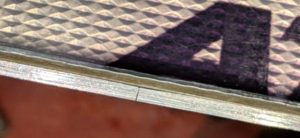
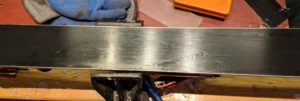
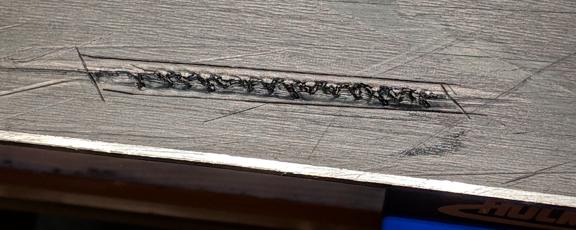
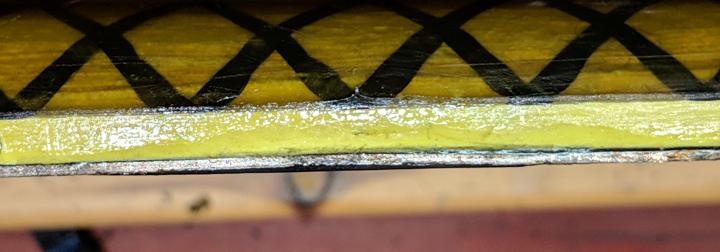
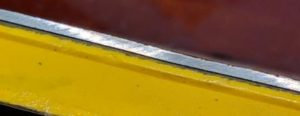
That’s because the light is reflecting of the left hand side of the ding. It’s not massive but again, once it’s been filed into submission we need to mark up this ski so that the ding stays on an outside edge from now on.

Once the bindings are set up for Roger’s snazzy boots they’re all ready for collection. John’s wavey Factions and Myles’s Armadas are in the shot too but they were soooo easy to fettle, having been through the Cave already, that there’s really nowt to say about them.


A Gnu or two

It’s December, the Cave is getting a bit parky so it must be time for snow bums & bunnies to dig out their rusty gear and get it sorted.

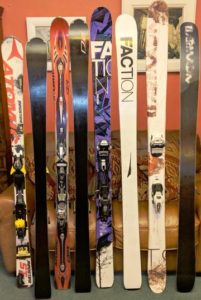
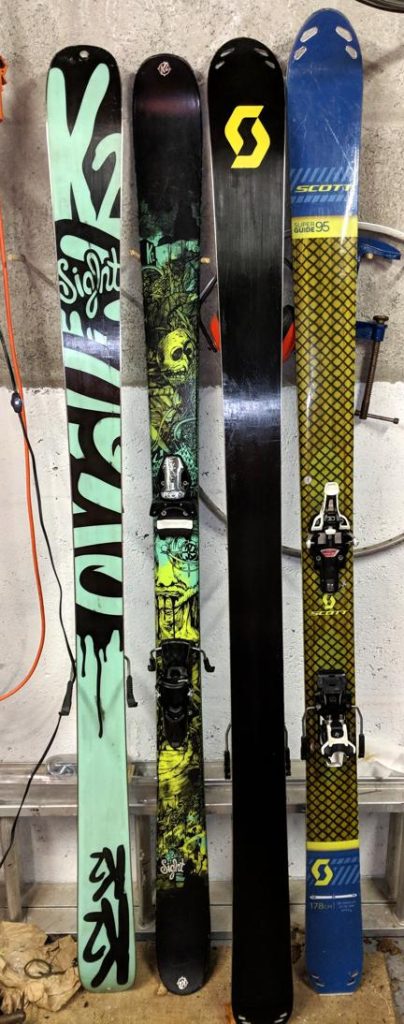
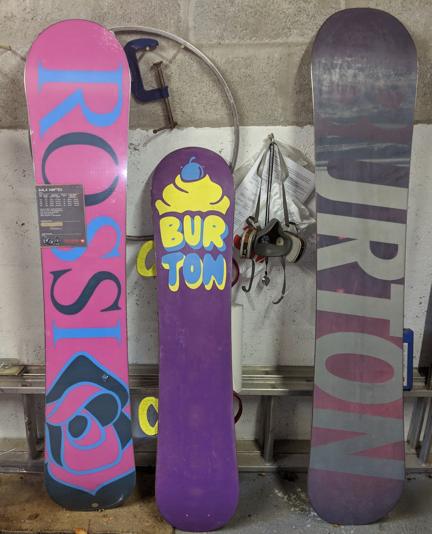
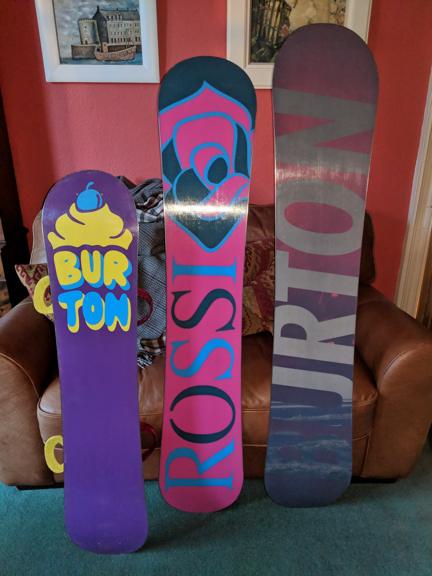
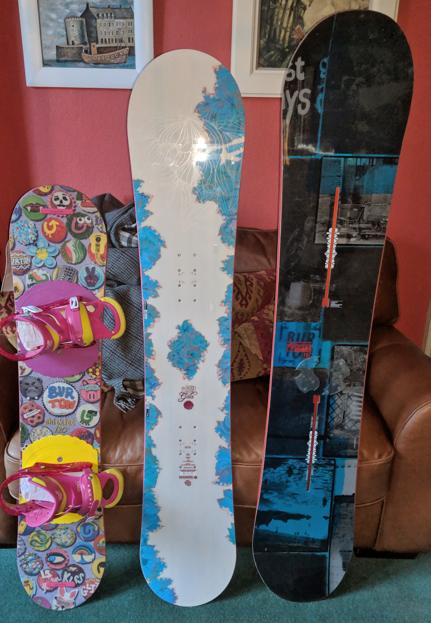
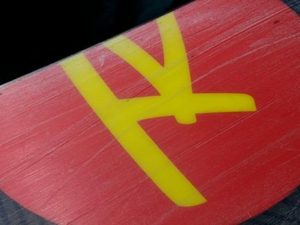
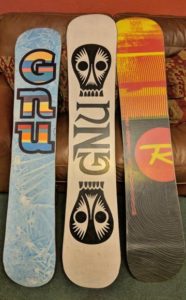
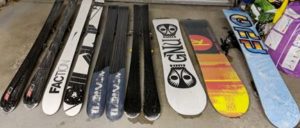
The annual multi-channel, multimedia, star-studded marketing blitz resulted in 4 sets of skis & 3 boards arriving to kick the season off. Here they are during the dullest part of any service – dewaxing/base cleaning.

Once they’re all clean the Rossi and white based Gnu needed some base repairs:

Neither of them was too bad but still needing some TLC. Once the bases were scraped and structured they drank immense amounts of base wax. In fact the white Gnu needed a third coat of wax to get to spec, something I’ve not had to deal with before – and I’ve worked with some pretty dried out bases. Both boards had pretty battered 
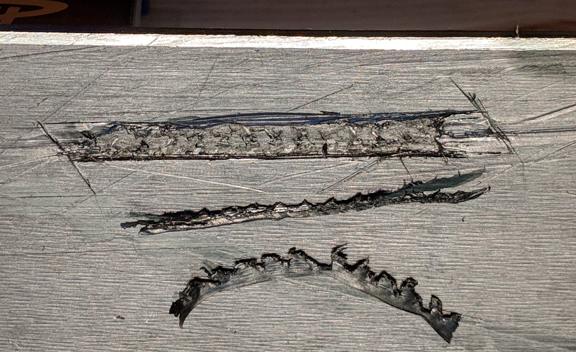
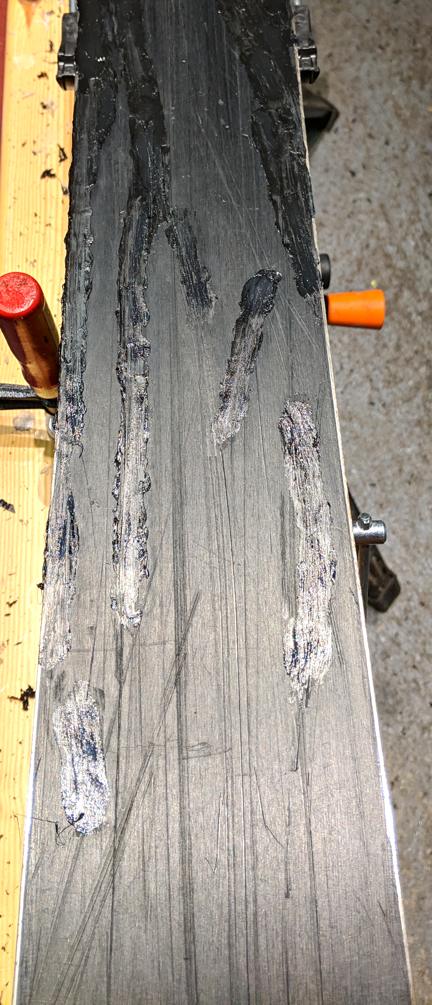
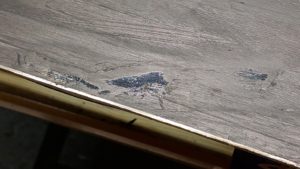
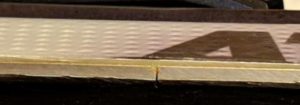
edges too but nothing terminal.


Eagle-eyed readers will recognise Susan’s blue Gnu. As it’s returning to the Cave for a freshen up it just needed a quick once over to get it back to perfect condition. Here they are all sorted and ready to be collected.


The Battle Weary Bataleon

Chris was too embarrassed to drop off his battered board in person so I picked it up from his mum’s place. There was lots of surface damage:

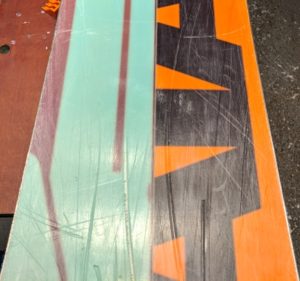
The gouge just left of centre has gone through the P-tex base, the underlying fibreglass and into the core of the board.


The other gouges are ugly but haven’t penetrated the fibreglass as this one shows:

The gouges tend to have raised edges so they need to be flattened and some of them opened up a little to give the repair P-tex something to stick to.


“What about the edges?” I hear you cry. Well not very nice either:

Quite a lot of quite deep scars which are too deep to be ground out entirely.


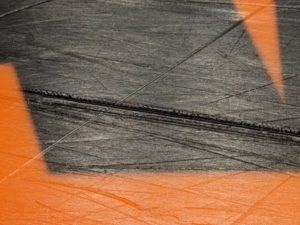
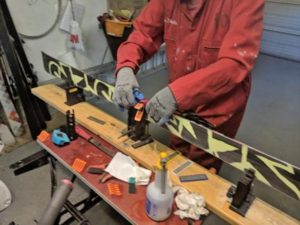
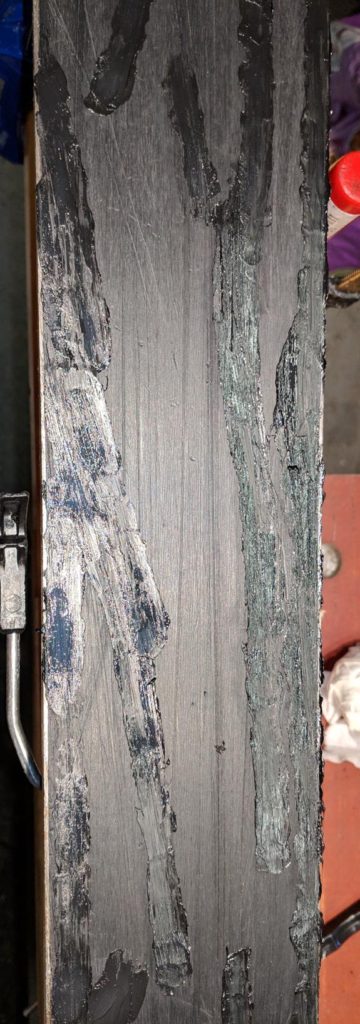
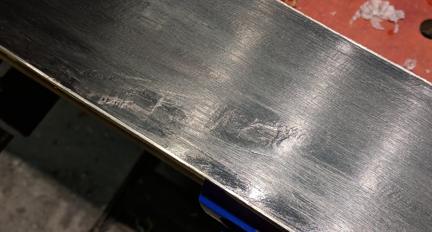
So once the anaesthetist & theatre nurses had been assembled we were ready to go to work. First off the broken ends of the fibreglass have to be cut and the edges of the big gouge smoothed off – both jobs for a sharp penknife. Although in theory the glass reinforces the resin, and therefore this piece of the board sandwich, the loss of integrity of a few broken fibres is neither here nor there so we can sweep along. One the cut is cleaned up it’s good practice to melt some metalgrip into the wound first as it is basically P-tex with a bit of glue and it should adhere better to the underlying layer. Once the metalgrip has had 15 mins to cure it’s time to melt the P-tex in over it – and the two thousand other gouges. Once that’s done the board is probably as ugly as it gets, covered in black & clear plastics:

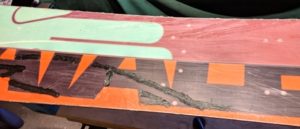
However the excess P-tex is easily scraped off and soon looks flat but dull. It’s time to structure the base using the Ski-Visions ruby stone for a clean cut, non-hairy base. Obviously the kooky Bataleon 3-D base with its wings & bulges means I can’t structure the base using the ergonomic tool but have to use a bit of broken ruby stone instead. Anyway the base is relatively soft and it’s not a long job. The structure blends the repairs in with the virgin base and gives the base wax something to bite on as well.

Regular readers will know that Bataleon leave their base edges with no bevel, assuming that the kicked up wings on the board do the job of keeping the base edges out of trouble. Which is great until you have to try to grind out some deep scars, and then you realise that there’s no such thing as a zero degree file guide. However, we can reach back into the distant past of Alpine tuning, don a beret, light up a Gauloise and before you can say “Bof!” you’ve wrapped a bit of tape around your mill file and made a 1950’s back street low angle file guide.

I’m not going to pretend that the base edges looked like new afterwards but they are at least out of the woods.

As you can imagine the base drank a gallon of the base renew wax. Once it was scraped the Zoom Universal on top polished up nicely and the board is ready for its next skirmish.


Peter’s lesson

Peter dropped off four sets of skis back in April with a view to getting a lesson at some point. Finally in early July the planets aligned and we were able to get to work on his K2s. Here are a couple of shots from the pre-lesson work:

Crossways scrape on the base – there were plenty of these

All the scrapes and gouges filled ready for scraping


By the time Peter and Kurtis arrived all the K2s needed was a quick edge & wax. There were two of them so they got a ski each to work on.

One good thing about working on skis in July is the natural light flooding into the cave, as well as no need for beanies or buffies. All very civilised.

Here’s Peter diamond filing an edge:


And here are the finished skis:

Colin’s Salomons

Colin took some time out of coordinating all of NE Scotland’s cycling activity to drop off his venerable Crossmaxes. They are the classic red white & blue jobbies and had me all teary with nostalgia for the days in the late 80s when all you would see at the Shee were crappy grey Rossi rental planks for the hoi polloi and the posh folks on their Crossmaxes.

Speaking of the Shee one of Colin’s skis had picked up a Glenshee Kiss:

It’s just as bad as it looks. In fact worse in the flesh as WordPress are a bit funny about uploading full fat photos.

Anyway down to the core and also right up to the edge means working in some metalgrip first then topping up to base level with P-Tex. It’s hard to get it absolutely perfect but it came out OK:

You can still see a shadow where the gouge was but it’s flat to the touch and after a few days’ skiing it will blend right in.

Finally a photo of Colin’s finished skis alongside Dave’s superlight Völkl tourers, waiting to be picked up: