Iain’s edges

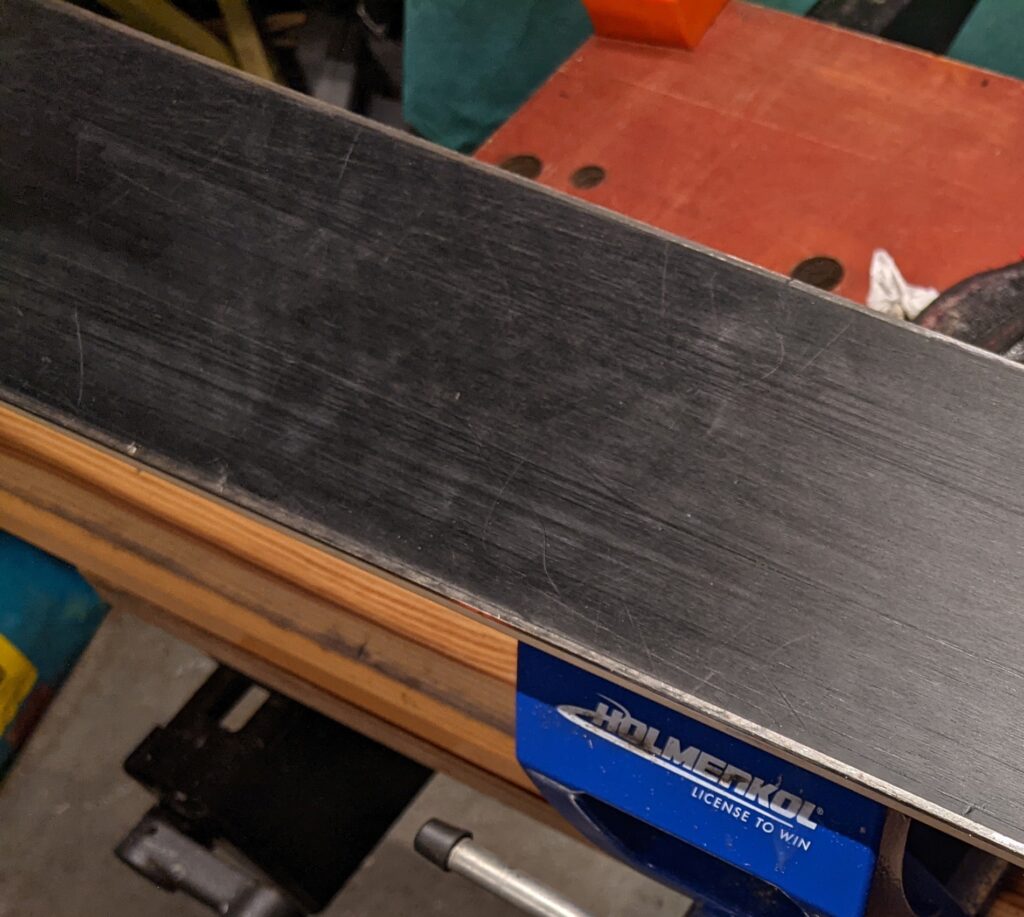
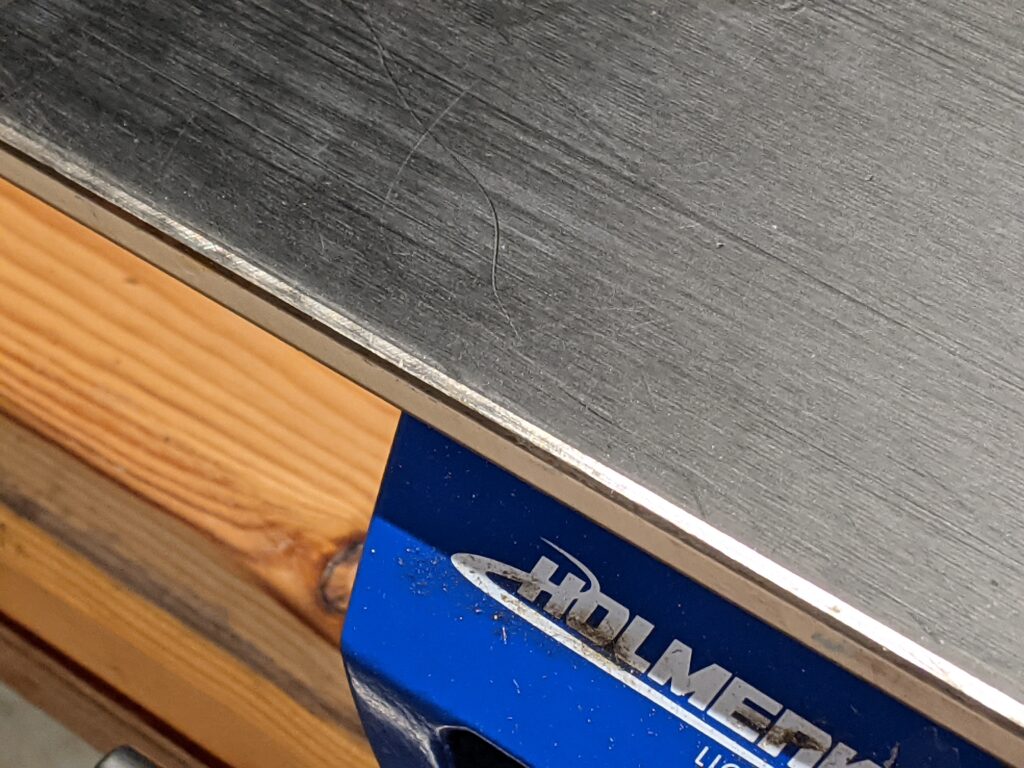
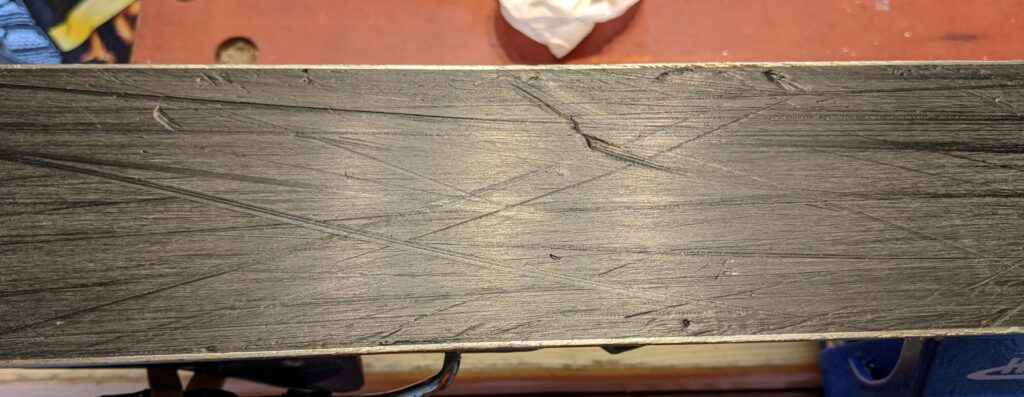
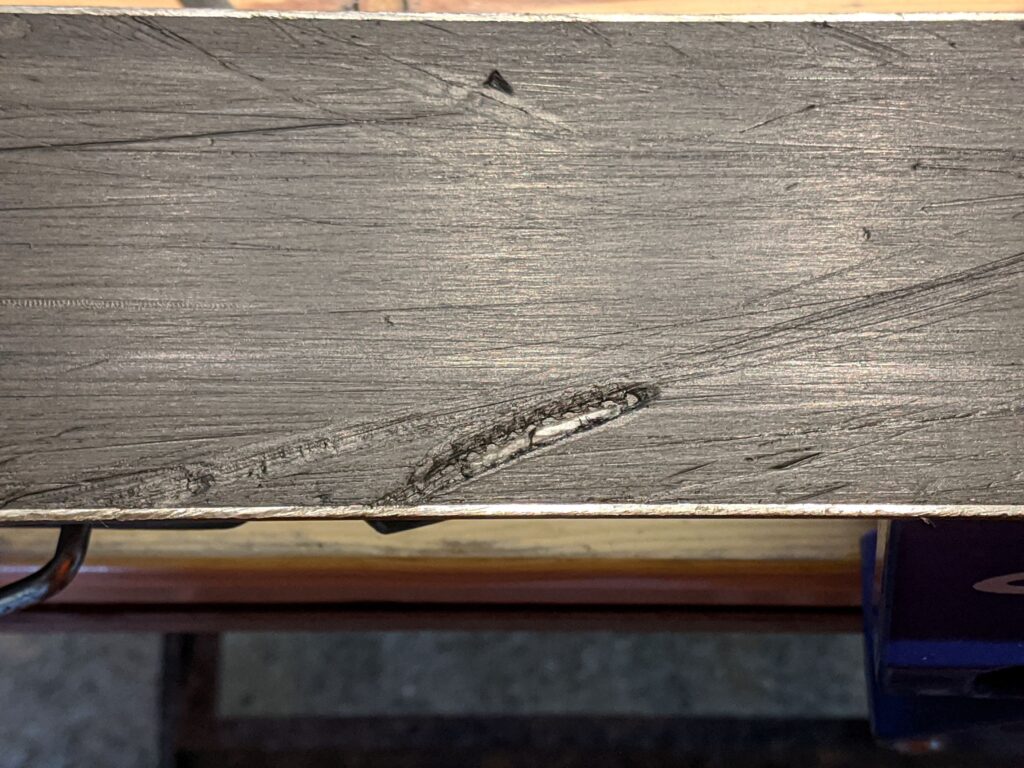
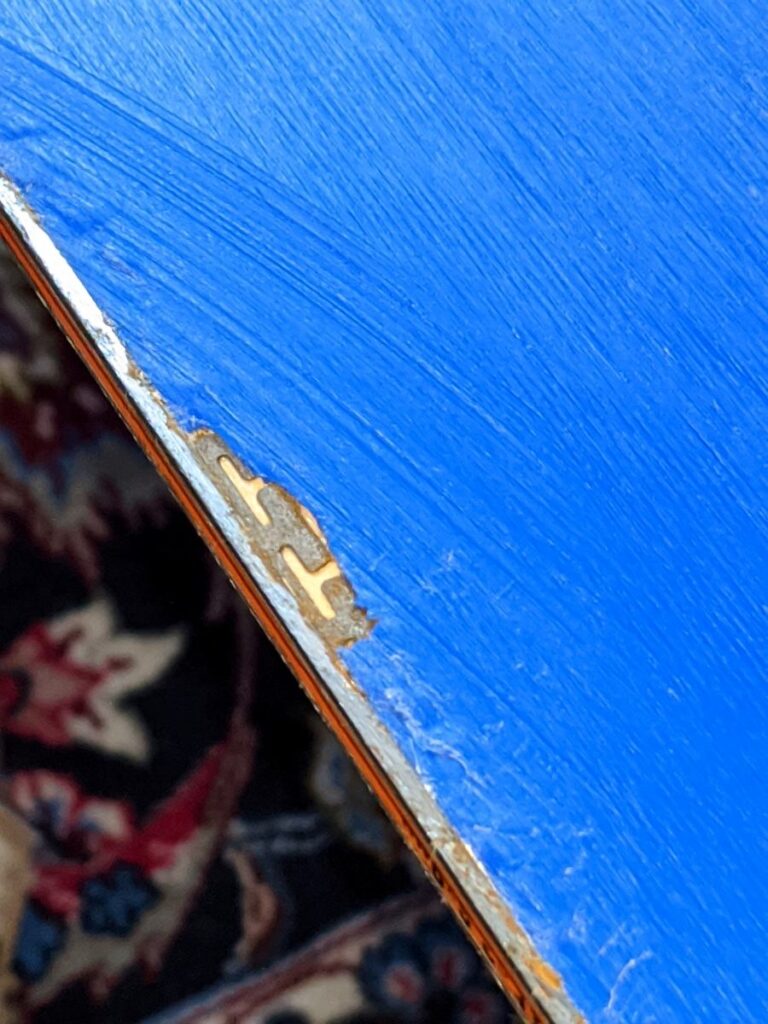
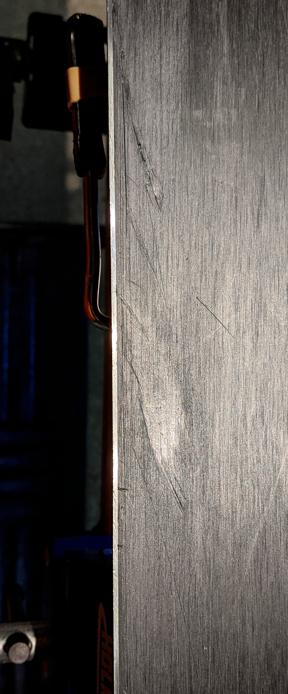
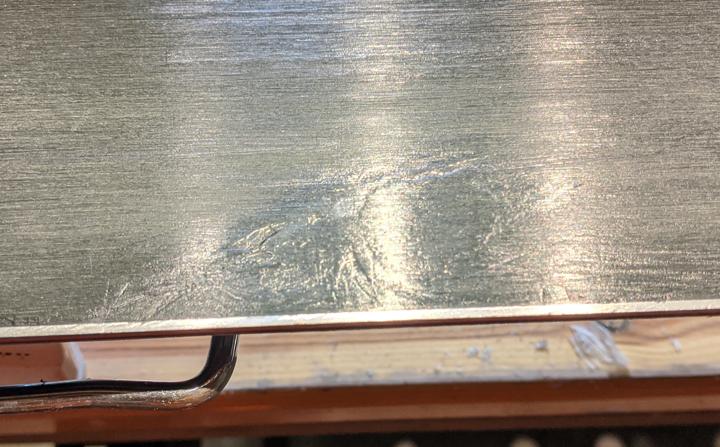
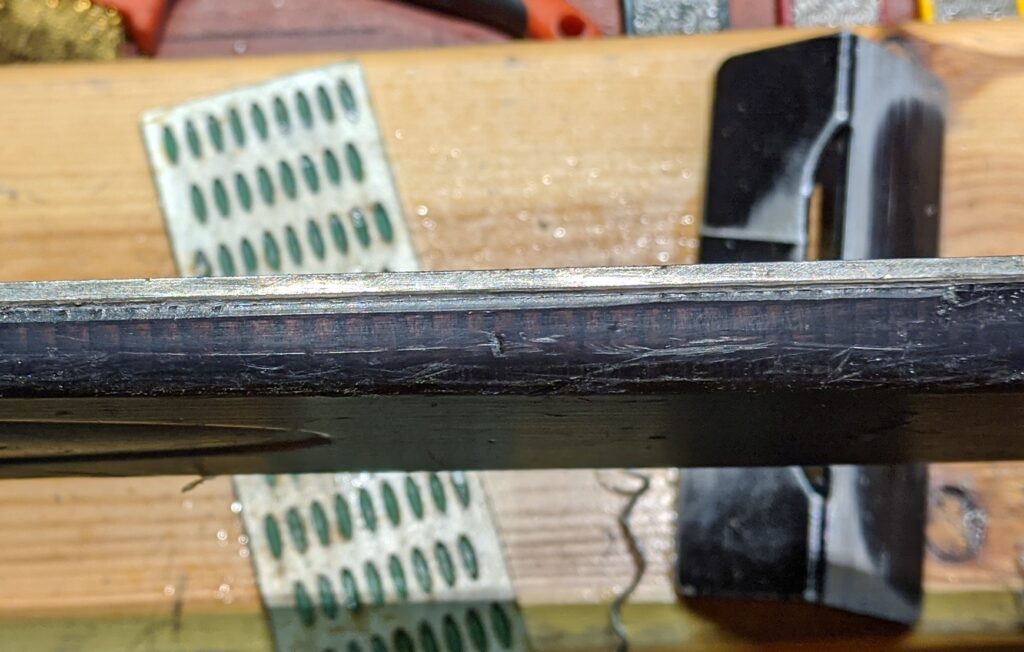
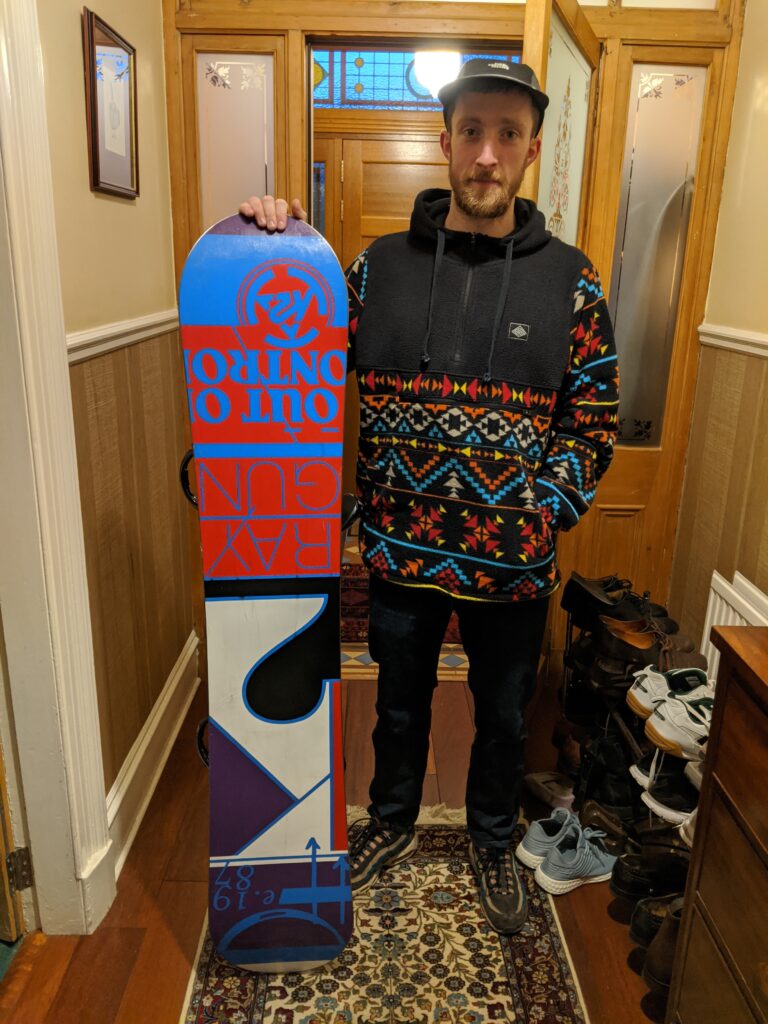
In keeping wth the main trend of the 22/23 season Iain is another multi-repeat client. Normally that means a nice straightforward job just following the last edging job. However, he managed to smuggle in a new-to-him set of Atomics that had clearly had a hard life. I can only imagine that many long hours in the park, specifically on the rails, can give you edges like these:

Lovely 45 degree edges here, no danger of cutting your fingers on that

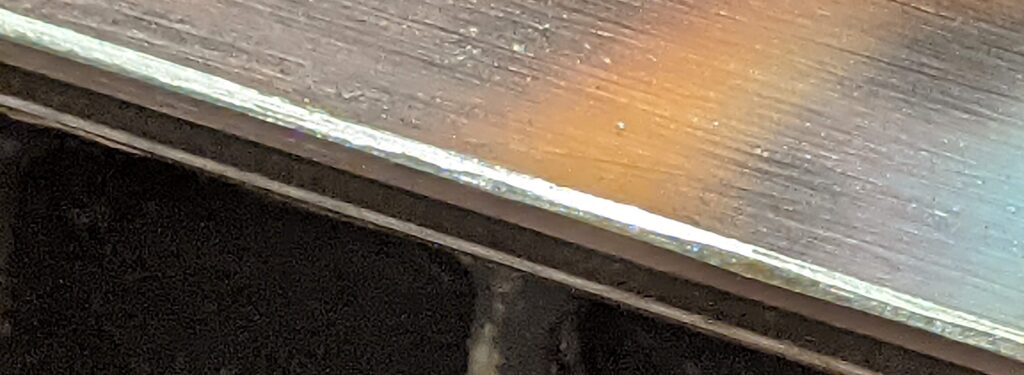
I’d handed these over to Andrii, 2022’s ski tech apprentice of the year, to complete so obviously I was in the pub when he called to ask what to do next. When I finally met the edges face to face I realised that no amount of filing could sort them properly. They did get a good seeing too, and I made £20 from selling the swarf to Pandarosa, so not all bad, but finally we had to stop. The key problem here is that you ride the rails with the edge directly under the centre of the boot (or at least you do if you want to keep off the “massive fail” section of YouTube) and of course when you finally want to turn on hard ice that is the same area you want to have a lovely sharp edge. However, Andrii pointed out that the damage is only on one side of each ski so you could run them on the correct feet for actual skiing and the wrong feet for park rail fun. Just goes to show why we should all have diversity our hiring process.

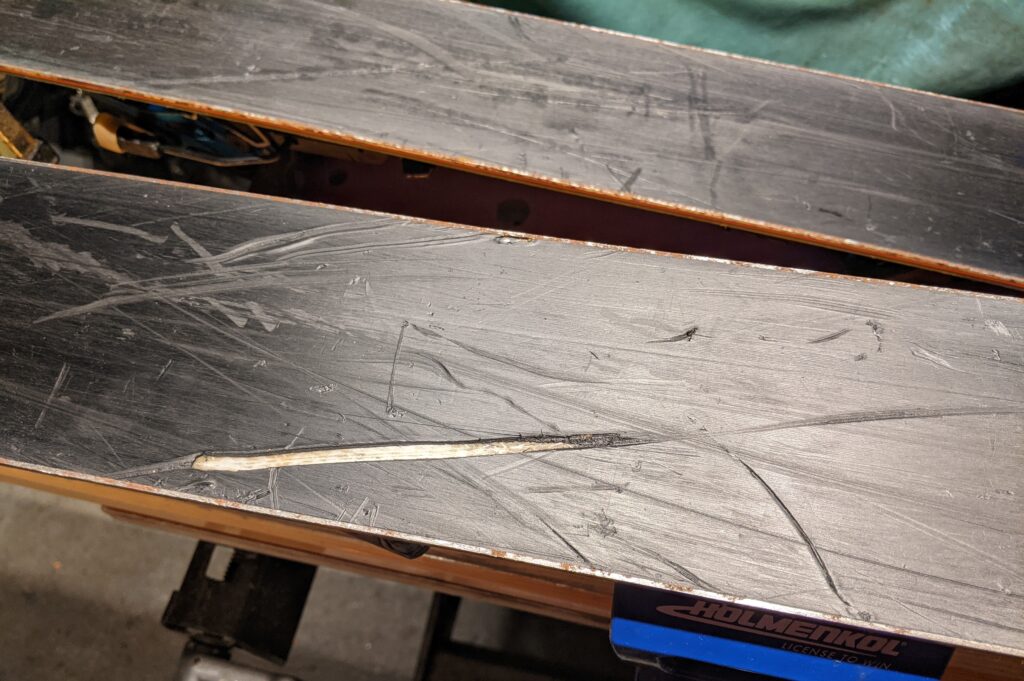
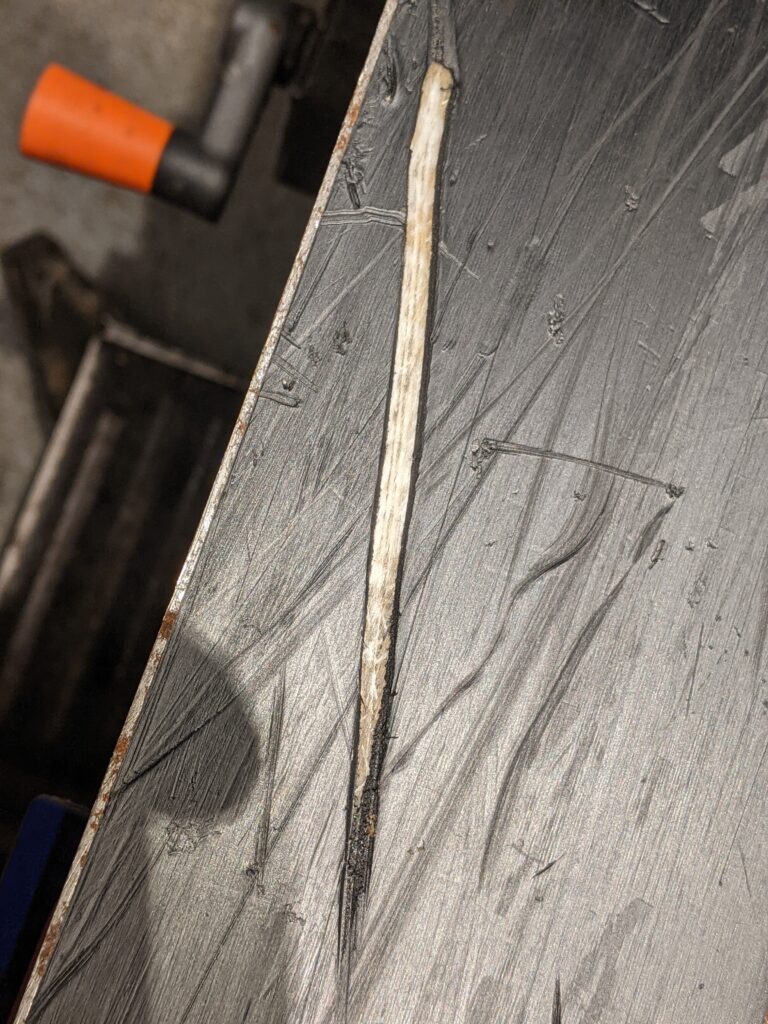
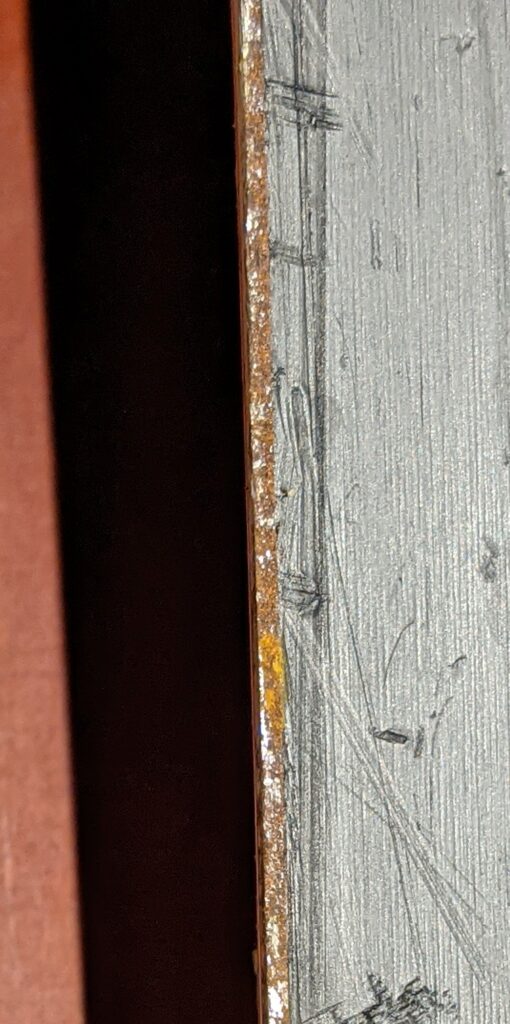
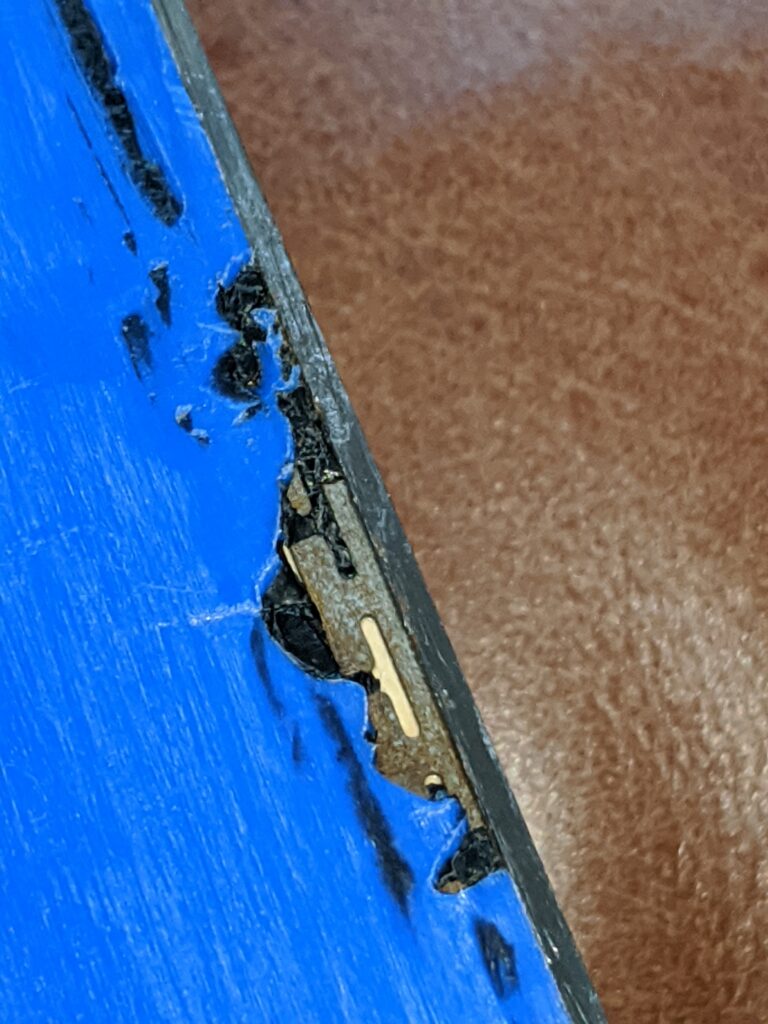
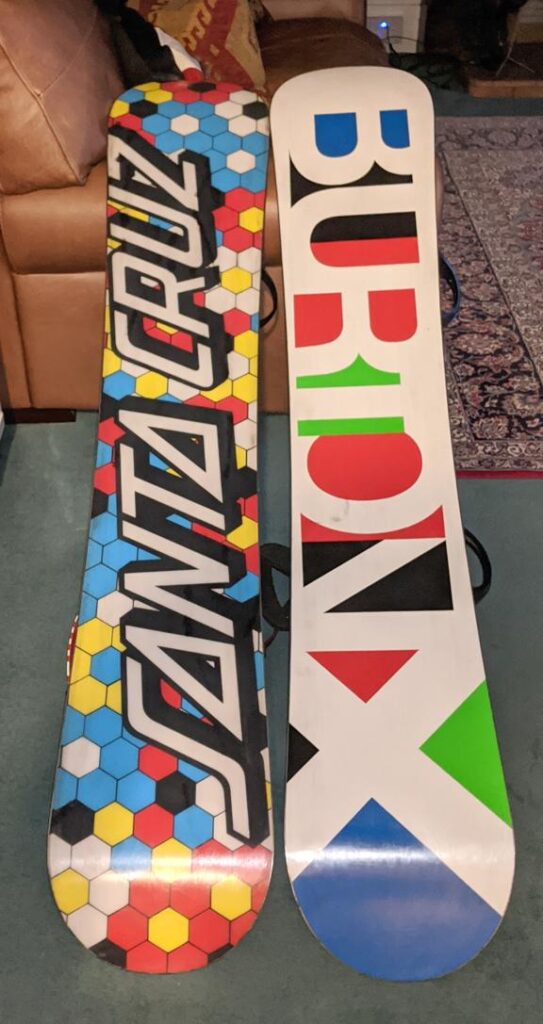
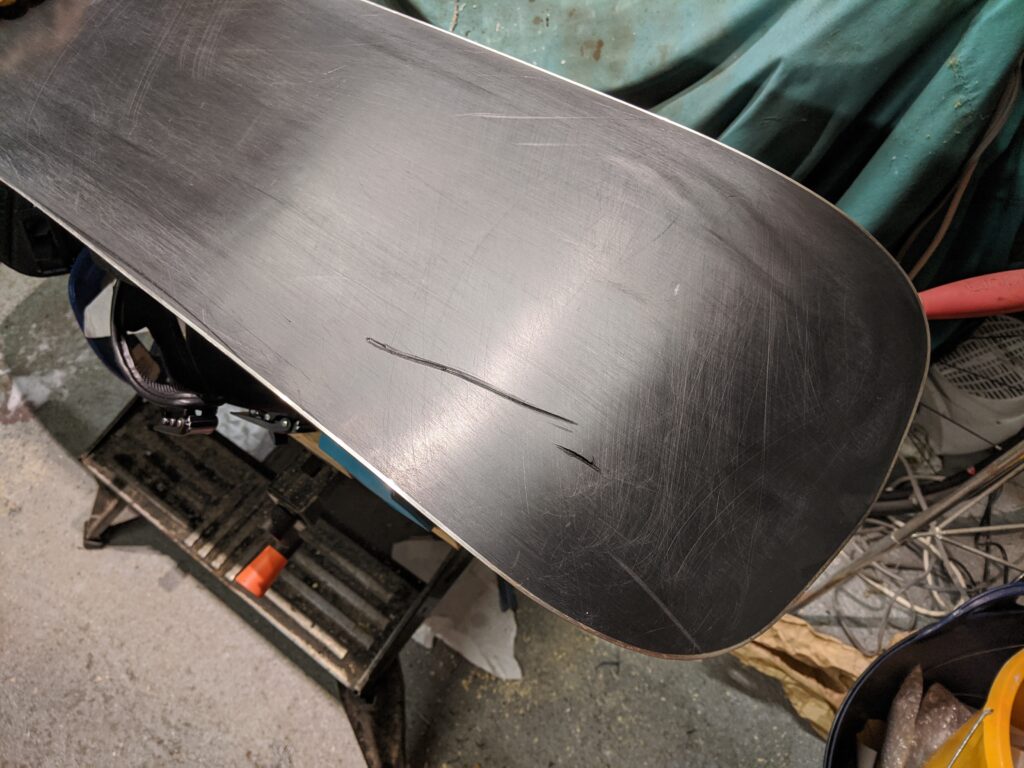
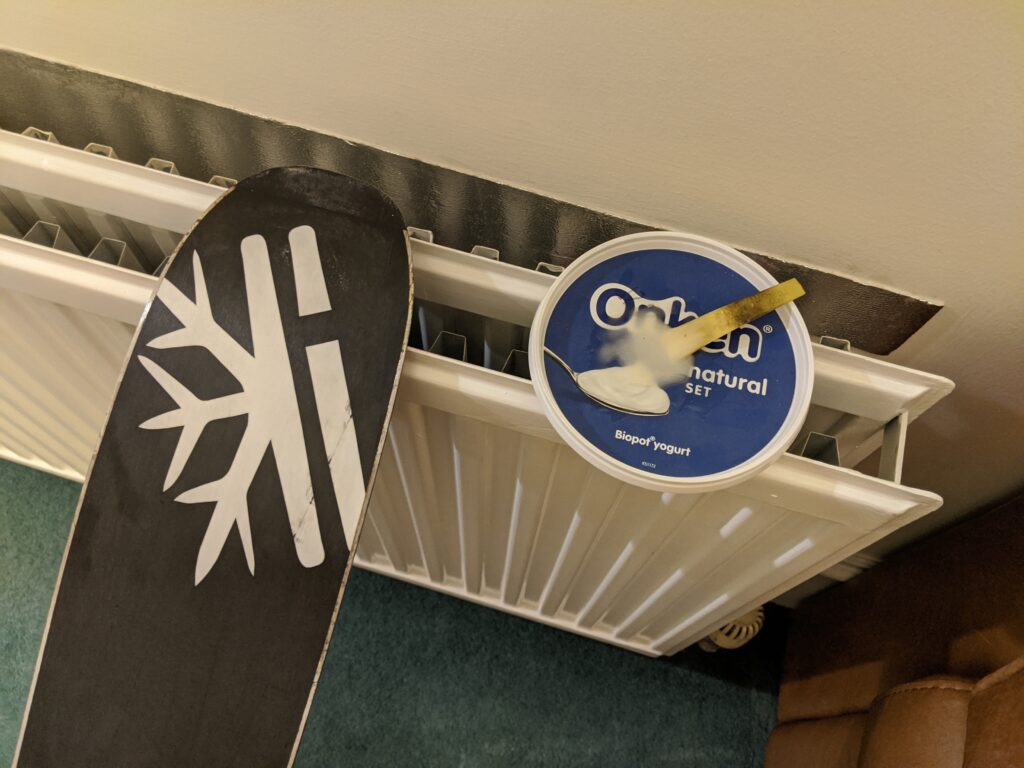
Once the Atomics were sorted it was time to sort the Bataleon DOA, which had also seen some serious use since it last graced the Cave with its presence. Regular readers will remember that Bataleon boards have longitudinal “wings” that lift up at the edges, so they think it’s OK to run the base edges with 0 degrees. Hmmmm. Once the base edges get scratched up (yes I’m looking at you Iain) it’s a bummer trying to file out the scratches as you end up filing the base as well as the metal. Last time I wrapped some masking tape around the file to give the lowest possible angle and trying the same trick again sort of worked without giving gorgeous results. Side edges are 1 degree and presented no problems other than the usual stainless thing of not wanting to take a decent edge until your files are all bald.

The Bataleon did present a good opportunity to get some base repair training in for Andrii and here are a couple of pics of him hard at it with his nice new Drager mask:

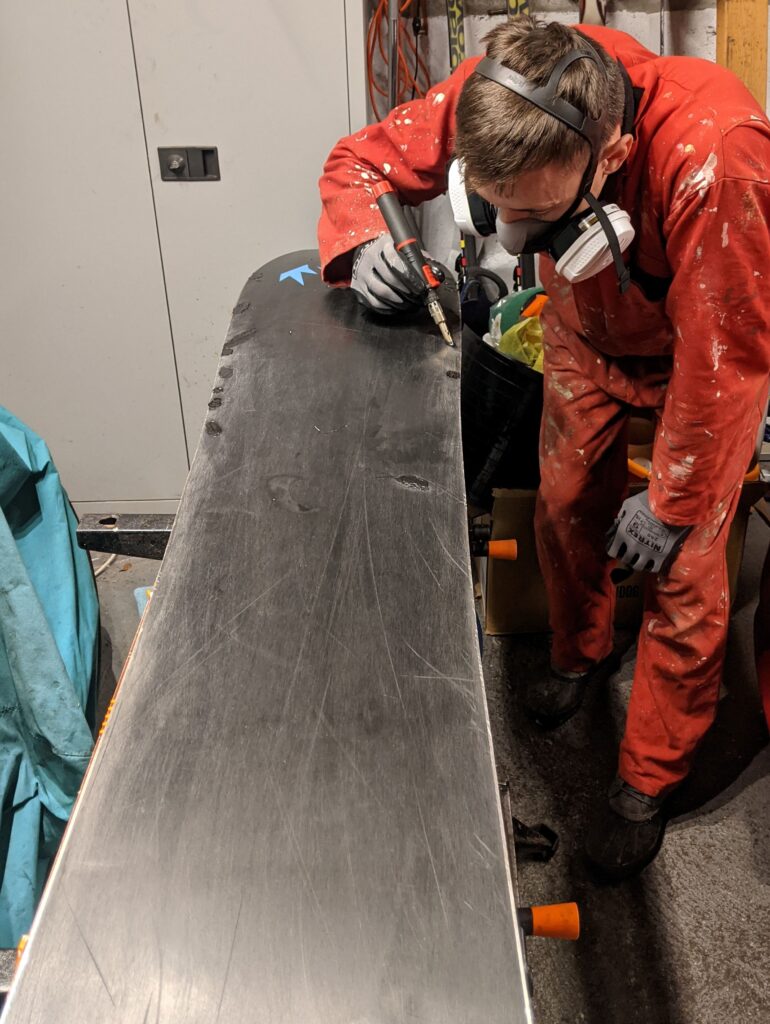
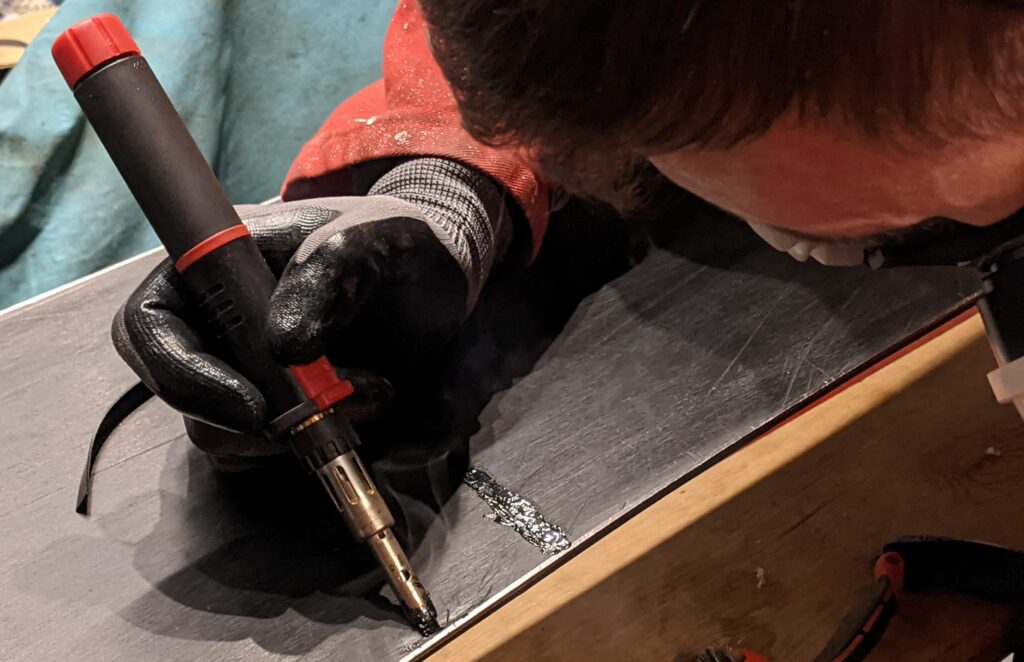
I like Andrii’s attitude – tell him what to do and he gets on with it regardless of the palls of acrid carcinogenic smoke wreathing his face. It reminds me that I need new filters for my respirator as well.

Finally the Black Crows were an absolute dream to work on – last done by me, no serious new damage: bish, bash and, frankly, bosh. Job’s a good ‘un. Still trying to explain to Andrii why all jobs aren’t quite so simple.

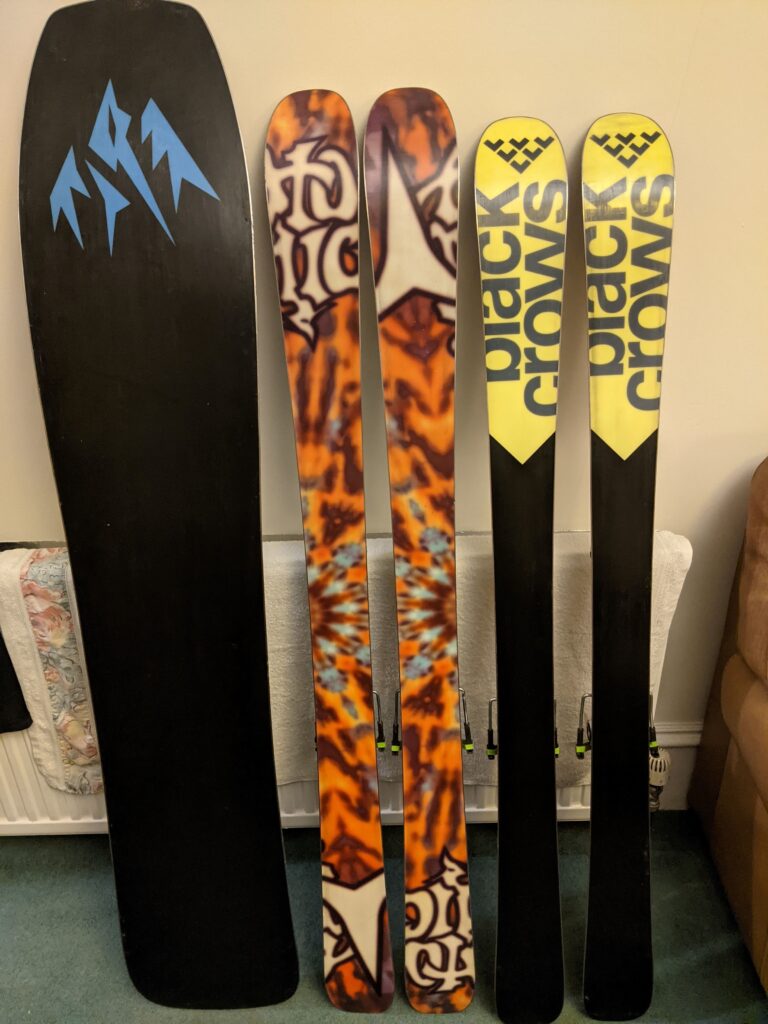
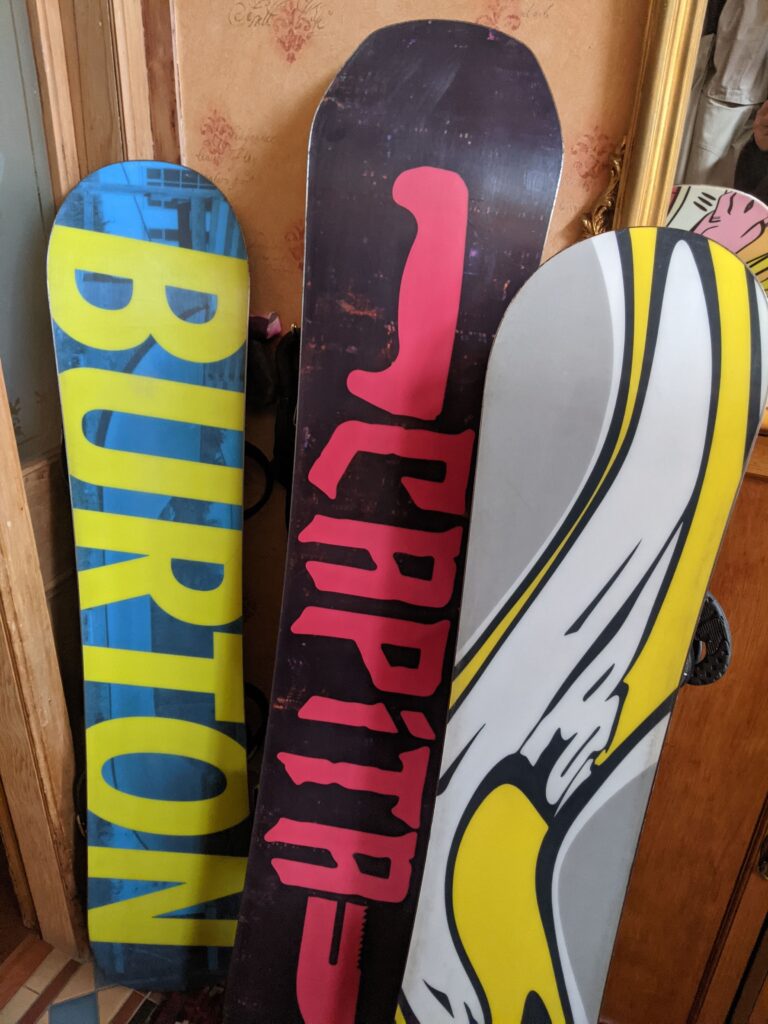
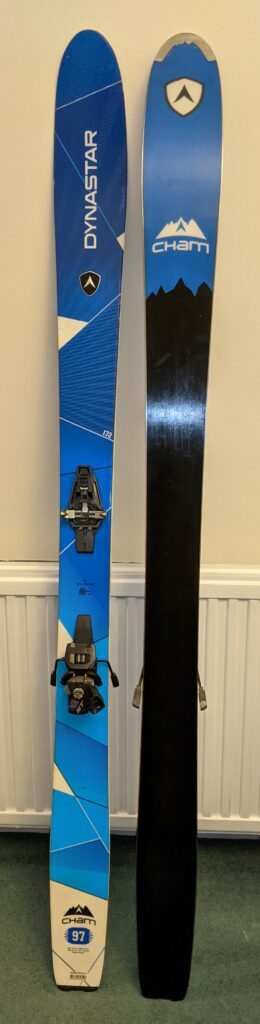
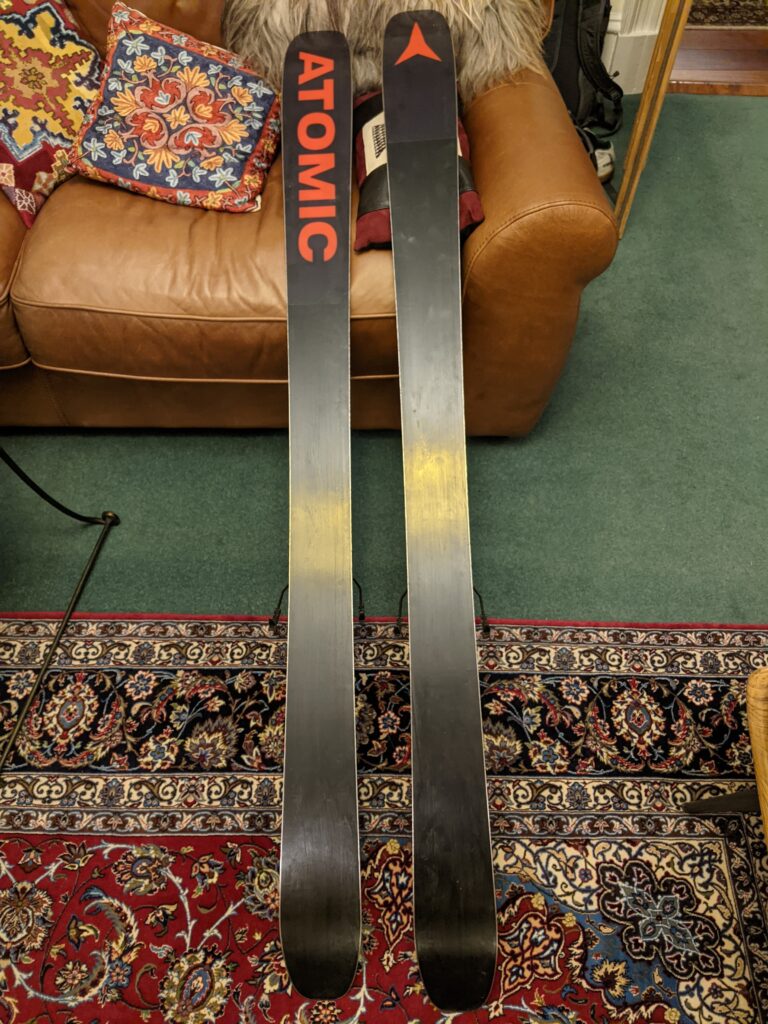
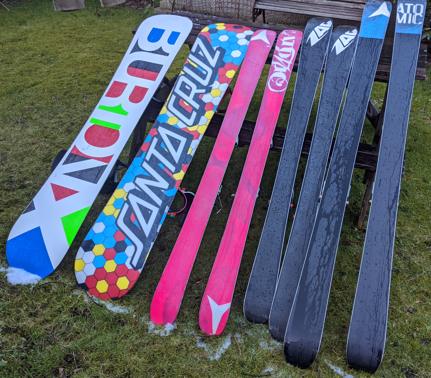
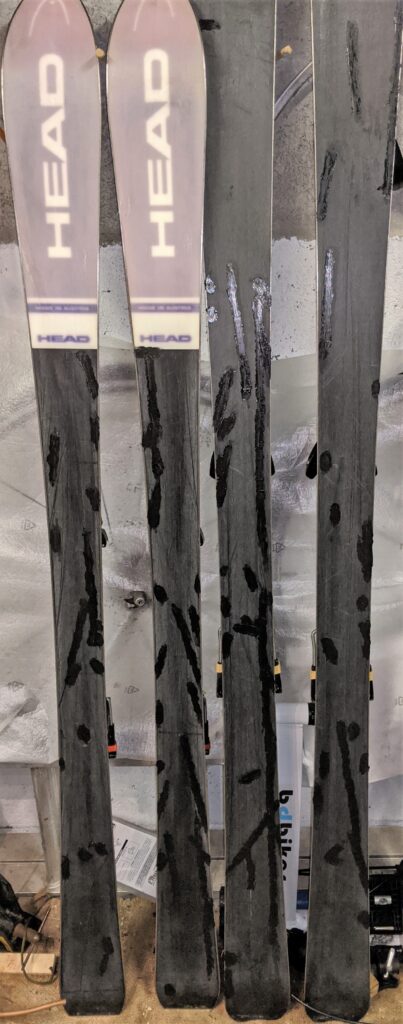
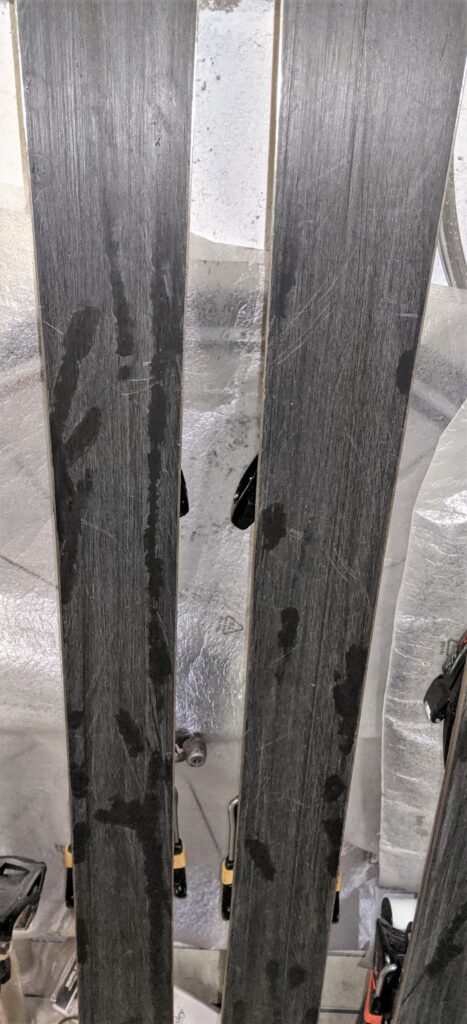
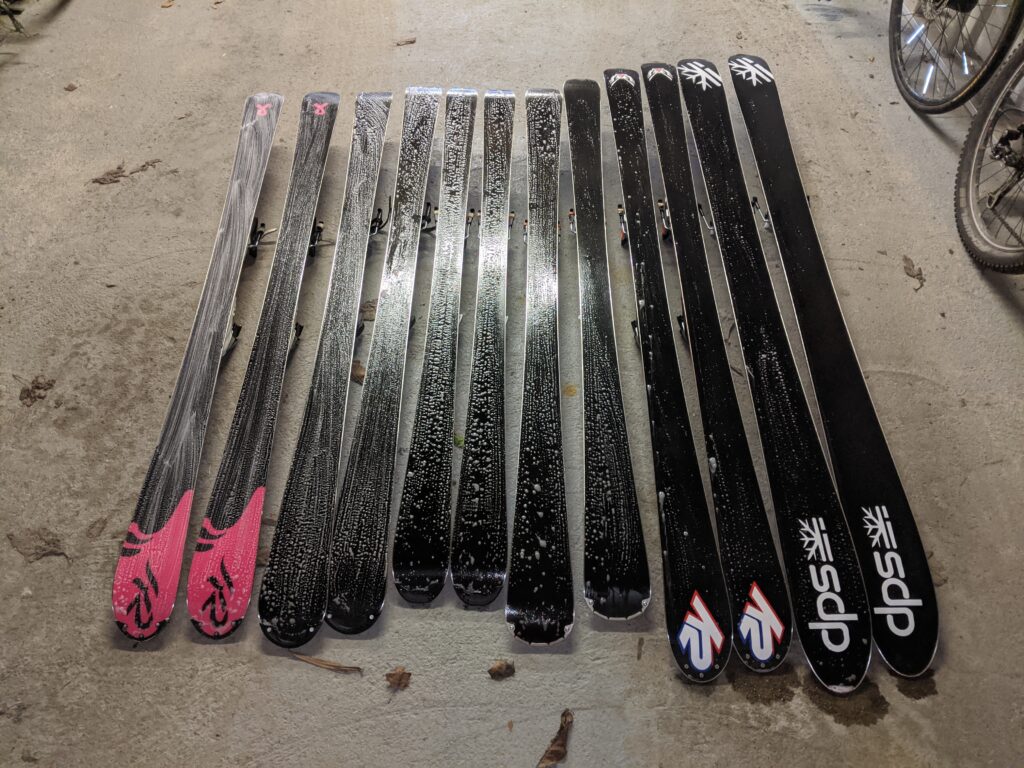
Here are the usual suspects lined up for the inevitable identity parade:

One and a half boards

Martin has been a loyal client of the Cave for a few years now and regular readers may remember his Capita DOA from a previous post. He dropped off the DOA plus a couple of baby boards for some early-season fettling. It’s always a pleasure to work on gear when it’s still above freezing – hint hint.

The DOA looked pretty good but had some rust and a couple of small nicks in one of the edges so unlike last time when I just gave the (brand new) edges a light once over this time they got a proper seeing to. Capita claim base and side edges are both 1.5 degrees but inspection last time revealed the side edges were 1 degree at the edge and 2 degrees right next to the base – so yes 1.5 degrees on average I suppose. This time it was necessary to clean up the side edges properly so they are a nice shiny 2 degrees now with no sign of the striations that had been left by the grinder that Capita used for the (somewhat peremptory) factory set.

One of the baby boards is a Burton with straightforward 1 degree base & side edges, like almost all snowboards, but the other board (an APO – had to look that one up) had, bizarrely, 1.5 base & side edges, definitely today’s quirky choice. Both the baby boards had noticeably concave bases, not worth fixing for a beginner board, but the APO also had one edge sunk very slightly below the level of the base. In practice this just means that we end up filing some of the base when we file the base edges – nothing critical, just another symptom of banging out low-cost boards as cheaply as possible. As noted previously no-one makes 1.5 degree side edge file guides so the board now boasts shiny 2 degree edges just like quirky uncle Capita.

Finally just a quick note that Andrii, one of my Ukrainian guests, has been training in the Cave and the baby Burton was his first completely solo job. Hopefully the improved flow of equipment after the last 2 wilderness years will give him plenty to get on with while I make some hay in the enhanced oil price environment.

Hugo’s Dynastars

Hugo dropped off some skis a couple of seasons ago so he qualified for the satisfied returning client discount. I happily took in his Dynastar Chams (supposed to be “born in Chamonix”, not sure what that means). Sharp-eyed readers will have spotted that the cover photo for this site was taken high above the Chamonix valley and I’m not going to pretend that I don’t have a soft spot for the area.

Suitably softened up by fond memories of my daughters learning to ski while staying at the Club Med in Chamonix (tip: just tell the ESF that your kids are 5 years old, they don’t check) I took the Chams to the Cave only to find that they had suffered an amateurish disc grinding edging at some point in the past. You need to look closely but you can see the dark areas every centimetre or so:

Look for repeating dark/light bands on the nearest edge
Look closer!

Anyway the damage to the edge in question was much easier to see than to photograph. Regular readers will already know that crap edging jobs don’t just leave you with dodgy angles, they harden the steel from which the edge is made, so when the next tech comes along they’re left with the thankless task of breaking through the hardening before they can apply a nice, smooth, stylish edge. Which takes ages. But it’s worth it 🙂

Here are Hugo’s skis following a bit of base repair, edging & waxing:

Ben’s Atomics

You know those adverts for DIY stores, where a guy in spotless white overalls is standing painting the centre of a big, perfectly flat wall? It makes it look easy, and glosses over (see what I did there?) the hassle of stripping the old wallpaper, filling holes, skimming, letting it all dry, sanding, priming, letting it all dry, clearing up all the dust, then painting the fiddly corners, high parts of the wall, low parts of the…you know what I mean. I’ve seen a few YouTube vids of ski techs tackling base repair jobs without any meaningful discussion of what process they went through to decide exactly how to sort the repair. For instance, take a look at Ben’s Atomic Backlanders which have clearly suffered a wee ding:

Nasty gouge. Note the blobby candle repair on the other ski in the background
Yes, down to the fibreglass all right

So there are a few ways you can approach core shots like this. If it’s a big area it’s worth cutting a P-tex patch to fit, aralditing it to the base, giving it a day or two to get really strong then blending it in with repair P-tex and your base doc iron. However we have a long narrow gouge and it’s thin gauge P-tex (common on touring skis to keep the weight down) and I’m out of skinny P-tex so it needs to be filled with repair P-tex. P-tex doesn’t stick to fibreglass so you either glue a bit of cotton fabric into the hole, to give the P-tex something to grab, or you can line the fibreglass with Metalgrip – basically P-tex with added glue. This is handy as you can fill the remaining gap with P-tex the same day rather than waiting 24 hours for the glue to set. It doesn’t work on big holes as the heat to melt the P-tex tends to re-melt the Metalgrip and give depressions that just can’t be filled. However a narrow gouge like Ben’s is a good candidate.

So once that’s done we can take a look at the edges:

Hmm, lightly oxidised…

Although the edges looked horrible they were still the original 1 degree base and 3 degrees edge like all Atomics, and they had never been brutalised by a cack-handed service so they came up a treat.

Here are the Backlanders filled, structured, edged, with base & top wax and ready to go:

And here’s a quick snap of the unbranded foamy velcro-ey ski straps that you can add to your order for only £3 a pair if you want to keep your bases shiny on the way to the slopes:

£3 a pair but only if you pay for work on the skis as well

Alex’s K2s

Alex dropped off his well-used K2s for a proper repair & service. The bases had seen some action:

Plenty of stories to tell
Ouch!

Fortunately K2 put proper thick P-tex on their bases so there was plenty to work with. An hour or so with the base doc soldering iron and many P-tex strips and we were back on track:

Also in the Cave a the same time were a typical pair of lightweight tourers, in this case John’s new Factions. John has previous form on bringing in horribly damaged skis and these were no exception. Take a look at that extra-thin P-tex which put up no resistance to the first rock it saw and stripped straight down to the edge tabs – twice:

The base is about 0.6mm thick instead of the healthier but heavier 1.2 or even 1.6mm
The black P-tex comes from a hot knife repair job on the chalet balcony apparently

John has had the lecture about coloured bases more than once but some people simply have anarchic tendencies so he keeps on going back to whacky colours which look rubbish when you fill them with black P-tex – which is why there aren’t any photos of the finished skis.

Richard’s Santa Cruz

I figured when I stopped all advertising for the Cave that I would only get happy smiling returning clients dropping off equipment that I had already sorted. It was going to be sooooo straightforward. So somehow I ended up with 3 new sets of skis and 2 new boards in the shop. Best laid plans and all that.

Richard dropped off his Santa Cruz board for some attention. “Edge and wax and the base might need some attention” were I think his exact words on the phone:

“Might need some attention”
There could well be some metal under all that rust…

So the board looks like it’s been helping to defend the rebels in Idlib for the last 6 weeks. Starting point once any remaining wax has been cleaned off (ha!) is to check the board is nice & flat. Oops! the board seems to have been designed with a prominent central ridge and wings, a bit like a Bataleon board. There’s plenty of marketing guff on the website about their various longitudinal profiles (“Go Big! Rocker” anyone?) but they don’t seem to have done this weird W-shape transverse profile on purpose. A few runs with the big SkiVisions planer indicated that taking down the centre to make the board flat would result in no P-tex in the centre. That would be a shame as, and I’m quoting directly from their website here, their bases feature: “Nano-additives boost acceleration up to formula one limits”.

Anyway, once I had stopped laughing at their badly translated marketing drivel it was time to try to fill in all those gouges. You’ll have spotted that the base is extremely fussy with loads of colours and narrow black lines separating various hexagons. So you start by filling all the black bits:

Half done

Then you use clear P-tex on everything else and give it all a good scrape. Sadly the weird base profile means that it’s damn near impossible to scrape the P-tex on the wings between the central plateau and the edges. So that’s another hour I’m not getting back.

Edging was fairly straightforward. When edges are as rusty as that you don’t need to colour them in with a Sharpie to figure out the bevel as the rust does that for you. The best fit was 1.5 degrees base, although with the wings raised up so far it’s questionable if you need to bevel as you could never catch an edge accidentally. As the base edge was 1.5 the side has to be at least 1.5 so they were taken to 2 degrees. The only problem with rusty edges and white bases is the way the rust & file-lubricating water combine to look like someone has dipped your board in oxtail soup. Anyway, edges much shinier now:

Three reflections as I have three spotlights in the ceiling of the Cave

You can probably imagine how nightmarish the wax scraping was based on the base profile. I don’t really want to relive the experience so I’ll just post the finished board next to a much better behaved Burton:

Sean’s slight depression

Sean dropped off his & hers skis for fettling with a view to heading off to Austria later in the week. His skis are big Atomics, just looking for big piles of soft snow to whizz across, while hers were ZAGs, a brand I have to say had previously passed me by. In the hunt for guidance on how they are set up in the factory (the edges had been assaulted previously by one of those hand-held grinder dudes) I discovered that ZAG are based in Chamonix and source 95% of their materials in the EU – edges from Germany, wood for cores from Poland etc. All very laudable but the retail prices on their website are a reminder of why everyone else gets their gear made in China or Vietnam.

Lovely day so cleaned the bases in the garden. ZAGs are second right.

Anyway Sean’s skis didn’t look too bad until I ran a finger over this weird-looking light spot and it turned out to be a big depression:

Hard to see what happened to leave this behind

Unfortunately someone had already tried to fill the hole with repair P-tex which hadn’t quite cut the mustard but it makes future work that bit harder. Anyway, Sean was on a deadline and I hadn’t quoted for a serious repair involving cutting out the old P-tex and replacing it with new. So, time to hit & hope. Simply heating up the area to soften it up for additional P-tex is enough to melt the previous repair so you end up looking like you’re stirring a pot of soup as you try to make the new P-tex hot without melting the old.

Eventually with this sort of caper you give up because it becomes obvious that no-one could do a perfect job. This is as good as I could get it – better than before but not gorgeous:

Both sets of skis came up quite nicely in the end and here’s hoping there’s lots of lovely snow in Austria.

Tender Loving Care

When Dave picked up his planks a couple of days ago he asked what he should do to keep them in good condition. It turned into a bit of a list but there may be some value in recreating it here to save me some breath next time. So here it is, not necessarily in order:

  1. Once you get to the end of your trip dry your gear off. Properly. Remember that your bindings will have some packed snow in them. You’d be horrified at how much steel you have to remove from your edges to sort out rust damage.
  2. Use velcro & foam straps to keep your skis together without scraping the bases. I have a supply of unbranded ones at £1.50 each or you can spend £5 at well-known outdoor stores.
  3. Ski don’t slide. If you’re on hard snow/ice/stones skiing means you should only get longitudinal grazes which aren’t too damaging. Those 60 degree gouges in your base edges are a nightmare.
  4. If the surface is bad consider getting in the gondola to go down. For some reason this seems to have negative connotations but there’s nothing big or clever about gubbing your skis in the last 10 minutes of the day’s sport just so you can boast that your chalet is ski in/ski out.
  5. Carry a 200 grit diamond file in your pocket to tidy up any dings on the slope. Remember to wet the file surface before using.
  6. I’ve never done this myself but apparently some people stick old bits of hose pipe on their edges before they stick them in the bag to prevent transit damage and to stop the edges cutting the ski bag. Worth a try I suppose.
  7. Finally lots of people ask how often skis should be serviced. Obviously the answer is “when they need it”. Certainly after a week in the Alps you’ll probably need fresh wax and might need edges tidied up. If it’s been lovely soft snow all week the edges won’t need any attention. Conversely 15 minutes at Glenshee can reduce the best prepared kit to a shocking state. If you feel a little burr when you slide the flats of your fingers down the side edge from the top of the ski it’s probably time to do the edges. If you’re actually skiing (see 3) the burr should build up in the same plane as the base. Don’t mistake a burr (which feels sharper one way than the opposite way) with a nice sharp edge (which should be equally fine in both directions). Remember always check sharpness with the flats of your fingers and perpendicular to the edge to avoid slicing fingers.

Hope that was helpful.

Dave’s Rental Revival

Dave has gratifyingly taken my advice and snapped up a pair of ex-rental skis for a song. They’re not pretty but he understands that there’s a gorgeous base hiding under all those scars and rust:

This is why you should repair gouged bases not just wax them and hope for the best – it takes ages to dig the wax out when you do actually want to repair them…

The skis were Head & Salomon, both of which had almost completely black bases (another Brownie point for Dave) so they were easy enough to plaster with new P-tex:

Patched up and awaiting scraping

Once the excess P-tex is scraped off the bases were structured using the SkiVisions ruby stone then finished off with the base plane.

Pancake flat but not very shiny yet

The Heads leave the factory with base 1 degree edge 1 degree and as that is the most common “do ’em all the same” setting for rental planks they were fairly easy to tidy up. The Salmons on the other hand should be 1,2 so the frankly revolting edges had to be beaten back to specs.

Nasty in & out edge plus extra hard to shave placcy top sheet. Soon be sorted with hardly any swear words.

Having stopped advertising the Cave due to other commitments, I’ve had lots of returning kit which means the edges are a breeze – done right once then just maintain them. So it’s a while since I’ve had to wrestle a pair of skis into submission, and you forget just how physical it is. If you ever need to do it yourself, the sequence is 1) shave sidewall 2) run your coarsest diamond file up and down the edge to try to get rid of any case-hardened burr 3) work the edge back to 2 degrees with the file guide & your coarse steel bastard file 4) stop to wipe the sweat from your brow and curse whichever dumpling buggered them up in the first place 5) get the edge to a decent state with the steel file, checking for burrs as resetting an edge will always give a mean burr 6) remove burr with coarse diamond file 7) use your diamond files & guide on the edge, fining up from 100 to 1600 grit (or whatever you’ve got) 8) check for burrs again 9) if OK polish side & base edges with gummi stone. Congrats – you’ve done one edge, only three more to go.

Next up is of course soak in a gallon of pink base renew wax, scrape & brass brush, then top off with green universal wax, scrape, brass brush then polish to a high shine with nylon/horsehair soft brush. Remember to remove the brake retainers…

Like new and a lot cheaper than buying new

Dave took advantage of the at-cost velcro separators that I got from the Piste Office last season and keep forgetting to mention to people (only three Scottish pounds per pair to you effendi), and he asked for some maintenance tips which I think I’ll make into a new blog post.

Winter update

So as is often the case January is the month when it all kicks off. I’ve mentioned before that it’s easier for everyone if you remember to drop your planks off in August so I can service them in the garden in glorious sunshine but for some reason the message simply doesn’t stick.

As I took four weeks in Spain from mid-December, to help build up vitamin D stocks before another Scottish winter, there was an understandable build up of demand in January so I didn’t really get many photos as I toiled away in the Cave.

Here are a couple of photos so everyone can understand that I wasn’t sitting with my feet up watching Oprah all month:

I think this was the biggest ding in Iain’s board…
A nice selection getting shampooed to get the old wax off
Colin’s other DPS ski getting the probiotic Araldite treatment
About half of the January skis & boards in the vestibule waiting to be picked up

So thanks to Scott, Claire, Steve, Colin Evan, Alyssa, Martin & Emma for these shots and to Mark, Dave & Lewis who got their gear in before Xmas: